Tuesday, December 24, 2013

The Odyssey family: Odyssey 7 and Odyssey 7Q


Convergent Design is announcing two exciting new monitor/recorder products: Odyssey7 and Odyssey7Q. The Odyssey family is intended to follow users as they journey through their careers from DSLRs to high-end 4K raw cine cameras, hugging the ever-changing camera technology curve and adapting to change without invasive hardware changes or costly upgrades. The Odyssey series combines Convergent Design's knowledge and experience of both broadcast and cinematography recorders, while adding the capabilities of a high-end professional monitor for an amazing $1295 USD (Odyssey7 - monitor and compressed recording capability). Then you are able to rent or buy features as you need them via the web.

The Odyssey family is a professional 7.7" OLED monitor with high-end monitor features, including Waveform, Zebras, Histogram, Vectorscope, Focus Assist, False Color, Timecode Display and Audio Level Meters, and 1:1 Pixel mode. Odyssey7 includes HDMI I/O, and SD/HD/3G-SDI I/O; in both single and dual link configurations. As you have come to expect from Convergent Design, Odyssey is low power, lightweight and comes in a rugged magnesium case.
Odyssey 7 and Odyssey 7Q

Odyssey7

Odyssey7 is an amazing value at $1295 (USD price, international prices vary), and includes full monitoring capabilities and compressed recording. Odyssey7 is ideal for use as a monitor onANY camera, proxy recorder, and DSLR applications.

Convergent Design's Odyssey7 RAW Monitor & Recorder is an advanced follow-up to Convergent's Gemini 4:4:4 RAW monitor/recorder. The Odyssey7 features a 7.7" 1280 x 800 LCD with a 3400:1 contrast ratio and is equipped with advanced image analysis tools, including Vectorscope, Waveform, and RGB Parade. A compressed DNxHD codec is included and will record up to 1080p60/50 10-bit 4:2:2. The firmware for the codec is preloaded and gets activated once you install a Convergent SSD. The Odyssey7 supports Convergent Design 2.5" SSDs only and has two built-in SSD slots. The monitor features two SDI inputs and two outputs and automatically detects the incoming video format upon input and when possible creates an entire recorder/monitor setup based on camera metadata.

The interface is a capacitive touchscreen and simple to navigate, meaning less setup time. All the controls can also be remotely accessed with an iPhone or Android device via Bluetooth. Most of the inputs/outputs are on the bottom, and 1/4" mounting threads are on the sides. An AC adapter is included for continuous power, and compatible IDX, AB and Sony battery plates are available.

DNxHD Codec Included

The Odyssey7 includes a compressed DNxHD codec that will record up to 1080p60/50 10-bit 4:2:2. The firmware for the codec is preloaded and gets activated once you install a Convergent SSD.

Convergent Design Odyssey7 Family Tech Specs
FeatureSpecification
Display7.7″ OLED, 1280×800, RGB 8-Bit, 3400:1 Contrast, 176° Viewing, True Blacks
SDI Video I/OSD/HD/3G Support: Single/Dual Link, 2-Inputs, 2-Outputs
Odyssey7Q adds 2 Bidirectional HD-SDI 3G ports to allow:4 HD-SDI 3G Inputs, and 2 HD-SDI 3G Inputs or2 HD-SDI 3G Inputs and 4 HD-SDI 3G Outputs or other configurations
SDI Video FormatsHD/2K RGB 444 8/10/12-Bit up to 60p/60psf,HD/2K YCC 422 8/10-Bit Up to 120p, QHD/4K 422 up to 30fps,ARRIRAW (16:9) 12-bit up to 60fps, ARRIRAW (4:3) 12-bit up to 48fps,Canon Raw QHD/4K 10-bit up to 60fps
HDMI Video I/OHDMI I/O Version 1.4a support
HDMI Video FormatsUp to 1080p60 422 8-bit
LUT SupportARRI, Canon, Sony
Monitor Analysis ToolsFocus Assist, YRGB Waveform, Histogram, False Color, Vectorscope, Zebras,H/V Flip/Flop, 1:1 Mode, Recticule Markers, Horizon Indicator
Odyssey7Q adds ability to monitor four video streams in a quad-split display
Recorder OptionsAvid DNxHD up to 1080p30/1080i60, HD/2K Uncompreseed RGB 444 up to 60fps,HD/2K Raw up to 120 fps, ARRIRAW (16:9) up to 60fps, (4:3) up to 48fps, Canon RAW QHD/4K up to 60fps
Odyssey7Q adds Four Stream recording up to 1080p30, 4K Support,High-Speed (120fps) and Simultaneous RAW + Proxy (DNxHD-36) mode
Record File FormatsDNxHD = .mov, Uncompressed = .dpx, HD/2K Raw = .dng,Canon Raw = .rmf, ARRIRAW = .ari
Record TriggersTouchscreen, SDI record trigger (ARRI, Canon, Panasonic, Red, Sony),Optional remote cable
Digital Audio I/O2-Channel Embedded Audio (48KHz, 24-bit)
Odyssey7Q adds 8-Chan support
Analog Audio I/OMono Speaker, 3.5mm headphone output, mono unbalanced consumer input
Remote ControlRS-232 I/O, programmable GPIO
TimecodeLTC I/O (BNC) or Embedded SDI/HDMI TC
Wireless ControlBluetooth LE with iPhone/Android App
Recording Media2.5″ professional server grade SSD in 240/480/960 GB sizes,500MB/sec read/write speed, SATA-3 (6 GHz) interface,compatible with off the shelf USB 3.0 and Thunderbolt adapters
User InterfaceCapacitive Touchscreen, Two mechanical Function Keys
Firmware UpdateVia USB Port to host computer, download updates from website
DC Power Input10 to 34 VDC with built-in reverse polarity protection; built-in power switch
Power Dissipation8 Watts (monitor only), 8-15 Watts (monitor and record mode)
Weight540 grams / 1.2 lbs, cast-magnesium case
Size7.9″ x 6.1″ x 1.0″ (200 x 155 x 25 mm), measured from end of BNC to SSD tabs
Enviromental-10 to +40°C (Operating), -20 to +70°C (Storage)
NotesAll Specifications subject to change without notice (Revision: 25-Mar-2013)

Odyssey7Q

The Odyssey7Q adds two bi-directional SDI's (2-In, 2-I/O, 2-Out), enabling a 4K@60fps-ready option. Additional computational power supports recording/playback of up to four-compressed HD/2K simultaneously, support for one video stream up to 120fps and concurrent proxy and raw recording. Odyssey7Q includes a built-in Quad Splitter and Four-Channel Live Switcher. Odyssey7Q starts at $2295 (USD price, international prices vary), including compressed recording. 7Q can be upgraded to a full professional recorder with the following options: Alexa (ARRIRAW, full 16:9 and 4:3 support), Canon C500 4K Raw, and Sony Raw for the FS700, Weisscam Raw (CinemaDNG), and Quad Stream Recording.

As a recorder, Odyssey7 and 7Q support a wide range of recording formats including Avid DNxHD (up to 120fps), uncompressed HD/2K RGB 444 (up to 60p), 2K/HD Raw, ARRIRAW (4:3 and 16:9), and Canon 4K Raw. All recording formats are extra-cost options. New 2.5"; highly-reliable "Server-Grade" SSD's support read/write bandwidths in excess of 500 MBytes/sec per drive, enabling Canon 4K Raw at 60 fps on a single recorder. The unique dual SSD architecture can be configured in spanning mode (to double record times), RAID 1 mode, for auto-backup or in RAID 0 mode for data-rates in excess of 1 GByte/sec.

Comparison: Odyssey 7 vs 7Q

Based on extensive market feedback, Convergent Design is introducing a new purchasing model to on-board recorders. Odyssey7 or 7Q ships as a monitor only, which can be upgraded to a recorder as needed. For the first time, support for recording options can be purchased outright or "rented" at competitive rates. Add optional features anytime from anywhere, via a secure online purchase from the CD website to obtain an activation key, provided at the point of purchase and you're up and running! Rental of recording options (ARRIRAW, for example) provides many benefits including no shipping hassles, no insurance certificates, and none of the scheduling issues of traditional rentals. Recording options are rented in 24-hour blocks, with unused blocks available for future use.

The Odyssey7Q utilizes the same 7.7" OLED architecture; the Odyssey7 is intended for single stream support (up to 4K Raw), while the 7Q adds additional bi-directional HD-SDI 3G ports. The 7Q's extra processing power enables certain extra cost options to support: four-stream HD/2K monitoring (quad-split) and compressed recording, 4K video and high-speed (120fps) support, and simultaneous recording of proxy (DNxHD-36) and Raw video. The price of the Odyssey7Q is to be determined, but will be competitively priced and use the same, affordable 2.5" premium media as Odyssey7.

A wide range of battery accessories, mounting options, and sunshade, are planned to support both products. Odyssey7 and Odyssey7Q will be on display at NAB booth C6713.

Raw media files recorded with Odyssey 7/7Q are not supported by Windows/Mac or NLEs natively. If you want to edit or playback the videos, try Pavtube HD Video Converter and HD Video Converter for Mac to do a quick conversion to MOV, WMV, M4V, MP4, Apple ProRes for Final Cut Pro, AIC MOV for Avid Studio, MPG/WMV for Sony Vegas or Adobe Premiere Pro, etc.

Here are some guides for you:
  
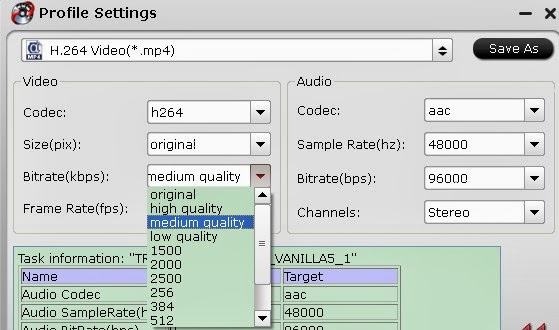
Don't forget to click "Settings" and adjust target video size, bitrate and frame rate settings to get video in best quality.
  

Easily convert DVD to PS3 with Dolby Digital 5.1 channels audio

This post will give you the easiest solution to rip DVD movies to PS3 for playing on HDTV or Home Theatre, especially for users who want to keep the 5.1 audio track.

To start, just have a look at a question asked by a friend of mine:
I am ripping material off my standard DVDs to an MP4 format to play back on my sony playstation. Is there a way I could save 5.1 audio for playing on my PS3?

Additional Tips:

The following types of files can be played by PS3 under (Video)

  • - MPEG-4 SP (AAC LC)
  • - H.264/MPEG-4 AVC Main Profile (AAC LC)
  • - MPEG-1 (MPEG Audio Layer 2)
  • - MPEG-2 PS (MPEG2 Audio Layer 2, AAC LC, AC3(Dolby Digital), LPCM)
  • - MPEG-2 TS (MPEG2 Audio Layer 2)
  • - AVI
  • - Motion JPEG (Linear PCM)
  • - AVCHD (.m2ts)
To view your DVD movie on your PS3, Pavtube DVDAid (30% off now) is the best tool for you. Overall, this program can help you extract DVD movies to PS3 playable format, and it has PS3 profile preset with remaining AC3 5.1 audio for output. The Mac version is Pavtube DVDAid for Mac. Below is guide for you to learn how to convert DVD to PS3 with 5.1 channel. (Read Review)

Step 1: Run Pavtube DVD to PS3 Converter, and load DVD files to it. You can click "DVD ROM" to load movie from DVD drive or "ISO/IFO" DVD ISO file.

 DVD to PS3

Step 2: Select output format for PS3. Click on the drop-down list at the opposite side of "Format", and then choose "PSP/PS3" > "PS3 Video AC3 5.1 (*.avi)" format. The format is designed for users that wanna get Dolby Digital 5.1 channels audio when streaming DVD rips to PS3.

 DVD to PS3 with mp4

Tip: This PS3 DVDAid let users control/customize output file quality. To improve video quality, simply click "Settings" and set video bitrate up.

 DVD to PS3 settings

Step 3: Start ripping DVD to AVI video for PS3 streaming.

Click "Convert" button to rip DVD to PS3, once the ripping task is finished by Pavtube DVD to PS3 Converter, you can click "Open" button at the bottom of the main interface to get the output AVI file for streaming to PS3.

You can use a PC with PS3 Media Server, TVersity, Windows Media Player 11, Vuse, Nero MediaHome or Mezzmo configured. (Learn how to set up Windows PC as a DLNA Media Server for PS3 streaming.)

More related:

From: http://bestvideosolution.blogspot.com/2013/12/rip-dvd-to-ps3-with-5.1-audio.html  

Monday, December 23, 2013

Enjoy your favorite DVD movies on your TV for a better enjoyment

With a good DVD to TV converter, you can convert DVD to TV and then you can play the DVD videos on your TV for a better enjoyment without restriction.

Suppose that if you have a great DVD video and you want to copy it to watch on your TV, but the DVD videos can not allow you play on TV directly. The following article will help you to solve the problem and give an easy way to watch DVD movies on TV.


“I am a medical device designer and I really don’t have a hobby, other than my movie collection. I enjoy watching DVD movies on my TV without any editing. I originally saw the reviews of Pavtube Video Converter Ultimate on Giveaway of the Day. I have used Aiseesoft Total Video Converter Platinum, but I choose to purchase the converter because of the price, good reviews, especially the conversion speed and ease of using. The only one tiny complaint is about the AMD and CUDA, I am not sure which one I need for my computer to speed up the ripping and conversion process. Anyway, the software does an excellent job of converting and I really like it very much!”

If you want to convert DVD to TV as the customer, the only thing you need to is find a good DVD to TV converter. However, when searching on the Internet for the DVD to TV converter, you can find a lot, but not all of them can really help you copy and convert DVD to TV, you need to polish your eyes to distinguish which one is the best one that you need.

Among so many DVD to TV converter, I think that Pavtube Video Converter Ultimate is you best choice. More than a simply converter, this apps is an all-in-one solution to backup Blu-ray/DVD movies, convert disc content and transcode common videos to any formats you want. (Get Mac version here: Pavtube iMedia Converter for Mac)

See Also:
How To Make your DVD be Compatible with your TV
  
Follow the steps mentioned below:

Step 1: Launch the Pavtube DVD Movie Converter for TV, and click the “Load File” button to load your DVD movies to the program.

dvd to tv converter

Step 2: Click the “Format” bar to choose a suitable output format like MP4 that your TV can support.

convert dvd to h.264 mp4 for tv

Tips:

1. If you have Nvidia CUDA/ATI AMD ready graphics card, you can have GPU encoding. Check the status of the CUDA/AMD button on the main interface and you’ll learn if CUDA/AMD encoding is in use which will help users accelerate conversion speed.

cuda dvd ripper

2. If you want to watch the DVD movies on your TV with high quality, Click “Setting” and adjust the bitrate. Remember, the size of your output file mainly depends on the bitrate, which means the higher bitrate the bigger file size you will get. You can also set other profile like video frame rate, audio channels .etc.


Step 3: Back to the main interface, and hit the big “Convert” button on the bottom right corner to start the conversion. You can do some housework during the conversion, and then you can enjoy your favorite DVD movies on your TV for a better enjoyment.

Articles you may want to read:

Friday, December 20, 2013

Lossless backup/encode BBD 1080i VC-1 Blu-Ray to MKV for NAS

Description: A detailed guide to show how to lossless backup VC-1 BBD or encode them to H.264 MKV, so that you can preserve them on NAS or playback on HD media player/home theatre for sharing with family&friends.

Here is a  

Q: “Usually I backup DVDs with DVDFab. But recently I got some VC-1 format Blu-rays and wish to back up them in H.264 for playback on home theatre. I have a BIG file server(NAS). So the file size is not an issue. So is there any tool well support VC-1 Blu-rays and backup them without quality loss? Thanks!”

It’s a great idea to backup Blu-ray collections to H.264 MKV for a long time saving without scratches. For people who have a large NAS server, video quality should be the most important thing. Follow this guide to learn how to lossless backup/encode VC-1 blu-rays to MKV for playback on computer and home theatre.

What is VC-1?

VC-1 is an evolution of the conventional DCT-based video codec design. Both HD DVD and Blu-ray Disc have adopted VC-1 as a video standard, meaning their video playback devices will be capable of decoding and playing video-content compressed using VC-1. Blu-ray players like XBMC Frodo have problems with VC-1 Blu-rays; so we have to try another way to backup these Blu-rays.

Although there’re many programs supporting Blu-ray ripping, many of them do not support converting VC-1 standard Blu-rays. For people who want to backup VC-1 Blu-rays like me, you are suggested to try this Pavtube ByteCopy(Mac Version).

Pavtube ByteCopy is a professional Lossless Blu-ray backup tool which supports normal commercial Blu-rays including those in VC-1 standard. With this program, we can decrypt Blu-rays and lossless backup Blu-rays to MKV format, or  transcode it to compressed H.264 MKV with desires audio–tracks.

Share this page on Facebook to get 20% off any Pavtube programs.

More Pavtube specials on Christmas can be found here: http://www.pavtube.com/2013-christmas-specials.html

How to lossless backup/encode VC-1 Blu-rays to MKV on PC/Mac?

Part 1. Run this ByteCopy; load discs

Click the top left icon to load Blu-ray/DVD disc, Blu-ray folder/ISO, or DVD folder/IFO/ISO image files.

Pavtube ByteCopy will detect the main title and check it by default.


Part 2. Choose lossless/encode MKV format

Click “Format” drop-down list and choose “Multi-track Video>Lossless/encoded Multi-track MKV(*.mkv)”.


Part 3. Adjust target settings

This preset includes two output formats: lossless and encoded MKV. Let’s click the “Settings” besides “Format” to choose wanted format.

See these screenshots:

1. Switch to “Video” tab; check the “Encode” to output compressed H.264 MKV; otherwise you can get lossless MKV files.

2. Switch to “Audio” tab; select wanted audio tracks.

Moreover, users can see all the source/target video specs including AC-1, AC3(audio codec), kbps(bitrate), etc. in this window. So we can easily check and adjust the input/output video settings immediately before conversion.

Part 4. Start Lossless Conversion

Back to the main interface; hit the big red “Convert” to star converting VC-1 Blu-rays to lossless/encoded MKV files. After the conversion, you can hit “Open” or “Open output folder” to quick locate the converted video; now you can playback them on computer or stream to HD media player to share with family and friends.

Related Guides:

Thursday, December 19, 2013

Pavtube Video Converter Ultimate 4.5.0.5225 Retail + Crack

SUMMARY:This Download periodically updates software information of Pavtube Video Converter Ultimate 4.8.6.6 Crack full version from the publisher, but some information may be slightly out-of-date. 


Pavtube Video Converter Ultimate 4.8.6.6 Crack is the best BD/DVD/Video solution to backup BD/DVD, compress disc and transcode video clips and audio formats including apple prores, h.265 mkv, etc. This all-in-one converter can be regarded as BD/DVD backup to copy the entire disc content to computer drive and save a complete BD M2TS/DVD VOB movie without extras, or used as a Blu-ray/DVD ripping tool, or a video converter for video conversion for TV playback. 

View full Pavtube Video Converter Ultimate 4.8.6.6 Crack screenshot: 


Major Update: 

1.support latest Blu-ray movies. 
2. fix some bugs. 
3. add Apple Prores as output. 
4. support encoding to HEVC MKV. 
5. compatible with Sony/LG/Samsung/Panasonic TVs. 

Pavtube Video Converter Ultimate 4.8.6.6 Crack full details: 

File Size: 34.96 MB 
License: Free To Try 
Price: $65.00 
Released: 2016-03-22 
Downloads: Total: 1205 | This Month: 10 
Publisher: Pavtube Studio 
Publisher URL: http://www.multipelife.com/ 

Homepage: http://www.multipelife.com/video-converter-ultimate 

System Requirements: 

Processor: Intel or AMD Dual core CPU, 1.6 MHz at least 
Operating System: Windows 2003/XP/Vista/Windows 7/Windows 8/Windows 8.1/Windows 10 
Memory: 512MB or above 
Display resolution: 1024 x 768 or above 
Optical Drive: DVD drive/ BD drive(BD drive is required for ripping Blu-ray disc) 

Pavtube Video Converter Ultimate 4.8.6.6 Crack Main Features : 

* Allow various file types as source media 

This Pavtube Video Converter Ultimate 4.8.6.6 Crack supports multiple file types as source media, including Blu-ray and DVD movies, and a wide range of HD and SD video files, like MTS, M2TS, TOD, MOD, MOV, WMV, MP4, TiVo, FLV, some MXF files, etc that are downloaded online and recorded by camcorders. Plus, the Blu-ray and DVD movies can be imported from not only BD/DVD Disc, but also BD/DVD Folder and BD/DVD ISO image. 

* Add *.srt and *.ass subtitles into video 

Pavtube Video Converter Ultimate now supports adding *.srt and *.ass subtitle into video and merge them into video part. Note: Once you have merged subtitle text and video into one file, the subtitles would be hard subtitles and become a part of video, in other word, you cannot turn it on or off during playback. 

* 6X faster conversion speed 

Pavtube Video Converter Ultimate takes full advantage of NVIDIA's CUDA technology and ATI Stream (AMD APP) technology to help users accelerate conversion speed. If your computer is equipped with NVIDIA graphics card or an AMD graphics card with AMD APP technology, the GPU acceleration feature in Pavtube software application saves users lots of time when choosing H.264 codec for output video format. 

* Support almost all popular media players/devices 

Pavtube Video Converter Ultimate 4.8.6.6 Crack allows Windows users to back up/rip/convert Blu-ray/DVD/Videos for playback on Android Tablets & Phones (Samsung Galaxy Tab S2, Galaxy Note 5, Galaxy S7/S7 Edge, Amazon Kindle Fire HDX, Google Nexus 7/10), Apple devices (Apple TV/Apple TV 2/Apple TV 3/Apple TV 4, iPhone 5s/6/6s/6s Plus), Windows Tablets (Surface RT), HD Media Players (Xbox 360, Xbox One, PS4, WD TV, Popcorn Hour, PSP) and video editing software (Adobe Premiere, Sony Vegas, Pinnacle Studio etc). 

Note: The program also allows you to extract audio from video and save the following in the right format, you can make a video for mobile phones and consoles, implemented batch mode before convert, you can configure all the parameters of the picture, there is a preview, the whole program is good, It has a simple interface, without Russian support. 

Download Link: 

- Pavtube New official address: http://www.multipelife.com/download/video-converter-ultimate/video_converter_ultimate_setup.exe 
- Pavtube old official address: http://www.pavtube.cn/blu-ray-video-converter-ultimate/ 
- Cnet Download: http://download.cnet.com/Pavtube-Video-Converter-Ultimate/3000-2194_4-75938564.html 
- Softpedia Download: http://www.softpedia.com/get/Multimedia/Video/Encoders-Converter-DIVX-Related/Pavtube-Video-Converter-Ultimate.shtml 
- V5pc Download: http://www.v5pc.com/7668.html 
- Itshareware Download: http://www.itshareware.com/prodview-code_348698--download-pavtube-video-converter-ultimate.htm 
- Top4download Download: http://www.top4download.com/pavtube-video-converter-ultimate/qxxwevxs.html 

Source:http://onebestsoft.com/pavtube-video-converter-ultimate-retail/

Convert Canon 70D MOV to ProRes 422, ProRes 422 LT, ProRes 4444, ProRes 422 HQ/Proxy for FCP editing

The article shows you the best workaround for editing Canon EOS 70D videos in FCP by transcoding Canon 7D MOV to FCP native editing format: Apple Prores 422 Codec or ProRes 422 LT, ProRes 4444, ProRes 422 HQ and ProRes 422 Proxy.
I'm working on a feature on my Mac, shot on Canon 70D, and am in the process of converting all my MOV files to manageable ProRes files. But I am unsure how to do this. Can someone give me a basic rundown of the procedure? I would be most appreciative.
This question is from one of my client, if you have used Canon 70D camera and recorded many 1080p videos, then how to ingest Canon 70D mov video into FCP for editing without crashing problem and avoid rendering?

In fact, MOV video format came from Canon 70D is a long GOP format that is highly compressed, which means it is not convenient for editing on Mac with Final Cut Pro. To import Canon EOS 70D 1080P video to Final Cut Pro for editing, the best way is to convert Canon EOS 70D 1080p HD MOV video to Final Cut Pro native Apple Prores .mov video on Mac.

Pavtube HD Video Converter for Mac is a professional Mac Canon 7D MOV to FCP Converter for you to easily convert Canon 70D 1080p H.264 MOV video to Apple ProRes 422 so that you can easily import the Canon h.264 recordings to Final Cut Pro X, Final Cut Pro 6, Final Cut Pro 7 for editing on Mac (10.9 Mavericks adn Mountain Lion included). This will help you import the file correctly and saving the rendering time.

Breaking news: Pavtube Studio has started the 2013 Christmas Hot Deals, if you get HD Video Converter for Mac, you can free get DVD Creator for Mac which can help you to free burn Canon mov footage to DVD on Mac with ease. Never miss!

Below is a brief guide for you.

How to import Canon EOS 70D H.264 MOV footage to Final Cut Pro on Mac? 

1. Free Download and run the best Canon 7D H.264 MOV converter and drag 70D MOV files to the software.


2. Click format bar to choose output format for use in FCP 6/7 or FCP X. For editing Nikon MOV on Mac, you can choose Apple ProRes 422 for FCP.


Tips:

Here listed the main difference of the five ProRes codecs.

a. ProRes 422 (HQ): offers the utmost possible quality for 4:2:2 or 4:2:0 sources and provides target data rate of approximately 220 Mbps and higher quality than Apple ProRes 422;

b. ProRes 422: provides target data rate of approximately 145 Mbps and higher quality than Apple ProRes 422 (LT);

c. ProRes 422 (LT): provides roughly 70 percent of the data rate of Apple ProRes 422 (thus, smaller file sizes than Apple ProRes 422) and higher quality than ProRes 422 (Proxy);

Learn how to convert Canon EOS 70D H.264 MOV to ProRes 422 LT for FCP X 

d. ProRes 422 (Proxy): provides roughly 30 percent of the data rate of Apple ProRes 422 and high-quality offline editing at the original frame size, frame rate, and aspect ratio;

e. ProRes 4444: offers the utmost possible quality for 4:4:4 sources and roughly 50 percent higher than the data rate of Apple ProRes 422 (HQ).

Step 4. You can click "settings" to customize the output parameters, adjust the resolution, bitrate as you want.

Note 1: You are allowed to adjust output video and video parameters. However, if you have no idea about profile setting, keep it as original recordings will provide you the files with less quality loss, and keep default settings is also a good choice for your to get a high quality files.

Note 2: In order to get customized videos, you can add subtitles to your own videos.

The free Subtitle Edit will help you to edit your own subtitles then put it into videos.

Read More: Subtitle FAQs: Free permanently attach subtitles to videos/movies

3. Click convert button in the main interface to start converting Canon 70D H.264 MOV videos to Prores for FCP.

Some more helpful features of the app:

1. Settings- Click to adjust the output parameters, such as resolution, frame rate, etc, customize the parameters as you want.

2. Editor (next to "Add" icon)- click to set deinterlace, denoise, mute, volume up, trim, crop, etc.

After converting the MOV to ProRes format, you can easily import/edit Canon EOS 70D h.264 mov files in Final Cut Pro 6/7 or FCP X smoothly on Mac.

Tips:

1. Before you try to do the conversion, if you are also a FCP X user, please make sure that you have installed the Apple ProRes Codec manually since the FCP X asks users to install it by themselves.

2. This Mac Canon MOV Video Converter can convert mov video to Prores with retaining timecode for FCP.

Refer to the picture below to see how this cool mac H.264 converting tool keep the timecode for FCP. It is not difficult to find that the timecode is kept.

3. Pavtube HD Video Converter can also convert Canon 70D mov videos to iMovie and FCEPremiere ProAvid Media ComposerDaVinci ResolveApple Aperture 3 and After Effects CS6 with good quality, just download the and have a try.

And you can get more info about how to import video to FCP (X) on pavtube website.

Source: http://pc-mac-compatibility-issues.blogspot.com/2013/11/edit-canon-70d-mov-in-fcp.html
    

Read more:

MP4 to FCP ǀ AVCHD to FCP ǀ MOV to FCP ǀ H.265 to FCP