Summary: Error when importing HX90V XAVC S to Sony Vegas/Pinnacle/WMM? Trouble editing HX90V XAVC S in Sony Vegas/Pinnacle/WMM? Don’t worry. I sincerely hope this paper can do you a favor.

Sony Cybershot HX90V is the world’s smallest superzoom camera that can record full HD 1080p videos in AVCHD or in the high-quality XAVC S format at 50 Mbps in multiple frame rates. While, there are a few issues when it comes to viewing, importing and editing Sony HX90V XAVC S files in editing software like Sony Vegas/Pinnacle/WMM. Luckily, I’ve figured out an effective way to import XAVC S to Sony Vegas/Pinnacle/WMM flawlessly.
“I’m using the Sony HX90V to make a short film and we are shooting XAVC S videos with it. Is there an easy way that allows easy import XAVC S from Sony HX90V to Sony Vegas/Pinnacle/WMM directly, without having to use any complex plug-in. I’m seeking for HX90V XAVC S best workflow.”
XAVC S format is efficient, but simply isn’t engineered to maintain quality during complex post production effects processing. Uncompressed HD format delivers superior image quality, but data rates and file sizes can stop a workflow dead in its tracks. On the contrary, best suitable format delivers both efficiency and quality without compromises. So, before editing HX90V XAVC S in Sony Vegas/Pinnacle/WMM and searching on their relatively official website, you’d better convert HX90V XAVC S to MPEG-2 for Sony Vegas, AVI for Pinnacle and WMV for Windows Movie Maker with a powerful third-party program. I recommend you to try Pavtube Video Converter, which is a professional tool for Windows users to transcode XAVC S to Sony Vegas/Pinnacle/WMM with the best quality. What’s more? It supports encoding XAVC S to more video editing software compatible file types like DNxHD for Avid Media Composer, MPEG-2 for Adobe Premiere Pro and etc.


How to edit Sony HX90V XAVC S in Sony Vegas/Pinnacle/WMM?
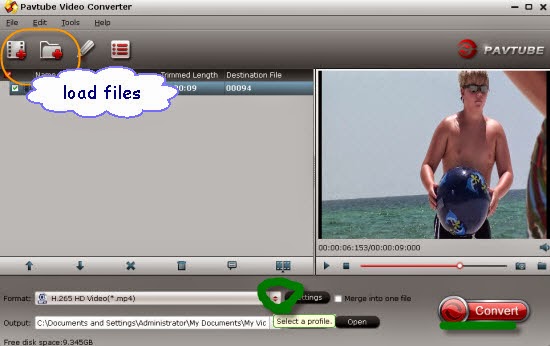
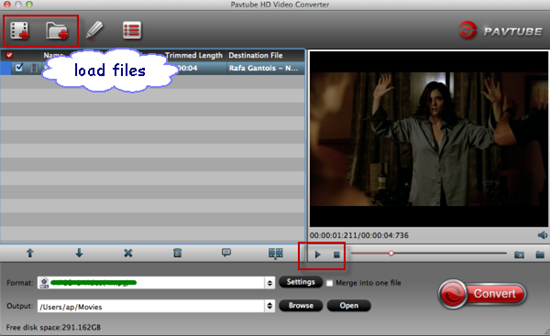
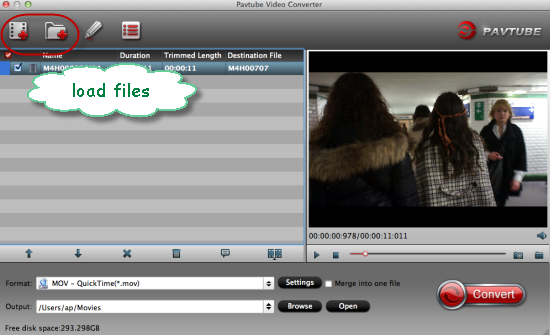
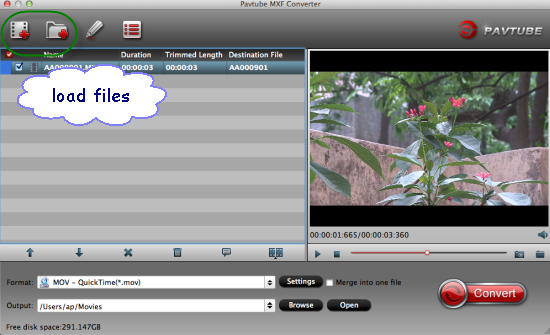
Step 1: Run the best XAVC S Converter, and click the “Add video” button to load XAVC S videos from Sony HX90V. If you want to load several files at one time, “Add from folder” button is available.

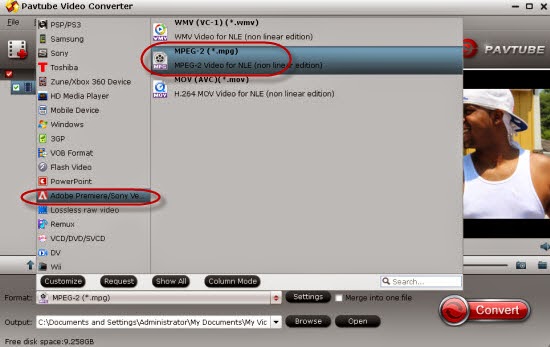
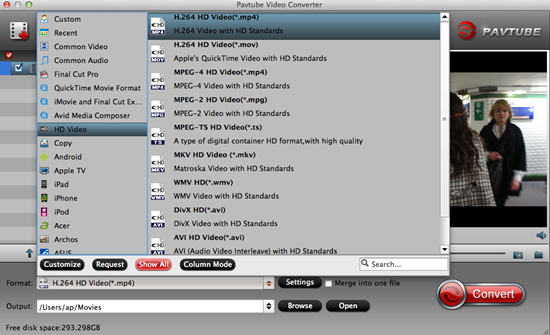
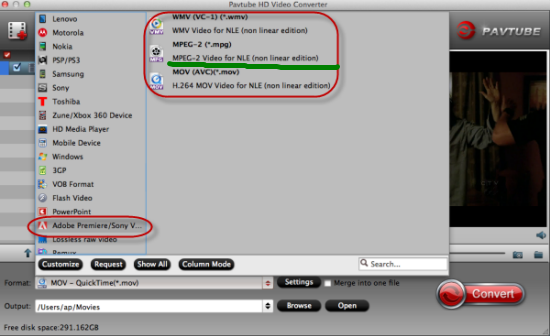
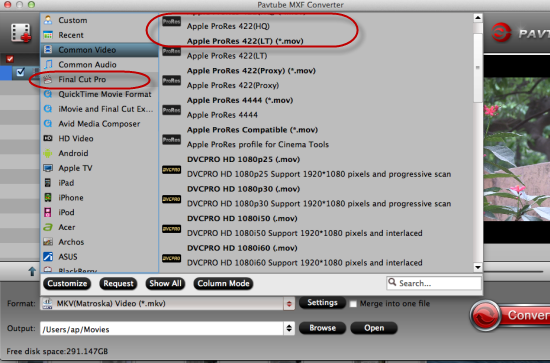
Step 2: Click “Format” bar to determine output format. Follow “Adobe Premiere/Sony Vegas” and select “MPEG-2(*.mpg)” as the output format. Besides, you can also choose WMV (VC-1) (*.wmv) if you want to get a relatively smaller output file.

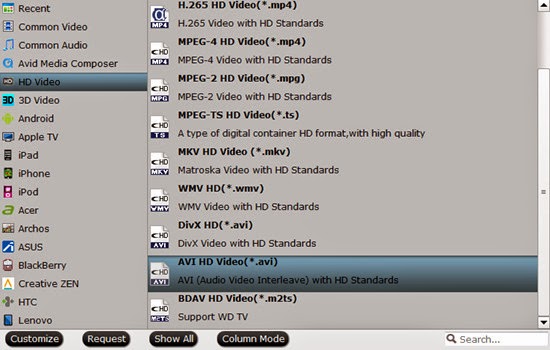
Tips: For editing in Pinnacle, choose “HD Video>>AVI HD Video (*.avi)”.
For editing in Windows Movie Maker, choose “HD Video>>WMV HD (*.wmv)”.
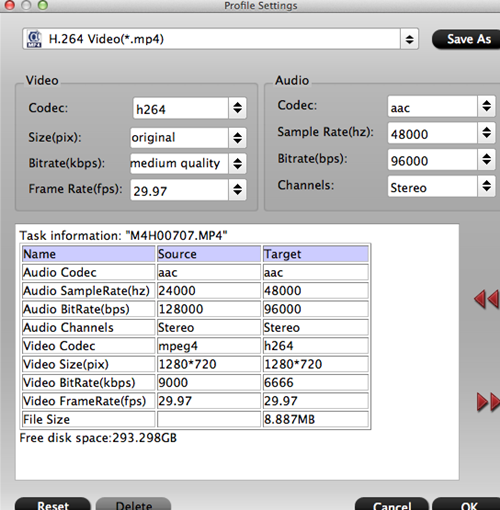
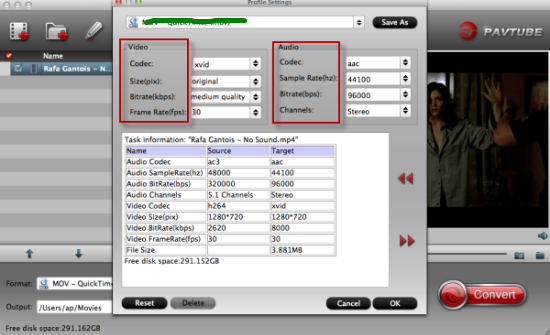
Step 3: Adjust video and audio parameters, including the bit rate of video and audio, the codec of video and audio, video size, sample rate, frame rate, audio channels, etc., in the Profile Settings by hitting “Settings” button.
Step 4: Click “Convert” button to start encoding HX90V XAVC S to MPEG-2, AVI, WMV especially for importing to Sony Vegas/Pinnacle/WMM.
Conclusion: When the conversion task is finished, click “Open” button to get the exported files and then import the converted HX90V footage into Sony Vegas/Pinnacle/WMM to do further editing without hassles.
Further Reading:
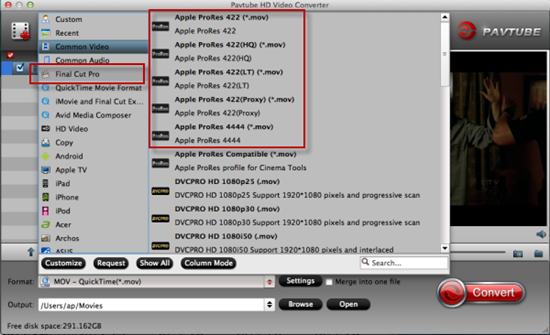
- Rewrap MKV to ProRes 422/4444/LT/Proxy for FCP
- Encode/Decode PXW-X70 XAVC-L MXF to Avid MC 8 on Mac
- Work Sony Alpha 77 Mark II AVCHD with DaVinci Resolve
- Edit Sony HD1550 XAVC 4K Video in Avid MC on Yosemite
- Upload Canon XC10 4K MXF to YouTube/Vimeo/Facebook on Mac
- Best Way to Edit PJ810 AVCHD Files in Premiere Pro CC
- Convert AX30 4K XAVC S to ProRes/AVI/MPEG-2/WMV for Editing and Playing