"The camera that we are using is a Panasonic HPX500. We are shooting at 1080p 60i. But the videos are wrapped in MXF which I am not familiar with. I'm wondering whether I can edit these P2 MXF videos in Adobe Premiere Pro CS6? Thanks in advance!"Panasonic AG-HPX500 is an HD P2 camcorder with high resolution. Many photography fans choose it for its outstanding video recording ability with 4:2:2 10-bit sampling, records in DVCPRO50, DVCPRO and DV, and other HD, SD formats at 1080 in 60i, 50i, 30p, 25p and 24p; as well as four independent audio channels.
The Panasonic AG-HPX500 recorded videos are really excellent among the high-end cameras; and you may want to edit them in some editing programs on mac, such as Adobe Premiere Pro, iMovie/FCE, FCP, After Effects and so on. But all of them are nonlinear editing programs which mean the MXF encoded files are not supported directly. So here comes up the original question: how can we convert Panasonic AG-HPX500 P2 MXF recordings to Premiere Pro CS6/5.5/5 compatible format?
After lots of searching and testing among the top converting programs, this Pavtube Panasonic P2 MXF Converter for Mac is recommended for that it's capable to convert Panasonic AG-HPX500 P2 MXF to Premiere Pro efficiently and stably. Click here to download the free trial version, get it installed and let's start!

- More choices: 2013 Top 5 Best MXF Converters for Mac
How to convert Panasonic AG-HPX500 P2 MXF footage for Premiere Pro CS6/5.5/5
Step 1. Add MXF files to Pavtube Mac P2 MXF Converter.
Connect you camcorder to Mac and keep it on until it show as a hard drive on desktop.
Install and run Pavtube MXF Converter for Mac.
Click top left icon to load you footages. You can choose "Add videos" or "Add from folder" directly.
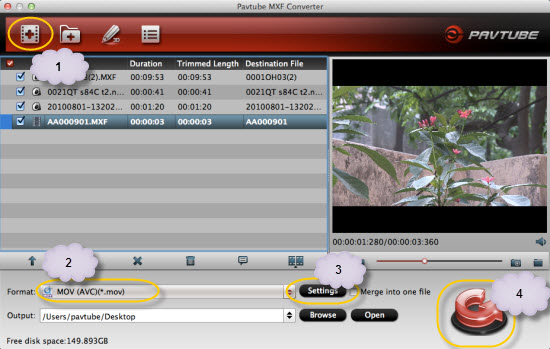
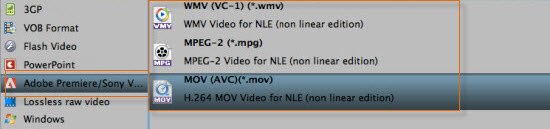
Step 2. Choose compatible format for Adobe Premiere Pro CS6/5.5/5
Click "Format" and find Adobe Premiere Pro at left, choose "MPEG-2 (*.mov)" or "MOV(AVC)(*mov)" etc. as it's the preferred codec for Premiere Pro. Or you can choose "Final Cut Pro > Apple ProRes 422 (*.mov)".
Apple ProRes 422:

MOV, MPEG, WMV:
Step 3. Set up output videos settings for Premiere (Optional)
Click "Settings" which is marked as 3, you can fix the bitrate, frame rate, sample rate and video size, it's all up to you. Usually the higher bitrate you choose, higher video quality will be, and larger video size correspondingly.
Step 4. Start converting AG-HPX500 P2 MXF for Premiere Pro
Now click the big red circle at right bottom, wait for moments till the conversion complete. You can click "Open" to locate the converted video directly.
For beginners, here is a guide on how to import video files to Premiere Pro
Learn More MXF related guide:
- How to play MXF with VLC | MXF Files Converter Column
- Transcode Panasonic P2 MXF to Quicktime MOV
- Convert Panasonic DVCPRO HD P2 MXF to ProRes for FCP X
- Ingest Panasonic AG-HPX600 P2 MXF to iMovie/FCE
- Import Panasonic HPX3100 P2 MXF to Avid Media Composer
- Import Panasonic P2 MXF to DaVinci Resolve on Mac
- Importing P2 Footage into Final Cut Pro directly from a P2 card
- Convert Panasonic P2 MXF to AVI/MP4 for playback