Speed up your tapeless workflow using Prelude to Ingest and Transcode at the same time.

Adobe has added a new tool to the Creative Cloud / Master Collection / Production Premium for video producers/editors called Prelude. Use Prelude to ingest and transcode tapeless media from cameras recording to cards, as well as a basic video editing tool for producers (Premiere Pro can read timelines created in Adobe Prelude).
Transcoding your DSLR footage to ProRes in Adobe Prelude gives you a 10 bit, edit friendly codec that FCP, AVID, & Premiere can all handle. This is a great file choice when you work with a variety of nonlinear apps (it’s a popular intermediate codec for FCP). ProRes is also a solid option if you plan on color correcting in Apple Color or Black Magic Resolve. Trancoding changes the codec – footage off the cards is H.264 8bit and Pro Res is 10 bit.
Read More: Types of Apple ProRes Codecs | Apple ProRes Format Specifications
1. First, to work with ProRes you need to have Final Cut Pro 7, FCPX , Motion, or Compressor installed on your system.
2. Then, download the ProRes presets from Adobe.
3. Once you install the presets into Media Encoder, ProRes will be available in Adobe Prelude. (same applies If you want to create your own custom presets).
4. After you download and install the ProRes presets, launch Adobe Prelude.
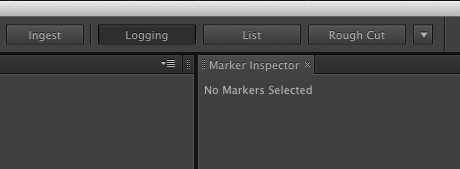
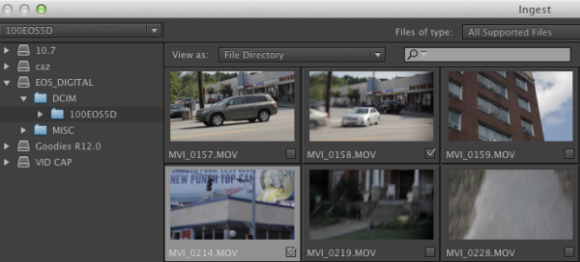
5. Click the Ingest button, and the Ingest window opens.

6. Select your card that has the video footage on it.

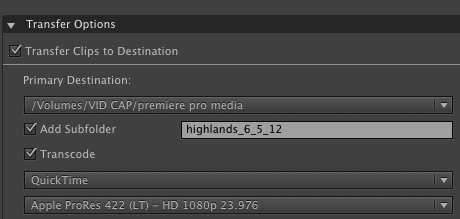
7. Check Transfer Clips to Destination.
8. Check the Transcode button and pick the ProRes setting that matches your footage.

9. Click the Ingest button and your footage will be ingested and encoded to ProRes.
After you finish ingesting and transcoding the video off a card, input another one or go straight to Adobe Premiere and start editing your footage!
- Source: premiumbeat.com
More Posts:
- 4 Free & Best tools to import Canon XF MXF to FCP (X)
- Workflow: Edcoding C100 AVCHD to FCP on Mac
- Lossless MTS M2TS MKV Editor and Converter for Camcorder Beginners
- Best Camcorder Partner: ClipWrap vs Pavtube Media Magician for Mac
- Convert Panasonic DVCPRO HD P2 MXF to FCP X on Mac
- Sony AVCHD footage AVCHD workflow in Mac
- Convert Sony Handycam AVCHD MTS videos on Windows