Monday, July 29, 2013

Mavericks solution: Transform Sony NEX-VG30 MTS footage to FCP (X), iMovie, FCE without rendering

Sony has announced the NEX-VG30 interchangeable lens camcorder. The NEX-VG30 camcorder features the same sensor format that Sony builds into its standard size DSLR cameras. With approximately 19.5 times the surface area of conventional camcorder sensors, the 16.1MP Exmor APS HD CMOS sensor makes capturing high-quality, cinematic video with a shallow depth of field a breeze.


Whatever your genre, whatever your shooting style, take your moviemaking to the next level with the Sony NEX-VG30 interchangeable lens HD camcorder and lens.

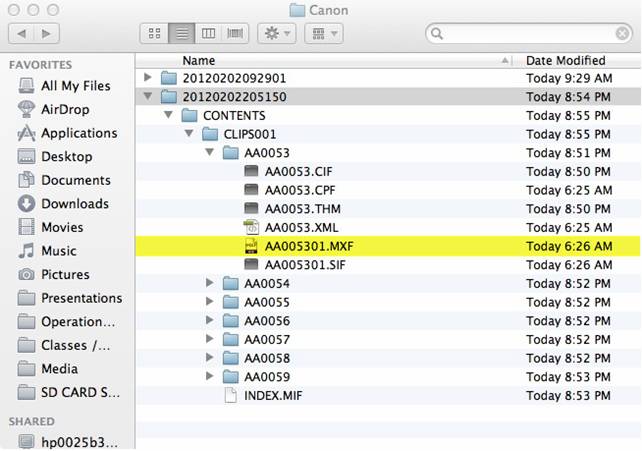
You may like shooting video with Sony NEX-VG30, it's wonderful for us to use this excellent camera to record beautiful landscapes and record exciting moments. After recording, you may need to import 1080p footages from Sony NEX-VG30 to Apple Final Cut for editing, but, Sony NEX-VG30 recorded videos are in AVCHD format, the AVCHD MTS/M2TS format is not compatible with many editing software, such as FCP, FCP X, iMovie and FCE on Mac OS X 10.9 Mavericks. Final Cut software doesn't supports AVCHD well, it takes much time to render.

What's the best solution to import Sony NEX-VG30 AVCHD files to FCP, FCP X, iMovie, FCE for editing without rendering? The best way is to transform Sony NEX-VG30 AVCHD MTS footage to ProRes/AIC codec MOV format, Apple ProRes 422 MOV format is best supported by FCP or FCP X, AIC MOV is best format for FCE and iMovie. Pavtube iMedia Converter for Mac is the best choice for you. It can generates best editing format/codec for filmmakers and video enthusiasts to use in different NLE apps, such as FCP 6/7, FCP X, iMovie 8/9/11, Adobe Premiere Pro CS4/CS5/CS6, Adobe After Effects, FCE, Apple Aperture 3, Kdenlive, Keynote, Avid Xpress Pro, Adobe Creative Suite 6, DaVinci Resolve, iPhoto, and so on.

What's more, Pavtube iMedia Converter for Mac also support adding subtitles (.srt, .ass, .ssa) into your video files.

Click the below download or buy button to get Pavtube MTS/M2TS Converter for Mavericks:


The below is a brief guide for beginners:

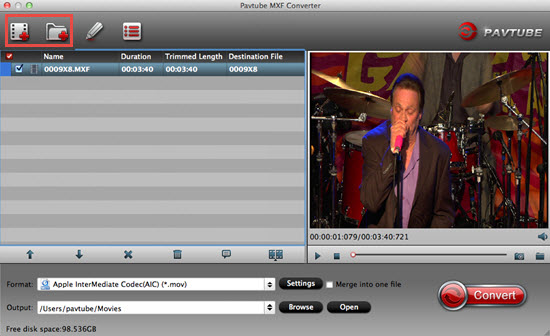
Step 1. Install and run Pavtube iMedia Converter for Mac, it's an professional AVCHD to FCP/iMovie Converter which can convert Sony NEX-VG30 AVCHD files to different formats on Mac OS X Mavericks.

Click "Add Video" to load the .mts files from Sony VG30 Camcorder to the Mac Converter.

imedia converter mac

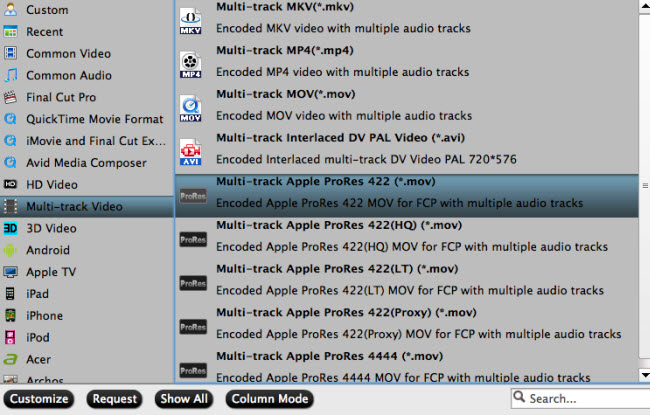
2. Click "format" bar to choose output format:

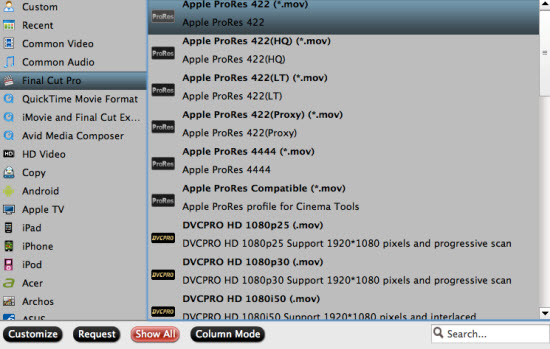
Choose "Final Cut Pro -> Apple ProRes 422 (*.mov)" as the best output codec for importing MTS files from Sony VG30 to Final Cut Pro (X) editing.

(P.S. Learn More about Types of Apple ProRes Codecs)


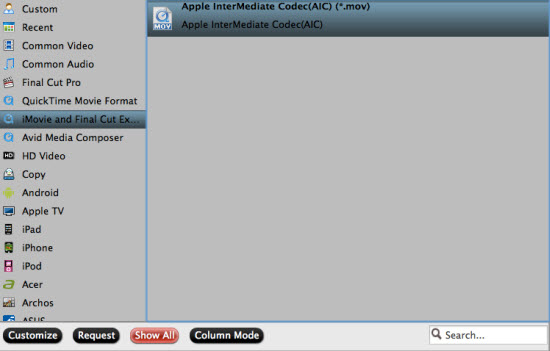
Choose "iMovie and Final Cut Express > Apple Intermediate Codec(AIC) (*.mov)" as the best video format for importing Sony VG30 AVCHD files to iMovie or Final Cut Express.


Then you can set the output folder by clicking "Browse" icon as you need.

Step 3. If you want to customize the output parameters, you can click settings button. Adjust the resolution and others as you need.

Step 4. Click "convert" button to start converting Sony NEX-VG30 AVCHD MTS to ProRes 422/AIC MOV format for editing on Mavericks.

After finish converting, you can import the converted AVCHD to FCP, iMovie, FCE for editing as you want.
  
If you want to enjoy AVCHD MTS/M2TS/M2T/TS videos and Blu-ray/DVD movies on portable device like iPad Air, iPad 4, iPad Mini 2, iPhone 5S/5C, Galaxy Tab 4, Galaxy Note 3, Galaxy TabPro, Galaxy NotePro, Song Xperia Z2, Galaxy S5, Surface 2, etc., you can simply convert them to proper format(like MP4 format) then import to your tablet or phone keeping audio and video synchronization.


Read More:

How to Solve the freezes when importing MTS media to Premiere CC-2015.3?
How to Convert MTS/M2TS with Handbrake Easily?
Best Solution to Play Sony MTS/M2TS Files on MacBook Pro
Play MTS on Smart TV (Windows and Mac Solutions)
Top 5 MTS/M2TS Video Editors for Mac
Top 5 MTS/M2TS Video Editors for Windows (10, 8.1, 8, 7, XP, etc)
Fix Choppy Issues When Importing AVCHD Files to FCP
Join and Convert MTS/M2TS Files for playing with VLC Player
How to Convert 3D AVCHD MTS to 3D Tablet for Watching?

Thursday, July 25, 2013

Convert Panasonic Lumix AVCHD MTS/M2TS footage on Mac Mavericks(FCP, iMovie, QuickTime, Cinelerra, Avid, Premiere, Kdenlive, etc.)

Panasonic Lumix cameras are well known products in the photography market, Panasonic has released so many camera product lines, Lumix series is one of the most successful products.

Panasonic Lumix cameras include Lumix DMC-TZ10, Lumix DMC-TZ20, Lumix DMC-FZ100, Lumix DMC-FZ200, Lumix LX7, Lumix F5, Lumix ZS30, Lumix ZS25, Lumix TS5, Lumix XS1, Lumix FZ70K etc. Lumix cameras recorded video format is AVCHD MTS/M2TS, and this format is also used in Panasonic camcorders and other popular high-end cameras. MTS/M2TS format is not easy to use as it's not well supported by many Mac editing software or Player, such as Final Cut Pro, iMovie, Final Cut Express, QuickTime, Avid Media Composer, Avid Xpress Pro, Adobe Premiere Pro, Adobe Creative Suite 6, Adobe After Effects CS6, Cinelerra, Apple Aperture 3, Kdenlive, Keynote, DaVinci Resolve, iPhoto and so on. You may encounter many problems when importing Panasonic AVCHD(.MTS/.M2TS) to Mac Editing Software, you could not import AVCHD folder or these MTS/M2TS files are not processed smoothly.
AVCHD MTS/M2TS format is not good for FCP, FCE, iMovie, Avid, etc., what's the best format for these Mac editing software? How to edit your Lumix MTS/M2TS footage in Mac Mavericks smoothly? The best way is to convert Lumix MTS/M2TS files to porper format/codec for editing or playing on Mac. 

You can download a Panasonic Lumix AVCHD MTS/M2TS Converter for Mac trail version, and choose Apple ProRes codec, it's the recommend codec by FCP. Attached the most widely used video codec on Mac:

  • For FCP, Aperture 3 and Premiere Pro users: choose "Format > Final Cut Pro > Apple ProRes 422 (*.mov), ProRes 4444, ProRes 422 HQ, ProRes 422 LT or ProRes 422 Proxy
  • For Avid users: choose "Format > Avid Media Composer > Avid DNxHD (*.mov)"
  • Adobe Premiere and Sony Vegas users: choose "Format > Adobe Premiere/Sony Vegas > WMV (VC-1) (*.wmv), MPEG-2 (*.mpg) or MOV (AVC)(*.mov)"
  • For iMovie and FCE users: choose "Format > iMovie and Final Cut Express > Apple InterMediate Codec (*.mov)", here is a guide.
  • For QuickTime users: choose "Format > Common Video > MOV-QuickTime(*.mov)", here is a guide.

P.S. If you are editing AVCHD MTS/M2TS footage in Windows (including Sony Vegas, Pinnacle, Cyberlink, Windows Movie Maker, Magix Movie Edit Pro, Avid, Premiere, etc.), Panasonic AVCHD Converter is a powerful conversion tool, what's more, I'll share a helpful guide:
Below is a guide for you on Mac:

1. Install Pavtube MTS/M2TS Converter for Mac and run it. It's an excellent Panasonic Lumix AVCHD MTS/M2TS to Mac Converter.

Import Panasonic recorded MTS/M2TS files to the converter.


2. Click "Format" bar to choose the porper format/codec as output for editing on Final Cut Pro, iMovie, Final Cut Express, Avid Media Composer, Adobe Premiere Pro, Adobe After Effects CS6, Cinelerra, Apple Aperture 3, Kdenlive, DaVinci Resolve, iPhoto or playing on QuickTime, etc.


Tips: You can click "Settings" button to adjust the output parameters, such as resolution, bitrate, choose them as you want.

3. With Panasonic Lumix AVCHD MTS/M2TS Converter Mac, you can embed srt/ass/ssa subtitle you want to video/movie by clicking "Edit".

First of all, you need to find your language subtitle from website. Best subtitle file searching method: "movie title" + "your preferred language" + "subtitle" as the search strings. Here I share some free subtitle files download website:
 
After getting subtitle files from internet, choose "Edit" button to launch the video editing window. Go to "Subtitle" tab, check "Enable", then click "Browse" button to load an external subtitle files (.srt, .ssa or .ass). After the subtitle is loaded, click "OK" button to return to the primary window.

The steps in detail: 


4. After completion of all the Settings, began to convert Panasonic Lumix AVCHD MTS/M2TS to proper formats for playing an editing on Mac(Mavericks included) by clicking "Convert" button. The conversion speed depends on your computer configuration and file size.

After conversion, click "Open" button to find the generated video files, the subtitle you need will be written permanently on the output video.

Just have a try. Have fun!

Read More:

How to Solve the freezes when importing MTS media to Premiere CC-2015.3?
How to Convert MTS/M2TS with Handbrake Easily?
Best Solution to Play Sony MTS/M2TS Files on MacBook Pro
Play MTS on Smart TV (Windows and Mac Solutions)
Top 5 MTS/M2TS Video Editors for Mac
Top 5 MTS/M2TS Video Editors for Windows (10, 8.1, 8, 7, XP, etc)
Fix Choppy Issues When Importing AVCHD Files to FCP
Join and Convert MTS/M2TS Files for playing with VLC Player
How to Convert 3D AVCHD MTS to 3D Tablet for Watching?

Wednesday, July 17, 2013

Lossless Backup Blu-ray/DVD to MKV and Retain Multiple Audio Tracks and Subtitle Streams Windows and Mac

If you want to watch Blu-ray/DVD movies on  your portable device when you don't have access to your disc, meanwhile, you do not want to suffer any quality loss when transcoding BD/DVD, it sounds difficult to realize. In fact, Pavtube Bytecopy can help to get it done easily. Just follow below article to learn how to lossless backup Blu-ray/DVD to MKV with multi-track/stream. 

Read More: Keep multiple audio and subtitle streams when backing up Blu-ray Disc to MKV/MP4/MOV

With the advent of movies of high definition, more and more people discard those low-quality movies and prefer to movies with high quality. Maybe you have collected lots of HD Blu-ray and DVD movies for enjoying them on TV. But if you are out of home or don't have access to your discs, how do you enjoy your movies? Of course, you could choose some BDMagic or DVDAid to convert BD/DVD to your portable device. It is a good idea. But it needs to transcode the original BD/DVD, which will suffer some quality loss.

Why don't you choose Pavtube Bytecopy. It combines all features in Blu-ray/DVD Ripper, including various output formats selection, editing options support, what's more, it can help you:
  1. Backup BD/DVD to MKV without any quality loss.
  2. Transcode Blu-ray/DVD to lossless MKV, MP4, MOV files with all multiple audio and subtitle tracks and chapter markers from original BD/DVD.
  3. Remove unwanted subs streams and audio tracks at will.
  4. Preserve soundtracks and subs in multiple languages, e.g. English, Spanish, French, Deutsch…
  5. Support convert/rip/copy latest Blu-ray/DVD movies for Android/iOS/Windows devices.
  6. Support exporting forced subtitles and .srt/.ass/.ssa external subtitles.

So, with ByteCopy, you can enjoy your movies at any time just like watching BD/DVD. Get it.

To see how it works, please refer to below guide for lossless backup BBlu-ray/DVD to MKV with multi-track/stream.

Firstly, you should have download and installed the BD/DVD to MKV Converter. If you wanna a Mac version, please go to Pavtube Bytecopy for Mac. Now let's go.

Step 1. Launch it and load your BD/DVD


Step 2. Go to "Format" to find "Multi-track Video" catalogue. Select "Loss/encoded Multi-track MKV(*.mkv)", which will provide lossless backup BD/DVD to MKV with multiple audio and subtitle tracks.


Tip: If you want to remove unwanted audio or subtitle stream from original BD/DVD for output, just unselect the box in front of it.


Step 3. Click "Convert" to start lossless converting Blu-ray/DVD to MKV and keeping multi-track/stream. The Conversion can be completed within a short time, then click "Open" to find generated MKV files.

With a very easy operation, you get the lossless MKV files from BD/DVD, which make you to enjoy movies with high quality wherever you want.

However, what Bytecopy can do is more than it, let's go to below tips to find more.

1. You may be confused about the other two options under "Multi-track Video" catalogue: Muti-track MP4(*.mp4)and Multi-track MOV(*.mov). They are used to transcode BD/DVD to .mp4 and .mov output files. The point is that they support saving encoded multiple audio tracks. So you could enjoy it in your iPhone 5, iPad 3, Apple TV 3 and more portable devices. 

2. Directly Copy will provide you another way to lossless output. It will provide you a 100% backup in original format without extracts. If you do not want to output mkv files or your player cannot play mkv files, directly copy is the best choice for you. It will save 100% intact .M2TS main movie from original BD disc, and allow all. subtitle and audio tracks preservation. You can see more details about it in Lossless Blu-ray M2TS backup for main movie.

Read More:

Tuesday, July 16, 2013

Transcoding Panasonic DVCPRO P2 MXF to AVI/MOV/MPG/WMV for Avid, Sony Vegas, Pinnacle, Cyberlink, Windows Movie Maker

Description: If you have recorded P2 MXF filed by Panansonic DVCPRO, but the problem is that they cannot be edited on some video-editing software, such as Avid, Sony Vegas, Pinnacle, Cyberlink, Windows Movie Maker and it may make you feel so depressed. In fact, what you need is a software for transcoding Panasonic DVCPRO P2 MXF to video format supported by those editing software, such as AVI/MOV/MPG/WMV. The following article will show you the solution.
Panasonic DVCPRO P2 camcorder is "broadcast equipment that brings unprecedented mobility, performance and convenience to news gathering" and with its P2 card it can record DVCPRO HD/DVCPRO 50/DVCPRO/DV data. And it will generate footage into a MXF file which usually known as P2 MXF file. However, the P2 MXF file is not supported by some common video-editing software, including Avid, Sony Vegas, Pinnacle, Cyberlink, Windows Movie Maker.


So if you happen to be lucky enough to have Sony Vegas or any of above video-editing programs together with Panasonic DVCPRO P2 camcorder, you will encounter some trouble when importing P2 MXF files into these programs for editing. And this trouble may puzzle many Panasonic DVCPRO P2 camcorder users. The point to solve this problem is transcoding Panasonic DVCPRO P2 MXF to AVI/MOV/MPG/WMV for Avid, Sony Vegas, Pinnacle, Cyberlink, Windows Movie Maker.

Now what you need to do is to find a program which can help to transcode Panasonic DVCPRO P2 MXF to AVI/MOV/MPG/WMV. If you do not want to spend too much time on selecting the suitable program, here we recommend an easy-to-use program to help you getting the work done. You could choose Pavtube Media Magician, which will help to convert P2 MXF files into many video formats without any audio and video out of sync issue.

What's more, good news to you is that you can get 50% discount now for 2013 Summer Holiday Sales. Do not miss it. Before purchase, you can get the trial version to test it.

Let's refer to below detailed guide to convert Panasonic DVCPRO P2 MXF files on Windows. First of all, please make sure having downloaded and installed Pavtube Media Magician.

1. Launch it and load P2 MXF files. You can choose to load from folders or load from camcorder directly.


2. You can put files into edit area on the bottom for doing some simple edit. Special effect, 3D effect and audio can be adjusted for each selected task. For example, you can add Simple Gause, Sample Laplaci, Gray, Flip Color, Invert, and Aged Film to your output video for personalized video.


3. Click "Output" button to find output settings. Here you are allowed to select output formats for each task. You can directly select output editor, including Avid, Sony Vegas, Pinnacle, Cyberlink. It also supports lossless output and to upload to YouTube directly. 

Before conversion, Select a task to adjust video and audio parameters(codec, size, bitrate, etc) for optimizing output video. The point is that multiple tasks can work together, which will help to save lots of time.


4. Click "Triangle" button to start transcoding Panasonic DVCPRO P2 MXF to AVI/MOV/MPG/WMV for selected tasks.

After conversion, you will be able to get the output files. Now you can import the converted Panasonic P2 MXF footage to Avid, Premiere, Sony Vegas, Pinnacle, Cyberlink, Windows Movie Maker for future editing without any trouble.

Pavtube Media Magician related articles:


Thursday, July 11, 2013

Converting Canon C300 MXF footage to ProRes/AIC for smootly editing on FCP, iMovie, FCE

In this tutorial, you will learn how to import MXF footage from Canon C300 to Final Cut Pro (X), iMovie, FCE for further editing on Mac without problems.

With every new camera, comes many new questions about workflow. The Canon C300 can help us record vivid high-definition videos in MXF format which is often used in Sony, Panasonic and Canon high-end cameras and camcorders. The MXF format is good to record videos, but MXF files are not easy to use because many editing software and devices can't read MXF format videos, such as Apple's Final Cut Pro 6/7, Final Cut Express and iMovie. So how to solve the program when importing C300 MXF footage into FCP 6/7 or other non-linear editing systems. Below, I will throw a quick guide up on how to ingest Canon C300 MXF footage into Final Cut Pro (X), iMovie and FCE for editing smoothly.

convert canon c300 mxf for editing
Here is the easy way to fix it, namely, converting MXF to ProRes or AIC mov on Mac. If you are interested doing likewise, check out Pavtube Canon MXF Converter for Mac. The program is an easy-to-use and intuitive Mac tool for camcorder users. It is good at batch converting MXF recordings shot by Panasonic P2 camcorders, Sony XDCAM camcorders, Canon XF series cameras to ProRes/AIC MOV formats compatible with your Mac Video editing software like iMovie, Final Cut Pro (X), Final Cut Express.

Tips: If you have the same problems about editing Canon C500, XF100, XF105, XF300, XF305 MXF footage on Mac, you may view the following articles:
Just free download or buy Pavtube Mac MXF Converter for Canon C300:


Step-by-step: Converting Canon C300 MXF to ProRes/AIC MOV on Mac

Step 1. Free download and run the best C300 MXF Converter for Mac, add MXF captured videos to the program. You can not only click "Add video" button to import Canon C300 MXF files.


You are allowed to load .MXF clips to Pavtube MXF Converter for Mac directly from your camera folder or a folder archived on your computer's HDD. If you want to load multiple .mxf files to convert for FCP X at a time, just drag and drop the entire folder into the Mac MXF Converter software. 


Step 2. Click the "Format" option, select the "Final Cut Pro > Apple ProRes 422 (*.mov) as target format. And navigate to the Final Cut Pro group, you will notice that there are profiles with Apple ProRes 422(HQ) (*.mov), Apple ProRes 422(LT) (*.mov), Apple ProRes 422(Proxy) (*.mov), Apple ProRes 4444 (*.mov). 

Apple ProRes 422 (*.mov) format is specially designed for using in Final Cut Pro X (include FCP 6/7). (The Apple ProRes 422 (Proxy) (*.mov) codec is intended for offline editing and contains 30 percent of the data rate of Apple ProRes 422)


And for editing Canon C300 MXF in iMovie/FCE, you can choose iMovie and Final Cut Express > Apple InterMediate Codec(AIC)(*mov).


Some more helpful features of the batch MXF to MOV Converter for Mac:

1. Adjust video and audio parameters. (Optional)

Click "Settings" button to customize the output video and audio settings by yourself. But if you are not good at it, you'd better use the default parameters, they will ensure you a good balance between file size and image quality basically. You can change the resolution, bitrate, frame rate as you need.

2. Editor (next to "Add" icon)- click to set deinterlace, denoise, mute, volume up, trim, crop, etc.


Step 3. When above steps finished, you can click "Convert" button to start converting Canon C300 MXF to ProRes/AIC MOV for FCP/FCE/iMovie with a super fast speed. with the excellent C300 MXF to MOV Converter, you can deal Canon C300 MXF footage on Mac with best video and audio quality as you want.

After converting Canon C300 MXF files, just according to the following tutorial import the output Apple PreRes 422 .mov files to Final Cut Pro 6/7/X for editing the video. Optimize your workflow and save time with the Apple ProRes compression for Final Cut Pro X. You can also import the output AIC MOV videos to iMovie/FCE for editing in full HD.

Additional tips:

1. This Mac version can run on Yosemite smoothly and users don't have to worry about any conversion lagging off.

2. How to transfer files into FCP or iMovie may be very helpful for newbie who just walk into Mac world.

3. If you intend to merge multiple MXF clips into one file, simply check "Merge into one file" box.

4.  If you would like to export Apple ProRes with multiple audio tracks kept, you may change to Pavtube iMixMXFprogram. You're advised to take the article.


5. To learn more conversion solutions for Canon MXF clips captured, please refer to Pavtube's Canon Column page.  

6. For Win users, Pavtube MXF Converter added new features like H.265/HEVC will allow you to maintain even improve the original videos while only half file size compared to original ones.

I hope can help you learn more. A happy work. Have a nice day!
   

Read More:

Tuesday, July 9, 2013

Up to 30% OFF: Backup/Rip Blu-ray Disc on Win/Mac on Summer Sale 2013

Source: http://device-camcorder-tips.blogspot.com/2013/07/backup-rip-blu-ray-disc-on-windows-and-mac.html


Dear students, Summer Vacation has already come, when you are existed to get ready for summer get-away trip, have you considered what to do on the way? Sleeping, chatting? Quite boring, don't you think? How about spending some quality time and enjoy movies? BTW, many new movies has released a Blu-ray version on disc, such as An American Girl, Upside Down, The Call, and Phantom and if you want to backup Blu-ray movies and watch them on the going, get 30% OFF Blu-ray Ripper (Windows/Mac) on Pavtube Unique Crazy Summer Sale 2013 to backup/rip Blu-ray discs for viewing on your portable devices When you're traveling.

(PS: In addition, there are still many top Blu-ray Ripper tools used to rip Blu-Ray discs, such as 20% OFF Video Converter UltimateByteCopyMakeMKVHandBrake)

Preparation:

Read More: Top 5 Best Blu-ray Ripper Review | Top Blu-ray Ripper Mac Review

Now get detailed instruction to backup Blu-ray Disc on Windows and Mac.

1. Launch Pavtube Blu-ray Ripper, and load Blu-ray disc from disc driver.


2. Click the Format button, and choose optimized profile for output.

PS: Pavtube BDMagic provides dozens of profile presets for almost all mobile devices, including some new tablets (Samsung Galaxy Tab 3, Google Nexus 7/10, iPad 3, iPad 4, Surface RT/Pro, Kindle Fire HD, etc.) and new smartphones (Samsung Galaxy S4, iPhone 5, HTC One, Nexus 4, etc.), so don't worry that you cannot find your device's friendly profile. Plus, Pavtube software application supports HD media players and video editing programs for output.

3. Click Settings button to set up profile parameters to get better video quality.

4. Click big "Convert" button to start backup/rip Blu-ray disc for playing on Tablet/Phone.

Pretty simple steps and you would get Blu-ray disc copied for Summer Holiday trip. More great news, Pavtube 2013 Summer Holiday Crazy Promotion activity offers up to 50% discount products.

Meanwhile, Pavtube Free DVD Ripper (Windows/Mac) and Free Video DVD Converter Ultimate is coming soon! Looking forward...

Get it soon, otherwise it would expires on July 31, 2013. View more discount:

Friday, July 5, 2013

2013 Summer Holiday Biggest Discount: Up to 50% OFF DVD Creator, Media Magician, etc.

Summer Break is starting now. It's time to have fun: hanging out with friends, spending some quality time with family members, enjoying personal space alone. No matter whom you are with or where you are, watching movies, sharing online videos or editing video footages would be a part of your summer holiday more or less. While a great video converter would be essential in your summer break if you want to do above stuff, and Pavtube software application is a perfect choice. Great news, Pavtube is offering Up to 50% OFF on Summer Holiday Sale for its top programs, including 30% OFF Blu-ray Ripper (Win & Mac), 20% OFF Video Converter Ultimate (Win & Mac), 50% OFF Media Magician (Win & Mac), and 50% OFF DVD Creator (Win & Mac). Plus, Like Pavtube on Facebook and you would get an extra 5% off discount from above products!


Let's get familiar with Pavtube Summer Sales Directory 2013:

Pavtube BDMagic for Windows/Mac with 30% OFF

  • Fully backup commercial Blu-ray and DVD discs
  • Support adding *.srt and *.ass subtitle
  • Direct copy titles from BD and DVD
  • Rip Blu-ray and DVD to many formats, such as .MP4, .MKV, .MOV, etc.
  • Preserve the BD/DVD's original file structure by using "Copy the entire disc" feature.
  • Support NVIDIA CUDA and ATI Stream (AMD APP) acceleration technologies.
  • Support output playback on various portable devices including tablets (the new iPad 3, Galaxy Tab 3, Toshiba Thrive, Nook Tablet, Amazon Kindle Fire) and mobile phones (Samsung Galaxy S4, HTC Evo 4G, iPhone 5), HD media player such as Apple TV, WDTV, PS3, and video editing programs like Sony Vegas, Adobe Premiere, FCP, iMovie.

Pavtube Video Converter Ultimate for Windows/Mac with 20% OFF

  • Integrate with Blu-ray Ripper, DVD Ripper, and HD Video Converter
  • Support adding *.srt and *.ass subtitle
  • Direct copy titles from BD and DVD; Support latest BD and DVD
  • Support TrueHD 6.1 and TrueHD 7.1 decoding
  • Convert Blu-ray, DVD, HD Videos to MP4/AVI/MKV/MPG/M4V/DivX/FLV etc.
  • Rip the latest Movies to any Tablet/Phone without video-audio sync issues
  • Copy Blu-ray/DVD remaining original structure
  • Transcode XDCAM/XAVC/MXF/AVCHD/MTS/M2TS/MOV/Tivo/MKV/AVI/MVI etc. for editing

Pavtube Media Magician for Windows/Mac with 50% OFF

  • Manage/backup/convert Canon/Sony/Panasonic/JVC camcorder videos
  • Regarded as a nice camcorder assistant manager
  • Lossless output MTS/M2TS/MOD/TOD videos to original format or MKV
  • Output Apple Prores MOV(For Mac user), lossless MTS/MKV, MPEG-2/4, AVI/WMV/MOV/MKV
  • Edit timeline without rendering
  • Trim/split/cut videos on a timeline by accurate frame
  • Directly output video friendly with video editing programs or uploaded to YouTube

Pavtube DVD Creator for Windows/Mac with 50% OFF

  • Burn playable DVD from DVD folder and ISO image within a few clicks
  • Freely edit source material by trimming, cropping, adding watermark, etc.
  • Customize DVD menu template /style, menu text, display aspect ratio and background
  • Burn movies and TV shows to DVD for backup or sharing easily and quickly
  • Create Slide Show DVD with photos and music you designed
  • Create high quality DVDs from AVI, MKV, WMV, MXF, MOV, DivX, XviD, MP4, VOB, M2TS, MTS, TIVO and many other video files

Interested? Hurry up, the special 2013 Summer Holiday Sale is waiting for you.

In addition, Pavtube Free DVD Ripper and Free Video DVD Converter Ultimate is coming soon!

Convert Panasonic AG-AF100 AVCHD MTS to ProRes 422, ProRes 4444, ProRes 422 Proxy for FCP

This article aims to help Panasonic users convert Panasonic AG-AF100 AVCHD MTS to Apple ProRes for importing to Final Cut Pro, the Mac AVCHD to ProRes Converter can easily help you convert to many other formats.

Final Cut Pro is one of the most important NLE programs for Mac users; many people choose to further edit wonderful footages they shot in FCP for uploading, sharing with friends or do their job such as give a lecture. If you happen to have the video editing problem with Panasonic AG series camcorder, this guide maybe the one you are looking for to make the AVCHD files working in this way.

You may need to get some assistance to convert Panasonic AVCHD to FCP compatible video format. Come along and test this powerful Panasonic AVCHD to Apple ProRes Converter, you can easily get Panasonic AG-AF100 AVCHD in ProRes 422, ProRes 4444, ProRes 422 Proxy for further editing.


How to Convert Panasonic AG-AF100 AVCHD to ProRes 422, ProRes 4444 or ProRes 422 Proxy for FCP?

Step  1. Follow this link to free download the Pavtube MTS/M2TS Converter for Mac trial version or buy it now. Get it installed.

(For Mac OS X 10.5 Leopard users, download the DMG file)  

Step  2. Connect your Panasonic AG-AF100 AVCHD camcorder to Apple computer via USB cable, find the .mts, *.m2ts files from the camcorder folder like PRIVATE > AVCHD > BDMV > STREAM. Or use a card reader to copy and transfer the .mts, *.m2ts files from camera to Mac hard drive.

Launch Mac AVCHD to ProRes Converter, click the top left two icons to browse your computer hard drive and select the mts videos you want to convert. Or you can easily drag-and-drop mts files into this application for converting. 


Tips:
  • Joining files: Tick the box "Merge into one file" on the main interface. 
  • Preview: Double click on the file and you can get a preview on the converter. 

Step  3. Click the "Format" option and navigate the mouse cursor to "Final Cut Pro" > "Apple ProRes 422 (*.mov)" or "Apple ProRes 422(Proxy) (*.mov)" or "Apple ProRes 4444 (*.mov)" as output format. The Mac Panasonic AVCHD to Apple ProRes Converter will convert Panasonic AG-AF100 AVCHD MTS with high quality. 


Tip: 
  • Crop: Edit -> Crop and you can get the imported videos cropped as you want. 

Step 4. Click the "Convert" circle to start converting Panasonic AG-AF100 AVCHD MTS files to ProRes 422 or 4444

Note: Auto shutdown - Click "Option" and tick the box "Shut down the computer after conversion" before conversion starts.

This conversion process will finish soon. Afterwards, click the "Open" button to locate the output files and import ProRes MOV file to FCP for editing smoothly.


More step-by-step guide for Panasonic camera and camcorder users are available on Pavtube Panasonic Column.

More Tips:

1. If you are using FCP X, please make sure you have installed ProApps QuickTime Codecs, or you may get files with sound only without video. The FCP X does not install the ProApps QuickTime Codecs automatically, so you need download and install the codec manually from http://support.apple.com/kb/DL1396.

2. If you would like to edit MTS/M2TS/M2T/TS with FCE/iMovie, Adobe Premiere Pro, Kendlive, Avid Media Composer, Avid Xpress Pro, Adobe Creative Suite 6, Adobe After Effects CS6, DaVinci Resolve, etc, you can convert MTS/M2TS/M2T/TS files to AIC MOV, HD MOV, MPG, WMV, AVI, DNxHD MOV, MP4, DV, etc. on Mac. 

3. If you want to convert AVCHD/MTS/M2TS/M2T/TS files to Windows Movie Maker, Sony Vegas, Adobe Premiere, Avid Media Composer, Pinnacle Studio, Cyberlink etc. on Windows 8/7/Vista/XP, etc., please buy Pavtube Media Magician - 50% OFF.

4. What's more, if you want to burn Panasonic AVCHD (.mts) files to DVD disc or ISO files or folder files for backup or watching, you can try Pavtube DVD Creator for Mac - 50% OFF, which can burn HD videos to DVD easily.

Read More:

MP4 to FCP ǀ AVCHD to FCP ǀ MOV to FCP ǀ H.265 to FCP