HitFilm Pro 2017 is a unique mix of video editing, visual effects and 3D compositing tools all in one product. It includes 3D object rendering, a powerful particle simulator, over 500 customizable visual effects and presets, professional color grading, industry - standard BorisFX titling and over 150 creative plugins for use in other video software.
Import and edit MOV files with HitFilm Pro 2017
Have some MOV files downloaded from online sites or shot with your camera, camcorder, smartphones and wish to load them into HitFilm Pro 2017. But every time when you try to import a MOV file, it just ask you to install QuickTime player, which you didn't install because I found it is just for Mac.
Related article: Import AVCHD/MTS/MXF/MKV to HitFilm | Import AVI to HitFilm
Why HitFilm Pro 2017 not import MOV files?
After searching for HitFilm supported file formats, we can see that it can native import the following file types:
Video |
Audio |
AVCHD (M2T, MTS, M2TS) |
AAC |
From above list, we can see that HitFilm Pro 2017 only supports to handle QuickTime MOV files, in addition, you will need to install the latest QuickTime player version on your computer. It also means that if you will fail to import other types of QuickTime MOV files into HitFilm Pro 2017.


Transcode unsupported MOV for HitFilm Pro 2017
To fix the format or codec incompatible issue, you can download a third-party video conversion app. If you are looking for a powerful yet simple to use application to get the job easily completed, we highly recommend Pavtube Video Converter to you. The program has full importing support for 4K/2K/HD/SD MOV files encoded with various different video and audio compression codec. Thanks to its batch conversion mode, you can load multiple MOV files into the application for conversion at one time. The tool can assist you to efficiently transcode unsupported MOV to HitFilm editable formats listed above with perfect quality and super-fast conversion speed.
Besides MOV, you can also use this application to convert other unsupported files such as MKV, H.265, XAVC, XAVC S, etc to HitFilm Pro workable editing formats listed above.
For Mac users, please go to download Pavtube Video Converter for Mac to complete the conversion on macOS High Sierra, macOS Sierra, Mac OS X El Capitan, Mac OS X Yosemite and Mac OS X Mavericks, etc.
Step by Step to Convert MOV for HitFilm 2017 Editing
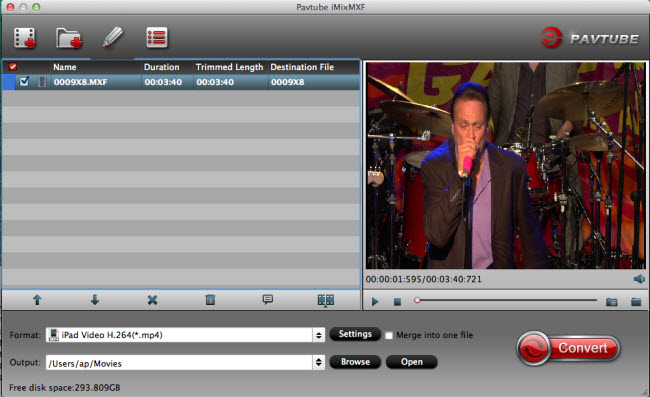
Step 1: Load MOV files into the application.
Download the free trial version of the program. Launch it on your computer. Click "File" menu and select "Add Video/Audio" or click the "Add Video" button on the top tool bar to import unsupported MOV video files into the program.

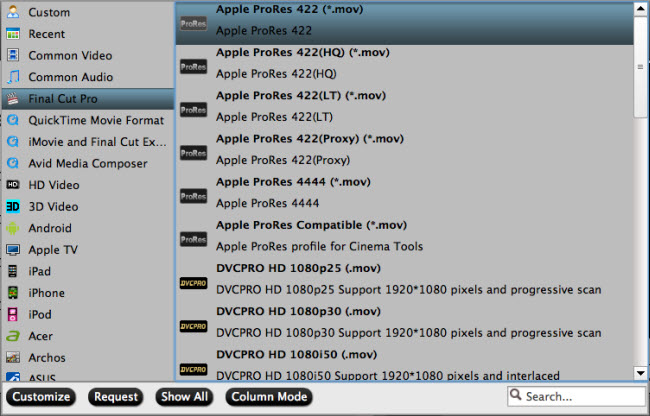
Step 2: Define the output format.
Clicking the Format bar, from its drop-down list, select one of HitFilm Pro 2017 editable file formats such as "Divx AVI - Audio Video Interleaved (Divx)(*.avi)" under "Common Video" main category.
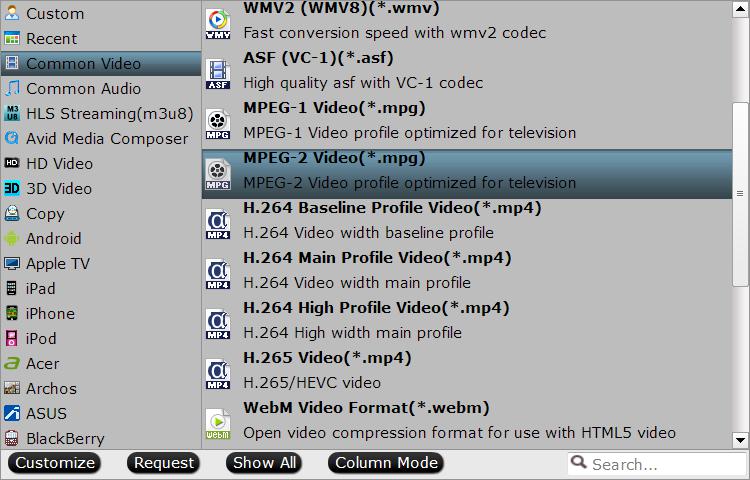
Tip: Before conversion, you can click the "Settings" icon to customize the output video/audio settings Bitrate such as video codec, bit rate, resolution and frame rate or audio codec, bit rate, sample rate and channels, etc.
Step 3: Begin the conversion process.
After all setting is completed, hit the "Convert" button at the right bottom of the main interface to begin the conversion process from MOV to HitFilm supported editing formats conversion process.
When the conversion is finished, click "Open Output Folder" icon on the main interface to open the folder with generated files. You'll then have no problem to work the converted MOV files with HitFilm 2017.
Related Articles
Hot Articles & Reviews
Any Product-related questions?support@pavtube.com