Friday, July 5, 2013

2013 Summer Holiday Biggest Discount: Up to 50% OFF DVD Creator, Media Magician, etc.

Summer Break is starting now. It's time to have fun: hanging out with friends, spending some quality time with family members, enjoying personal space alone. No matter whom you are with or where you are, watching movies, sharing online videos or editing video footages would be a part of your summer holiday more or less. While a great video converter would be essential in your summer break if you want to do above stuff, and Pavtube software application is a perfect choice. Great news, Pavtube is offering Up to 50% OFF on Summer Holiday Sale for its top programs, including 30% OFF Blu-ray Ripper (Win & Mac), 20% OFF Video Converter Ultimate (Win & Mac), 50% OFF Media Magician (Win & Mac), and 50% OFF DVD Creator (Win & Mac). Plus, Like Pavtube on Facebook and you would get an extra 5% off discount from above products!


Let's get familiar with Pavtube Summer Sales Directory 2013:

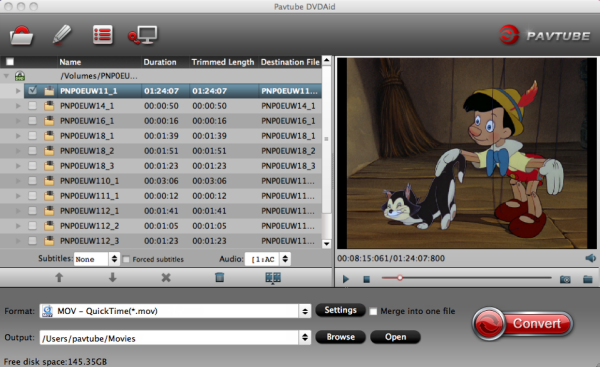
Pavtube BDMagic for Windows/Mac with 30% OFF

  • Fully backup commercial Blu-ray and DVD discs
  • Support adding *.srt and *.ass subtitle
  • Direct copy titles from BD and DVD
  • Rip Blu-ray and DVD to many formats, such as .MP4, .MKV, .MOV, etc.
  • Preserve the BD/DVD's original file structure by using "Copy the entire disc" feature.
  • Support NVIDIA CUDA and ATI Stream (AMD APP) acceleration technologies.
  • Support output playback on various portable devices including tablets (the new iPad 3, Galaxy Tab 3, Toshiba Thrive, Nook Tablet, Amazon Kindle Fire) and mobile phones (Samsung Galaxy S4, HTC Evo 4G, iPhone 5), HD media player such as Apple TV, WDTV, PS3, and video editing programs like Sony Vegas, Adobe Premiere, FCP, iMovie.

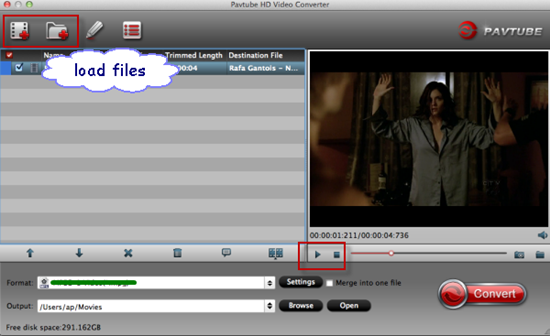
Pavtube Video Converter Ultimate for Windows/Mac with 20% OFF

  • Integrate with Blu-ray Ripper, DVD Ripper, and HD Video Converter
  • Support adding *.srt and *.ass subtitle
  • Direct copy titles from BD and DVD; Support latest BD and DVD
  • Support TrueHD 6.1 and TrueHD 7.1 decoding
  • Convert Blu-ray, DVD, HD Videos to MP4/AVI/MKV/MPG/M4V/DivX/FLV etc.
  • Rip the latest Movies to any Tablet/Phone without video-audio sync issues
  • Copy Blu-ray/DVD remaining original structure
  • Transcode XDCAM/XAVC/MXF/AVCHD/MTS/M2TS/MOV/Tivo/MKV/AVI/MVI etc. for editing

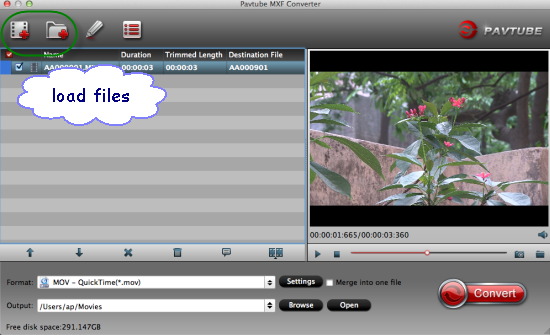
Pavtube Media Magician for Windows/Mac with 50% OFF

  • Manage/backup/convert Canon/Sony/Panasonic/JVC camcorder videos
  • Regarded as a nice camcorder assistant manager
  • Lossless output MTS/M2TS/MOD/TOD videos to original format or MKV
  • Output Apple Prores MOV(For Mac user), lossless MTS/MKV, MPEG-2/4, AVI/WMV/MOV/MKV
  • Edit timeline without rendering
  • Trim/split/cut videos on a timeline by accurate frame
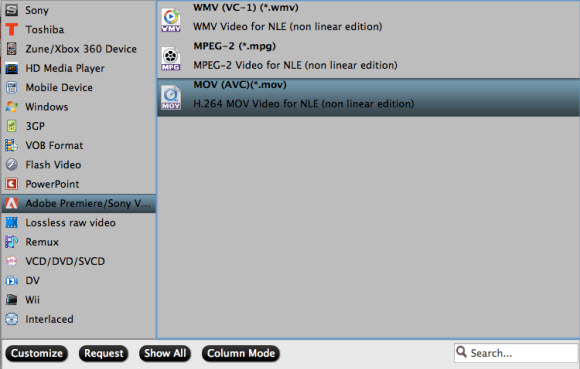
  • Directly output video friendly with video editing programs or uploaded to YouTube

Pavtube DVD Creator for Windows/Mac with 50% OFF

  • Burn playable DVD from DVD folder and ISO image within a few clicks
  • Freely edit source material by trimming, cropping, adding watermark, etc.
  • Customize DVD menu template /style, menu text, display aspect ratio and background
  • Burn movies and TV shows to DVD for backup or sharing easily and quickly
  • Create Slide Show DVD with photos and music you designed
  • Create high quality DVDs from AVI, MKV, WMV, MXF, MOV, DivX, XviD, MP4, VOB, M2TS, MTS, TIVO and many other video files

Interested? Hurry up, the special 2013 Summer Holiday Sale is waiting for you.

In addition, Pavtube Free DVD Ripper and Free Video DVD Converter Ultimate is coming soon!

Convert Panasonic AG-AF100 AVCHD MTS to ProRes 422, ProRes 4444, ProRes 422 Proxy for FCP

This article aims to help Panasonic users convert Panasonic AG-AF100 AVCHD MTS to Apple ProRes for importing to Final Cut Pro, the Mac AVCHD to ProRes Converter can easily help you convert to many other formats.

Final Cut Pro is one of the most important NLE programs for Mac users; many people choose to further edit wonderful footages they shot in FCP for uploading, sharing with friends or do their job such as give a lecture. If you happen to have the video editing problem with Panasonic AG series camcorder, this guide maybe the one you are looking for to make the AVCHD files working in this way.

You may need to get some assistance to convert Panasonic AVCHD to FCP compatible video format. Come along and test this powerful Panasonic AVCHD to Apple ProRes Converter, you can easily get Panasonic AG-AF100 AVCHD in ProRes 422, ProRes 4444, ProRes 422 Proxy for further editing.


How to Convert Panasonic AG-AF100 AVCHD to ProRes 422, ProRes 4444 or ProRes 422 Proxy for FCP?

Step  1. Follow this link to free download the Pavtube MTS/M2TS Converter for Mac trial version or buy it now. Get it installed.

(For Mac OS X 10.5 Leopard users, download the DMG file)  

Step  2. Connect your Panasonic AG-AF100 AVCHD camcorder to Apple computer via USB cable, find the .mts, *.m2ts files from the camcorder folder like PRIVATE > AVCHD > BDMV > STREAM. Or use a card reader to copy and transfer the .mts, *.m2ts files from camera to Mac hard drive.

Launch Mac AVCHD to ProRes Converter, click the top left two icons to browse your computer hard drive and select the mts videos you want to convert. Or you can easily drag-and-drop mts files into this application for converting. 


Tips:
  • Joining files: Tick the box "Merge into one file" on the main interface. 
  • Preview: Double click on the file and you can get a preview on the converter. 

Step  3. Click the "Format" option and navigate the mouse cursor to "Final Cut Pro" > "Apple ProRes 422 (*.mov)" or "Apple ProRes 422(Proxy) (*.mov)" or "Apple ProRes 4444 (*.mov)" as output format. The Mac Panasonic AVCHD to Apple ProRes Converter will convert Panasonic AG-AF100 AVCHD MTS with high quality. 


Tip: 
  • Crop: Edit -> Crop and you can get the imported videos cropped as you want. 

Step 4. Click the "Convert" circle to start converting Panasonic AG-AF100 AVCHD MTS files to ProRes 422 or 4444

Note: Auto shutdown - Click "Option" and tick the box "Shut down the computer after conversion" before conversion starts.

This conversion process will finish soon. Afterwards, click the "Open" button to locate the output files and import ProRes MOV file to FCP for editing smoothly.


More step-by-step guide for Panasonic camera and camcorder users are available on Pavtube Panasonic Column.

More Tips:

1. If you are using FCP X, please make sure you have installed ProApps QuickTime Codecs, or you may get files with sound only without video. The FCP X does not install the ProApps QuickTime Codecs automatically, so you need download and install the codec manually from http://support.apple.com/kb/DL1396.

2. If you would like to edit MTS/M2TS/M2T/TS with FCE/iMovie, Adobe Premiere Pro, Kendlive, Avid Media Composer, Avid Xpress Pro, Adobe Creative Suite 6, Adobe After Effects CS6, DaVinci Resolve, etc, you can convert MTS/M2TS/M2T/TS files to AIC MOV, HD MOV, MPG, WMV, AVI, DNxHD MOV, MP4, DV, etc. on Mac. 

3. If you want to convert AVCHD/MTS/M2TS/M2T/TS files to Windows Movie Maker, Sony Vegas, Adobe Premiere, Avid Media Composer, Pinnacle Studio, Cyberlink etc. on Windows 8/7/Vista/XP, etc., please buy Pavtube Media Magician - 50% OFF.

4. What's more, if you want to burn Panasonic AVCHD (.mts) files to DVD disc or ISO files or folder files for backup or watching, you can try Pavtube DVD Creator for Mac - 50% OFF, which can burn HD videos to DVD easily.

Read More:

MP4 to FCP ǀ AVCHD to FCP ǀ MOV to FCP ǀ H.265 to FCP

Tuesday, July 2, 2013

Import Sony PMW-400 XAVC file to Avid Media Composer on Mac - Avid XAVC Workflow on Mac

This Sony XAVC to Avid Converter offers you the workflow to import Sony PMW-400 XAVC footage to Avid Media Composer on Mac, as well as some more NLE programs. With it, you can easily convert Sony XAVC to various formats according to your needs.
"I've spent all day long to figure out how to get my XAVC footage working in AMC. They are shoot in 1080p 60i with a Sony PMW-400; I know DNxHD is a codec that Avid MC prefers, but how can I turn my footage into it easily? I'm not very familiar with mac, pls try to be simple."


Sony's new PMW-400 is one of Sony PMW series camcorders; it includes a 2/3-inch Full HD 3CMOS sensor to enable capturing wonderful moments. It brings great video quality as well as a revolution of vide recording codec--its new, more efficient, mid-range XAVC codec. The new XAVC codec is offered for 4k 4:2:0 videos shooting and allows high frame rate shooting at 1080/60i or 720/60p.

Sony Plugin for XAVC in Final Cut Pro X (FCP-X) release

For most Sony PMW-400 users, one of the most importance thing with the footage should be how to playback Sony XAVC videos on Mac, or edit them in NLE programs such as Avid Media Composer, FCP, iMovie, etc. It's true that the XAVC codec itself is not supported by mac directly; hence the best workflow is to transcode Sony PMW-400 raw XAVC files to Mac/Avid compatible video format firstly.

Pavtube XAVC Converter for Mac, a powerful Sony XAVC to Avid DNxHD Converter which is able to convert Sony PMW-400 XAVC videos to DNxHD for Avid Media Composer on Mac.

How to import Sony PMW-400 XAVC to Avid Media Composer?

Step 1. Install and launch this XAVC to Avid Converter for Mac, click top left two icons to load individual videos or load the entire folder.


Step 2. Click "Format" and choose Avid Media Composer > Avid DNxHD (*.mov) as the best video format forediting PMW-400 XAVC in Avid Media Composer on Mac.


Click "Settings" to change the video bitrate, frame rate, size, etc. all according to your needs.

Step 3. Click the big red circle at the bottom right to start converting Sony PMW-400 XAVC to Avid DNxHD MOV for Avid Media Composer on Mac. Wait for a while; you can load the fresh hot converted video to AMC now.

More guides on Sony:

Friday, June 28, 2013

Adobe Prelude: Ingesting and Converting DSLR Footage to ProRes

Speed up your tapeless workflow using Prelude to Ingest and Transcode at the same time.


Adobe has added a new tool to the Creative Cloud / Master Collection / Production Premium for video producers/editors called Prelude.  Use Prelude to ingest and transcode tapeless media from cameras recording to cards, as well as a basic video editing tool for producers (Premiere Pro can read timelines created in Adobe Prelude).

Transcoding your DSLR footage to ProRes in Adobe Prelude gives you a 10 bit, edit friendly codec that FCP, AVID, & Premiere can all handle.  This is a great file choice when you work with a variety of nonlinear apps (it’s a popular intermediate codec for FCP).  ProRes is also a solid option if you  plan on color correcting in Apple Color or Black Magic Resolve.  Trancoding changes the codec – footage off the cards is H.264 8bit and Pro Res is 10 bit.

Read More: Types of Apple ProRes Codecs | Apple ProRes Format Specifications

1. First, to work with ProRes you need to have Final Cut Pro 7, FCPX , Motion, or Compressor installed on your system.

2. Then, download the ProRes presets from Adobe.

3. Once you install the presets into Media Encoder, ProRes will be available in Adobe Prelude. (same applies If you want to create your own custom presets).

4. After you download and install the ProRes presets, launch Adobe Prelude.

5. Click the Ingest button, and the Ingest window opens.


6. Select your card that has the video footage on it.


7. Check Transfer Clips to Destination.

8. Check the Transcode button and pick the ProRes setting that matches your footage.


9. Click the Ingest button and your footage will be ingested and encoded to ProRes.

After you finish ingesting and transcoding the video off a card, input another one or go straight to Adobe Premiere and start editing your footage!


More Posts:


Thursday, June 27, 2013

How to Connect a Nikon Coolpix to a Mac?


Nikon Coolpix cameras include photo-transfer software compatible with Mac computers. Additionally, Coolpix cameras are compatible with iPhoto, the photo management application that is a part of the Mac OS X operating system. Regardless of which option you use to transfer photos from the camera to the computer, the method of connecting the Coolpix camera to a Mac is the same.

1. Turn on the Mac computer.

2. Turn off the Nikon Coolpix camera.

3. Connect the USB cable included with the camera to the camera and the USB port on the Mac. The camera powers up once connected, but the camera display remains off.

Very easy.

How to Enable QuickTime play DVD Movies on Mac? Convert DVD to QuickTime MOV

Unable enjoy DVD movies on Mac with QuickTime player? This guide will be helpful for you to introduce a simple way to convert DVD to QuickTime Player on Mac OS X.


Having collected many DVDs on your shelf, but can not play DVD movies on Mac? Many DVD movie lovers would come across the same problem which makes them inconvenient. Obviously DVDs are not supported by Mac for many years, including iMac, MacBook Pro and MacBook Air. As a result, the native player - QuickTime unfortunately cannot play them even you connected an extended DVD driver to your Mac. This due to its format limitation - QuickTime only allows you import video in MOV, MP4, M4V and some particular AVI for playback. So if you want to play DVD movies on QuickTime, you have to transcode DVD to QuickTime friendly formats first. How to Enable QuickTime play DVD Movies on Mac? This guide would provide a perfect solution.

What you need for the video conversion:

Mac DVD to QuickTime Converter - Here Pavtube DVDAid for Mac is strongly recommended. Many users have spoken highly of it. It could rip DVD to any video format quickly and flawlessly. (If you are using Windows PC and want to convert DVD movie to QuickTime MOV in Windows, please use DVD Ripper.)

Pavtube DVD Ripper for Mac is an easy-to-use DVD ripping program for Mac users to rip and convert DVD to QuickTime file format. Besides converting DVD to QuickTime, it also can convert DVD to almost all video and audio formats including AVI, MPEG, WMV, DivX, MP4, H.264/AVC, Apple ProResAIC MOV, RM, 3GP, MP3, WAV, WMA, RA, M4A, AAC, AC3, OGG, AU, etc.

Part 1: How to convert DVD to QuickTime on Mac?

Free Download and install the DVD to QuickTime Converter on Mac.


Step 1: Load DVD resource

Insert your DVD disc into your DVD-Rom (Ensure that you have sufficient space on hard drive to store the DVD). Click "Import DVD" button to add the DVD file. You can also click 'Load ISO/IFO' to add DVD/IFO from your hard disk.


Step 2: Choose output format.

Choose titles or chapters you want to rip, and then select a profile from the format bar menu list. Here we choose "Common Video > MOV - QuickTime (*.mov)" as output format..

Step 3: Finally you need hit the "Convert" button to start converting DVD to QuickTime MOV on Mac.

After the conversion, you can directly click to open the video with QuickTime player for enjoying.

Part 2: Advanced Function of DVD Ripper - Movie Editor(optional)

Before you convert DVD to QuickTime MOV format, you can edit your movie files at will.

Split or Join - DVDAid for Mac will help you to trim any clips or join several clips as you want. A DVD may have multiple titles and each title contains one or more chapters. After a DVD movie is loaded, its contents will be listed. Choose the "Merge into one file", the clips will be combined into a new video. Or you can click trim", you can trim video into segments.

Crop – Cut off the black edge of your DVD movie to enjoy your movie in full screen by clicking the "Crop" tab on the edditing interface.

Effect- Set the Video Effects: Brightness, Contrast, Saturation and adjust the volume to modulate the effect.

Now know how to do the DVD to Quicktime MOV conversion? With Pavtube DVD Ripper for Mac, ripping DVD to other popular video formats is no longer a hard task.

Related articles:

Wednesday, June 26, 2013

Convert Sony PMW-200 XDCAM MXF for Premiere Pro CS5

This article aims to help users transcode Sony PMW-200 1080/50i MXF to compatible format for editing in Adobe Premiere Pro CS5; with this easy-to-use Sony XDCAM MXF Converter for Mac, you can easily convert your MXF footage for various formats for NLE programs.


"Hi, I want to edit some 1080/50i MXF videos from a Sony PMW-200 in Adobe Premiere Pro CS5, but CS5 does like to work with MXF videos. Do you have any ideas of how to get it working?"

The PMW-200 is one of the high-end XDCAM HD422 Memory Handy camcorder from Sony, which supports the 50 Mbps MPEG HD422 codec and MXF recording. With a PMW-200, you can shoot both HD and SD videos with extraordinary quality, and the footage can reach 50 Mbps MPEG HD422 as MXF files.

However the MXF files are not support by many NLE programs on Mac natively; hereby if you want to edit XDCAM 1080/50i MXF in Premiere Pro CS5, you'd better to convert Sony PMW-200 MXF footage to AVC encoded mov files for that's the most compatible format for Premiere Pro CS5. Come and meet this Pavtube XDCAM MXF Converter for Mac, which is capable of converting Sony XDCAM HD422 MXF footage to various video formats on Mac.

Hot Search: MXF to YouTube | MXF to Mac/PC | Convert Multi-track MXF

How to convert Sony PMW-200 XDCAM MXF to Adobe Premiere Pro CS5 on Mac?

Step 1. Connect your Sony PMW-200 XDCAM HD422 camcorder to Mac and keep it on, or use a card reader to transfer your footage to Mac. Get this Sony MXF to Adobe Converter installed, click top left two icons to load individual videos or the entire folder correspondingly.


Step 2. Choose best format for editing in Adobe Premiere Pro CS5.

Click the drop-down list besides "Format", choose "Adobe Premiere > MOV(AVC)(*.mov)" as the most compatible format as well as best video quality for CS5. You can also choose "MPEG-2 (*.mpg)", "WMV (VC-1) (*.wmv)" or Apple ProRes 422 (*.mov).


Step 3. Adjust output video settings including video size, codec, bitrate, frame rate by clicking "Settings", all according to your needs.


Step 4. Click the big red circle to start conversion. Wait for a while, you can get the fresh hot converted video which is compatible with Adobe Premiere Pro CS5.

Tips: Click here to learn: How to import Media Files to Premiere Pro on Mac.

Read More: