Tuesday, August 22, 2017

Import Canon 5D Mark IV 4K to FCP X

Canon 5D Mark IV 4K Video issues in FCP X

"Hi guys. I have Canon 5D mark 4 and it can shoot 4K videos in MJPEG format. When i tried to edit this videos in FCPX video seems laggy and not smooth. I think it's about for MJPEG format because it's normal in the camera screen. And 1080P ALL-I & IPB videos are seems normal and ok too. Do you have any suggestions to solve for this issue?"

Can FCP X handle Canon 5D Mark IV 4K video?

The Canon 5D Mark IV shots DCI 4K (4096 x2160) resolution recording in MJPEG format, which is unfortunately excluded from FCP X supported file formats. To successfully load Canon 5D Mark IV 4K to FCP X, you will need to perform a format transcoding process.

Best workflow of Canon 5D Mark IV 4K with FCP X

You can easily convert Canon 5D Mark IV 4K MJPEG to one of FCP X editable file formats with any of the Mac video conversion tool on the market , however, if you are looking for a high quality and high performance workflow, we highly recommend you to use the Apple Prores codec, which retains higher quality during editing while requiring much less expensive disk systems.

To generate Apple Prores codec, you can download this professional program - Pavtube Video Converter for Mac, which can swiftly transcode Canon 5D Mark IV 4K MJPEG to Apple Prores codec in various types, you can choose a proper codec according to your computer hardware system condition.

If you computer is old or slow, or you just want to do some rough editing, you can select to output "Apple Prores Proxy)(*.mov)"or "Apple Prores (LT)(*.mov)"format to save more space and bandwidth. However, if your computer are powerful enough to handle multicam and high-resolution video and you are going to do many effects editing work with FCP X, you'd better choose to output "Apple Prores 422(*.mov)"or "Apple Prores 422(HQ)(*.mov)" for better performance.

Notes:
1.When converting video to Final Cut Pro oriented format templates(e.g. Apple Prores), please ensure that your computer has Final Cut Pro installed, otherwise the converted files will have audio only without image.
2.If you are using FCP X, please make sure you have installed ProApps QuickTime Codecs, or you may get files with sound only without video.

Step by Step to Convert Canon 5D Mark IV 4K to Apple Prores for FCP X

Step 1: Load Canon 5D Mark IV 4K footage.

After transferring the footage from the camera to your Mac local drive, launch the program on your Mac computer, from "File" drop-down option, select "add Video/Audio" to add Canon 5D Mark IV 4K files to the program.

Load Canon 5D Mark IV 4K video

Step 2: Select output file format.

Click "Format"bar, from its drop-down list, select "Final Cut Pro"> "Apple Prores 422(*.mov)"as your desired output file formats for working with high performance computer, for slow computer, just choose "Apple Prores Proxy)(*.mov)"or "Apple Prores (LT)(*.mov)"format.

Output Apple Prores format

Step 3: Begin the conversion process.

Go back to the main interface and press the "Convert" icon on the right-bottom to start Canon 5D Mark IV 4K to Final Cut Pro X Apple Prores codec encoding process.

When the conversion is done, you can easily import converted video to FCP X for furthering professional editing.

Tuesday, August 15, 2017

Upload 4K Video to Instagram

Have some personal 4K video shot with your camera, camcorder, smartphone, tablets or downloaded from online sites and wish to upload and share the 4K video on Instagram, but have no ideal how to get the best uploading settings such as file format, video length, file size, etc. The following article will give you the full answer for all those questions.

Best video settings for Instagram uploading

Size: maximum width 1080 pixels (any height)
Frame Rate: 29.96 frames per second
Codec: H.264 codec / MP4
Bit rate: 3,500 kbps video bitrate
Audio: AAC audio codec at 44.1 kHz mono

From above lists, we can see that the maximum uploading resolution for Instagram is 1080p, therefore, it is essential for you to compress 4K to 1080p to get a fast and smooth uploading process. In addition, the video format should be MP4 file format compressed with H.264 video codec and AAC audio codec. If the 4K video that you try to post to Instagram are wrapped in other incompatible container file formats such as AVI/WMV/MOV/MKV/FLV/TS/XAVC/XAVC S/MXF or unsupported codec like H.265, Prores, etc. You will need to perform a format and codec transcoding process. What's more, the best video frame rate should be 29.96, therefore, make sure that the video are encoded with that compatible frame rate.

Best tool for converting and compressing 4K video for Instagram

To get above listed best uploading settings for Instagram, you can easily achieve that with our best Instagram video converter program called Pavtube Video Converter, the program not only assists you to encode 4K video to Instagram compatible H.264 codec with MP4 container, but also allows you to output Instagram best compatible uploading settings listed above in the program's profile parameters window.

Trim video for Instagram uploading

Since Instagram only allows you to post video from 3 to 60 seconds, therefore, if your 4K video is longer than 60 seconds, you can take good advantage of the program's built-in video trimming function to cut off video to remove unwanted parts or segments to shorten the video length to less than 60 seconds.

For Mac users, please download Pavtube Video Converter for Mac to produce Instagram best compatible uploading settings.

Step by Step to Convert and Compress DJI 4K for Instagram Uploading

Step 1: Load DJI 4K video into the program.

Start the program on your computer, click "File" menu and select "Add Video/Audio" or "Add from folder" to import DJI 4K video.

Load DJI 4K video

Step 2: Choose output file format.

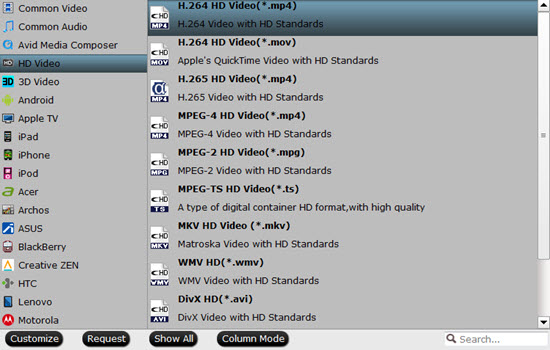
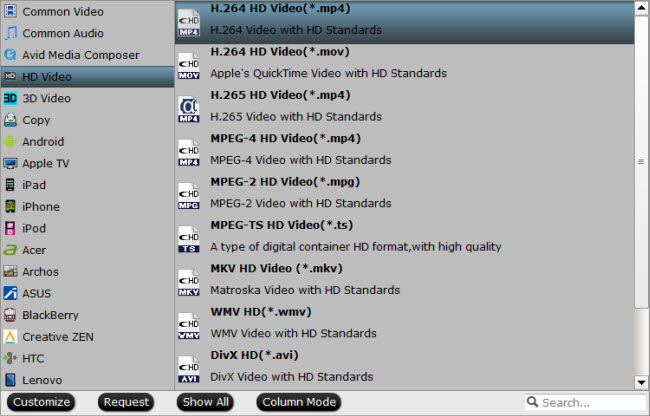
To downscale DJI 4K to 1080p, you can output Instagram compatible "H.264 HD Video(*.mp4)" under "HD Video" main category.

Output Instagram compatible HD H.264 format

Step 3: Output Instagram best uploading profile settings.

Click "Settings" icon on the main interface to open the "Profile Settings" window, under video section, set the output resolution as"1920*1080 or"1080*720, frame rate as 29.96fps, bit rate as 3500Kbps, audio codec as aac, sample rate as 44100, channels as mono.

Output Instagram compatible uploading profile settings

Step 3: Trim or cut DJI 4K video to less than 60 seconds.

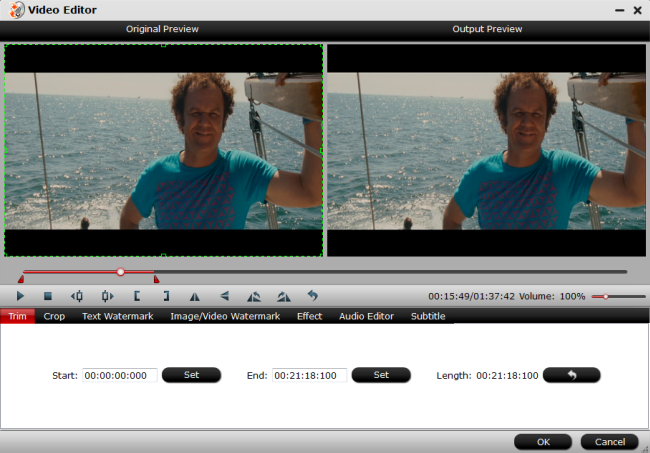
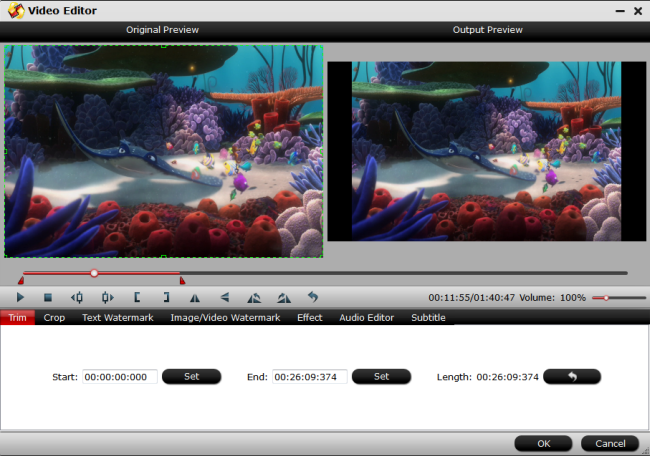
Open "Video Editor" window and switch to the "Trim" tab, you can drag the slider bars to include the segment you want to remain, click the left square bracket to set start point, and click the right square bracket to set end point when previewing the video or directly input specific values to "Start" and "End" box.

Trim DJI 4K video

Step 4: Start the conversion process.

After all settings are done, click right-bottom "Convert" button to begin to convert and compress DJI 4K video to the best formats and settings for Instagram.

When the conversion is completed, you can smoothly upload and share DJI 4K video on Instagram.

Tuesday, August 8, 2017

Canon EOS 6D Mark II to Premiere Pro

The Canon EOS 6D Mark II features a 26.2 Megapixel full-frame CMOS sensor designed to create high-resolution and detailed images. With the camera, you can record up to a maximum frame rate of 60p in MOV or MP4 container with MPEG-4 AVC/H.264 compression codec. Want to move the footage into Premiere Pro for some professional editing workflow. The following article will show you how to get a smooth workflow of Canon 6D Mark II with Premiere Pro.

Canon Premiere Pro native import Canon EOS 6D Mark II video?

After searching for Premiere Pro supported file formats, we get the information that the H.264 MP4 files shot with Canon EOS 6D Mark II is officially included in Premiere Pro CC workable file formats. However, it is well known H.264 is a good delivery file format but not a good editing format, to get a smooth workflow of Canon EOS 6D Mark II video with Premiere Pro, we highly recommend you to transcode EOS 6D Mark II H.264 to Premiere Pro native compatible editing format.

Transcode EOS 6D Mark II H.264 for Premiere Pro CC

Here, you can get the job easily completed with a simple to use application called Pavtube Video Converter. The program supports batch conversion mode, so that you can load multiple Canon EOS 6D Mark II footage for conversion at one time. Different from other application, you can easily get Premiere Pro CC specially optimized MPEG-2 video with best editing profile parameters.

Pavtube Video Converter is available on Windows 10/8.1/8/7, it is also accompanied with an update to date Mac version - Pavtube Video Converter for Mac. The program is quite simple to use, anyone can learn to use it in minutes. In addition, it produces high quality conversion results with better video/audio quality.

Step by Step to Convert Canon EOS 6D Mark II for Premiere Pro Editing

Step 1: Load Canon EOS 6D Mark II files.

Here you can directly drag & drop the Canon EOS 6D Mark II to the converter, or click "Add Video" or "Add from folder" button on the top menu to browse and choose the camera video files.

 Load Canon EOS 6D Mark II file

Step 2: Choose the preset output format.

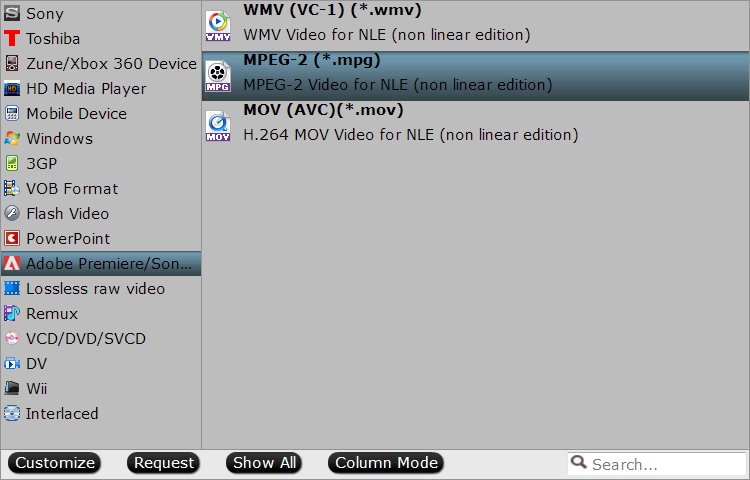
Here, you can directly use the program to output Premiere Pro CC specially optimized editing format "MPEG-2(*.mpg)" under "Adobe Premiere/Sony Vegas..." main category.

Output Premiere Pro specially optimized forma

Tips: Click "Settings" to open "Profile Settings" window to to flexibly adjust output video codec, resolution, bit rate, frame rate, audio codec, bit rate, sample rate, channels, etc as you like to get better output video and audio quality.

Step 3. Start converting Canon EOS 6D Mark II files.

Click the big "Convert" button in the main UI to begin the Canon EOS 6D Mark II to MPEG-2 conversion. You can see your converted videos by clicking "Open" button.

When the conversion is finished, click "Open Output Folder" icon on the main interface to open the folder with generated files, feel free to import video to Premiere Pro CC for professional post editing workflow.

Tuesday, August 1, 2017

Edit Canon EOS 6D Mark II with FCP X

The Canon EOS 6D Mark II comes equipped with powerful Full HD video recording options, you can record up to a maximum frame rate of 60p in MOV or MP4 container with MPEG-4 AVC/H.264 compression codec. For Mac users, you may wish to load the Canon EOS 6D Mark II to FCP X for some professional post editing workflow, the following will show you how to get the smooth workflow of Canon EOS 6D Mark II with FCP X.

Can FCP X native support Canon EOS 6D Mark II HD video?

From FCP X supported file formats, we can see that you can native import Canon EOS 6D Mark II MOV or MP4 H.264 file into FCP X. However, it is well known that H.264 is a good delivery file format, but not a good editing format. If you try to directly edit H.264 in FCP X, you will start to lose image quality as you do color correction or composite gradients to create greenscreen keys. If you wish to achieve a high quality and high performance workflow of Canon EOS 6D Mark II video with FCP X, we highly recommend you to transcode H.264 to Apple Prores codec, which render faster and have more room, so you can create great looking effects without losing any quality.

Transcode Canon EOS 6D Mark II H.264 to Prores for FCP X

To produce Apple Prores codec from Canon EOS 6D Mark II, we highly recommend our best Mac Prores Converter - Pavtube Video Converter for Mac to you. The program can assist you to effectively encode Canon EOS 6D Mark II H.264 to FCP X best compatible Apple Prores in various different file types including Apple Prores 422, Apple Prores 422 (HQ), Apple Prores 422 (LT), Apple Prores 422 (Proxy) and Apple Prores 4444. You can flexibly make your own selection according to your own needs.

If you computer is old or slow, or you just want to do some rough editing, you can select to output "Apple Prores Proxy)(*.mov)"or "Apple Prores (LT)(*.mov)"format to save more space and bandwidth. However, if your computer are powerful enough to handle multicam and high-resolution video and you are going to do many effects editing work with FCP X, you'd better choose to output "Apple Prores 422(*.mov)" for better performance.

Step by Step to Convert Canon EOS 6D Mark II to Prores for FCP X Editing

Step 1: Load Canon EOS 6D Mark II H.264 video.

Download the free trial version of the program. Launch it on your computer. Click "File" menu and select "Add Video/Audio" or click the "Add Video" button on the top tool bar to import Canon EOS 6D Mark II H.264 video files into the program.

Load Canon EOS 6D Mark II video

Step 2: Select output file format.

Click "Format" bar, from its drop-down list, select your desired Prores format such as "Final Cut Pro" > "Apple Prores 422(*.mov)", you can also choose other Prores format on your own needs.

Output Apple Prores format

Step 3: Begin the final conversion process.

Go back to the main interface and press the "Convert" icon on the right-bottom to start Canon EOS 6D Mark II H.264 video to Final Cut Pro X Apple Prores MOV conversion process.

When the conversion is done, feel free to import converted video to FCP X for furthering professional editing.

Tuesday, July 25, 2017

Upload Zenmuse X4S 4K Video to YouTube/Instagram

The Zenmuse X4S uses a DJI-designed compact lens with low dispersion and low distortion 24mm equivalent prime lens. Combined with CineCore 2.0, the Inspire 2's powerful image processing system, it can record 4K/60 H.264 and 4K/30 H.265 videos at a 100Mbps bit-rate, and oversample 5.2K video in real-time, capturing fine image details. After doing some either simple or professional editing with the Zenmuse X4S 4K video, you may come the idea to upload and share the Zenmuse X4S 4K video on YouTube or Instagram. The following article will show you how to make that achieved.

Best uploading settings for YouTube

Container: MP4

Video codec: H.264
Progressive scan not interlacing
High Profile
2 consecutive B frames
Closed GOP. GOP of half the frame rate.
CABAC
Variable bitrate, no bit rate limit required, though we offer recommended bit rates below for reference,
Chroma subsampling: 4:2:0

Audio codec: AAC-LC
Channels: Stereo or Stereo + 5.1
Sample rate 96khz or 48khz

Compatible Frame rate and bit rate for 4K/1080p/720p uploading

Resolution and aspect ratio
YouTube uses 16:9 aspect ratio players. If you're uploading a non-16:9 file, it will be processed and displayed correctly as well, with pillar boxes (black bars on the left and right) or letter boxes (black bars at the top and bottom) provided by the player.
Time and file size limitations for YouTube video upload
Size: Make sure you're using an up-to-date version of your browser so you can upload files greater than 20GB. The maximum file size you can upload to YouTube is 128GB.
Length: By default, you can upload videos that are up to 15 minutes long, but you can upload longer videos by following the steps below to verify your account.
1. go to the upload page at youtube.com/upload.
2. At the bottom of the page, click Increase your limit. You can also go directly to https://www.youtube.com/verify.
3. Follow the steps to verify your account. You can choose to receive a verification code through a text message on a mobile phone or an automated voice call.
4. Once you've verified your account, you can upload videos that are longer than 15 minutes long

Best uploading settings for Instagram

Size: maximum width 1080 pixels (any height)
Frame Rate: 29.96 frames per second
Codec: H.264 codec / MP4
Bit rate: 3,500 kbps video bitrate
Audio: AAC audio codec at 44.1 kHz mono

Transcode DJI Zenmuse X4S 4K for YouTube/instagram

To smoothly upload and post Zenmuse X4S 4K video to YouTube/Instagram, you can get assistant from Pavtube Video Converter, which not only assist you to transcode Zenmuse X4S 4K video to YouTube/Instagram best favorable uploading codec, but also allows you to adjust other profile settings such as video codec, resolution, bit rate, frame rate, audio codec, bit rate, sample rate, channels, etc to produce the best YouTube/Instagram uploading settings.

Trim/Split DJI Zenmuse X4S 4K for YouTube/instagram

If your video exceed the uploading file length or file size for YouTube/Instagram, feel free to use the trim function to shorten the video length, use the split option to split large video into small parts by file size, count or length.

For Mac users, you can download Pavtube Video Converter for Mac to fix DJI Zenmuse X4S 4K YouTube/Instagram uploading issues on macOS Sierra or previous version.

Step by Step to Transcode and Compress DJI Zenmuse X4S 4K for YouTube/Instagram

Step 1: Load DJI Zenmuse X4S 4K.

Download the free trial version of the program. Launch it on your computer. Click "File" menu and select "Add Video/Audio" or click the "Add Video" button on the top tool bar to import DJI Zenmuse X4S 4K video files into the program.

Load DJI Zenmuse X4S 4K

Step 2: Define the output format.

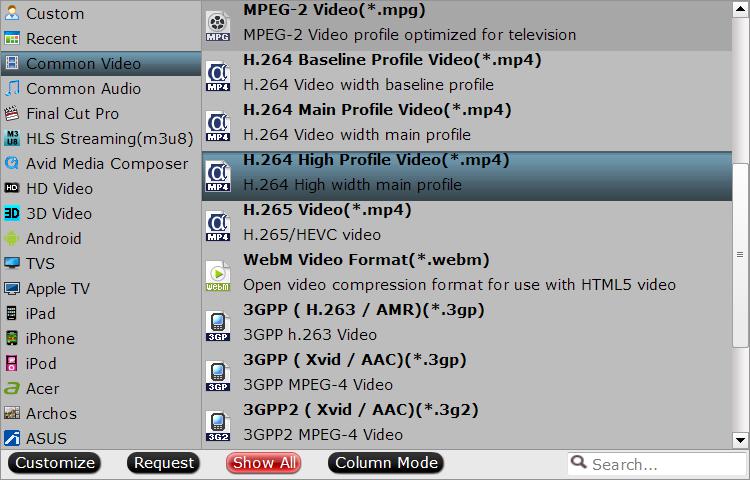
Clicking the Format bar, from its drop-down list, output YouTube best compatible 4K file format by following "H.264 High Profile Video(*.mp4)" under "Common Video" main category.

Output YouTube best compatible 4K formats

For Instagram uploading, it would be much ideal for you to choose "H.264 HD Video(*.mp4)" under "HD Video" main category.

Output Instagram supported file formats

Tips: Click "Settings" on the main interface to open "Profile Settings" window, here, you can flexibly adjust the output the profile parameters including video codec, resolution, bit rate, frame rate, audio codec, bit rate, sample rate, channels, etc to let them fit with YouTube and Instagram.

Step 3: Trim/Split/Compress DJI Zenmuse X4S 4K video.

Trim

Open "Video Editor" window and switch to the "Trim" tab, you can drag the slider bars to include the segment you want to remain, click the left square bracket to set start point, and click the right square bracket to set end point when previewing the video or directly input specific values to "Start" and "End" box.

Trim DJI Zenmuse X4S 4K video

Split

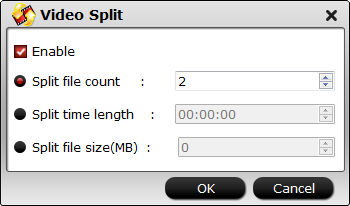
Click the split button on the file list to launch the Video Split window. Ticking "Enable" option, you can split the file by file count, time length, or file size.

Split DJI Zenmuse X4S 4K video

Step 4: Start the conversion process.

After all settings are done, click right-bottom "Convert" button to begin to convert and compress DJI Zenmuse X4S 4K video to the best formats and settings for YouTube/Instagram.
When the conversion is completed, you can smoothly upload and share DJI Zenmuse X4S 4K video on YouTube/Instagram.

Thursday, July 20, 2017

Import Sony A9 4K XAVC S to Avid Media Composer for Editing


Sony's Alpha A9 is a new flagship mirrorless camera with a 24 Megapixel full-frame stacked CMOS sensor and fully electronic shutter featuring 20fps shooting, silent vibration-free operation, anti-distortion shutter, 1/32000 shutter, 4k video in XAVC S, dual SD slots, bigger battery, touchscreen and AF joystick. Are you working with media from the Sony Alpha A9 camera? If so, you are in the right place. In this page, we'll talk about how to import Sony A9 4K XAVC S to Avid Media Composer for editing in an effective way.

The software that supports XAVC S importing and editing include CyberLinke PowerDirector, Adobe Premiere Elements, Apple's iMovie 10, Pinnacle Studio 18 Ultimate and Sony Movie Studio Platinum. However, Avid Media Composer, the most widely used NLE for professional video editing, is out of luck to be excluded. To import Sony A9 4K XAVC S to Avid Media Composer for smooth editing, a third-party software is required to convert XAVC S to DNxHD, a codec technology used by Avid is engineered to create mastering-quality media at reduced file size for faster and fluid workflow.

To convert Sony A9 4K XAVC S to Avid Media Composer compatible DNxHD codec, you can download Pavtube Video Converter for Mac. This software is able to convert XAVC S files from Sony A9 to Avid Media Composer, FCP, Adobe Premiere Pro, iMovie, FCE and more NLE systems fully compatible format and keep original quality at the mean while. Then you will have no problem when importing and editing Sony A9 4K XAVC S with Avid Media Composer.

If you are working on Windows(Windows 10 included), please turn to Pavtube Video Converter. Download the tool and start the Sony A9 4K XAVC S video conversion.

How to transcode Sony A9 4K XAVC S for Avid Media Composer editing?

Follow these steps:

Step 1: Transfer 4K XAVC S Videos from Camcorder to Computer

a: Connect the AC Adopter to your camcorder's in-jack and the wall outlet (wall socket), and turn on the camcorder.

b: Connect the USB/Firewire jack of your camcorder to the computer using the supplied USB/Firewire cable.

c: Now your camcorder will be automatically detected and will appear as a hard disk drive on computer (usually a Hint pop-up in the bottom right corner). If your camcorder doesn't recognized by computer, install the driver using the supplied CD-ROM.

d. If you set your camcorder to record video to Flash Memory like Memory Stick or SD Card, you need a Card reader to transfer video from flash memory to your computer. There are many brands of card readers that are compatible with both Memory Stick and SD card, and usually have a USB jack, so you can easy transfer recorded video to computer like operating local disk files after connect the USB jack to USB port on your computer.

Step 2: Load Sony A9 4K XAVC S files to Converter

Install Pavtube Video Converter and run it. Click "Add Video" button or "Add from folder" button to import the Sony A9 4K XAVC S files to the application. You are also allowed to import a number of video clips to do batch conversion.

Add Samsung NX1 H.265 videos

Step 3: Select Avid DNxHD as output file format

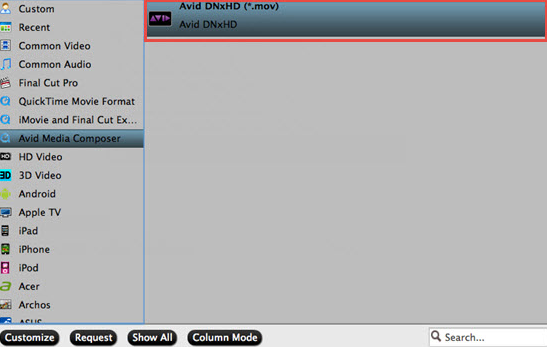
From "Format" drop-down lists, you can select Avid Media Composer preferable editing codec from "Avid Media Composer" > "Avid DNxHD(*.mov)" as the output format.

Select Avid DNxHD as output format

Step 4: Change output profile parameters

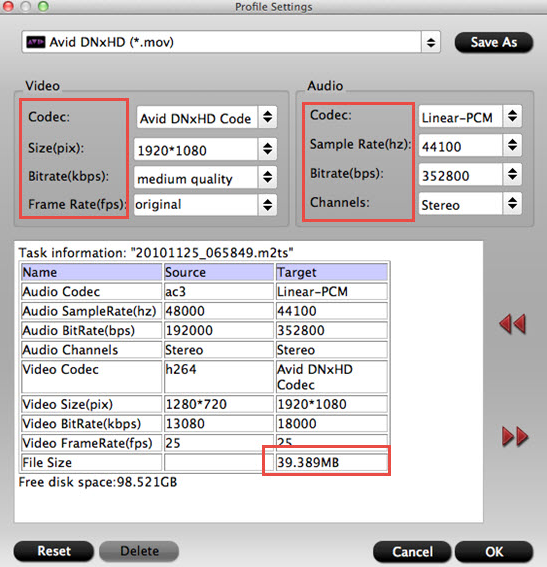
If you'd like to customize advanced audio and video parameters like Video Codec, aspect ratio, bit rate, frame rate, Audio codec, sample rate, audio channels, please turn to "Profile Settings" Window by clicking "Settings" button. Usually 1080p is the optimal setting for using in Avid MC, you can downscale Sony A9 4K to 1080p.

Change output profile parameters

Step 4: Start Sony A9 4K XAVC S to DNxHD Conversion

When ready, click "Convert" to start format conversion. As soon as the conversion is complete, you can open output folder to get the exported DNxHD files for use in Avid Media Composer with optimum performance.


Wednesday, July 12, 2017

How to Rip Blu-Ray in the Right Way?

For a long time I have ripped my movies for home use and have been fighting through many different programs of swinging character and swinging prisms. Most functionally work for specific purposes or have the great advantage of being free, but no one can do all tasks as well. There are programs like Makemaker that makes MKV files of your DVDs but can not handle Blu-Ray, Pavtube iMedia Converter that manages Blu-Ray but not in lossless format or with multiple audio and subtitle or Handbrake that's free but Which can not combine sections on a Series DVD / Blu-Ray and is quite slow.

For a long time I have also experimented with file formats and found that MKV is just becoming?the most useful format in all respects, so this guide focuses on an end result in MKV.

Additionally, I am tired of having to install different software to handle the different discs I would like to rip and should remember the different settings and procedures for each program.

I have chosen that ByteCopy from Pavtube should be my favorite tool as it has some obvious benefits when it comes to ripping. You can rip Blu-Ray and DVD on 2 methods. Either as lossless copy or as a converted encoded file with a less natural quality loss, but more importantly you can select multiple audio and subtitle tracks and you can encode them individually in the entire file to match your hardware setup as best as possible.?I personally rarely use lossless as it takes too much and would like my Blu-Ray into a 4-5 GB file for network playback for my ATV4.

Pavtube ByteCopy

So what can ByteCopy do? It looks like many of the other programs on the market when it rips and copies Blu-ray Disc and DVD movies to MKV. ByteCopy plays an irreplaceable role as the exclusive Blu-ray ripper that converts the main movie on Blu-ray, audio tracks and subtitles exactly as you want without compromising video and audio quality. When it encoder and diminish Blu-ray content, CUDA acceleration is turned on by default whenever possible and it gives a significant boost in speed.

Export file format: MKV
Video: H.264 / MPEG-4 AVC, VC-1, MPEG pass-through; H.264, Xvid, MPEG, VC-1 encoded
Audio: Dolby Digital, Dolby Digital Plus, Dolby TrueHD, DTS Digital, DTS-HD High-Def, DTS-HD MA Pass-through; Dolby Digital 5.1, DTS, AAC, MP3 encoded.

Method 1

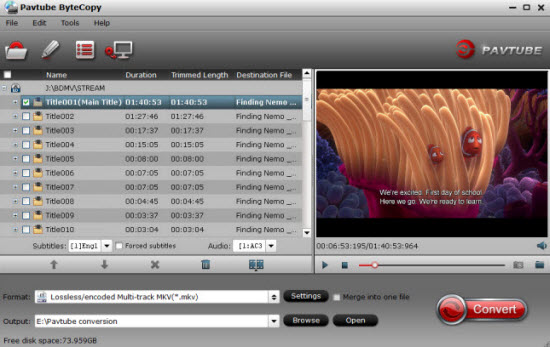
Step 1. Blu-ray rip in Lossless Mode, ie a rip of Blu-Ray main movie with all original video, audio and subtitle tracks without changing anything. For those who have a lot of disk space and who do not want to compromise on anything. Start ByteCopy and load your disk by clicking the DVD / Blu-Ray button. The movie is now loaded (copy protected or not) and the main movie is automatically selected, but everything can be selected. Useful if you have plenty of space.

Load Blu-ray movies

Step 2. Click the converter button to start riping your Blu-Ray to MKV, with the main file, all audio and subtitle tracks. If you have finished ripping, you can click "Browse Export Path" to find the MKV file. TIP! You can change the output path under settings in the software. Then just wait

Start Blu-ray to MKV Ripping process

Under lossless (default) mode, Pavtube ByteCopy will convert Blu-ray movies to MKV without changing anything. All it takes is to rip the main movie file from the disk and pack it in an MKV container. You get lossless quality with all subtitles and audio tracks, because original video, audio and subtitles are preserved. In addition, you also keep chapter marks.

Method 2

Certainly the method I use most. It shreds the disc with the subtitles and audio tracks you want, while compressing the file to a somewhat more handy size without compromising on quality compromises. I will show you how to do this, but you can change the different parameters for what suits you best. I rip my movies for a setup with an NAS that streams to a jailbreaked ATV4 with Firecore media player installed. This gives the smallest file the exact content I want.

Step 1. Load the file from ByteCopy. The main movie is automatically selected.

Load Blu-ray movies

Step 2. Select the title in the window and click edit disk. You can now choose which audio tracks and subtitles you want. TIP! You can set your selection by default in ByteCopy's settings, so they are remembered each time. In addition, you can also select a specific player you want to rip to, so ByteCopy converts light and subtitles to file formats that are compatible with your player. I always use lossless and put my own choice of file types.

Select desired Blu-ray subtitles and audio tracks

Step 3. If it's only a specific part you want to rip (for example, only main), go directly to the selected track and click Title Settings. Here you can choose to rip in Full HD, or as I do just below HD. At Full HD, I recommend bitrate of 8000, at HD you can reach 6000. Is it a DVD you rip, then choose 720x576 in Size and you can beat a bitrate of around 2000. Remember to tick the Enco if you Will change the resolution and bitrate.

Customize video settings

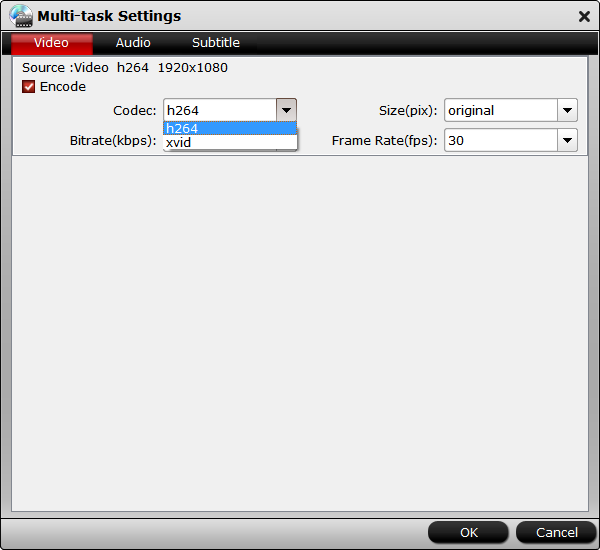
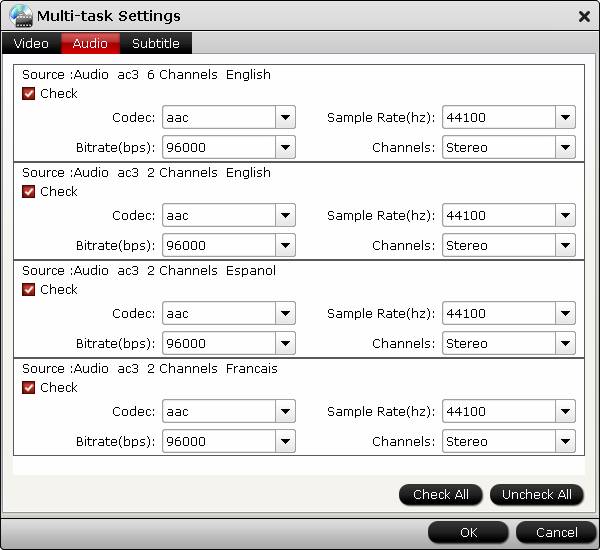
Step 4. Next turn is the sound. I always start by clicking uncheck All, as I usually only want Danish and English audio. After checking the checkboxes you want, you can choose whether you want the Encode audio, or just keep it as it is in Source. I always keep it as ATV4?can handle DTSHD for a stereo TV speaker, but for some, it may be necessary to convert to a stereo track.

Remove unwanted audio tracks

Step 5. Then we are on subtitles. Again Unchecl All and select the subtitle (s) you want. I always choose Danish only, but some may want others too. When done, click OK, and click the MKV button to begin.

Remove unwanted subtitles

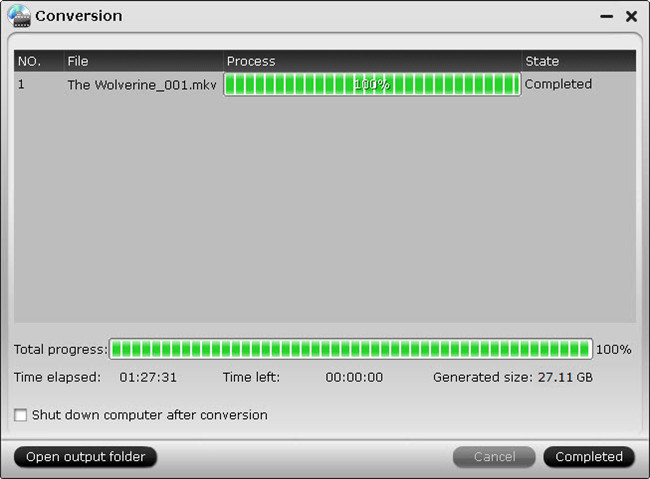
Then the task is created and ByteCopy starts calculating time and size based on your choices and the power of your computer. As you can see in the screenshots below, ByteCopy is quite accurate in its calculations, and only diverges a very small amount. The time you see listed is on a 2012 13 "Macbook Air, and I think it's quite good to be able to rip and compress / encode a Blu-Ray disc in less than 2 hours. Is it just a DVD, then we talk for half an hour.

Start Blu-ray movie copying process

ByteCopy is by far the best and fastest program I've tried. You can download a trial version from Pavtube, either ByteCopy for Windows or ByteCopy for Mac OS X. You can make 7 lossless rips with the trial and want to rip and encode to get a watermark on the movie. You can purchase the software for only $ 42 including unlimited lifetime upgrades. Enjoy.