Have some personal 4K video shot with your camera, camcorder, smartphone, tablets or downloaded from online sites and wish to upload and share the 4K video on Instagram, but have no ideal how to get the best uploading settings such as file format, video length, file size, etc. The following article will give you the full answer for all those questions.
Best video settings for Instagram uploading
Size: maximum width 1080 pixels (any height)
Frame Rate: 29.96 frames per second
Codec: H.264 codec / MP4
Bit rate: 3,500 kbps video bitrate
Audio: AAC audio codec at 44.1 kHz mono
From above lists, we can see that the maximum uploading resolution for Instagram is 1080p, therefore, it is essential for you to compress 4K to 1080p to get a fast and smooth uploading process. In addition, the video format should be MP4 file format compressed with H.264 video codec and AAC audio codec. If the 4K video that you try to post to Instagram are wrapped in other incompatible container file formats such as AVI/WMV/MOV/MKV/FLV/TS/XAVC/XAVC S/MXF or unsupported codec like H.265, Prores, etc. You will need to perform a format and codec transcoding process. What's more, the best video frame rate should be 29.96, therefore, make sure that the video are encoded with that compatible frame rate.
Best tool for converting and compressing 4K video for Instagram
To get above listed best uploading settings for Instagram, you can easily achieve that with our best Instagram video converter program called Pavtube Video Converter, the program not only assists you to encode 4K video to Instagram compatible H.264 codec with MP4 container, but also allows you to output Instagram best compatible uploading settings listed above in the program's profile parameters window.
Trim video for Instagram uploading
Since Instagram only allows you to post video from 3 to 60 seconds, therefore, if your 4K video is longer than 60 seconds, you can take good advantage of the program's built-in video trimming function to cut off video to remove unwanted parts or segments to shorten the video length to less than 60 seconds.
For Mac users, please download Pavtube Video Converter for Mac to produce Instagram best compatible uploading settings.


Step by Step to Convert and Compress DJI 4K for Instagram Uploading
Step 1: Load DJI 4K video into the program.
Start the program on your computer, click "File" menu and select "Add Video/Audio" or "Add from folder" to import DJI 4K video.

Step 2: Choose output file format.
To downscale DJI 4K to 1080p, you can output Instagram compatible "H.264 HD Video(*.mp4)" under "HD Video" main category.

Step 3: Output Instagram best uploading profile settings.
Click "Settings" icon on the main interface to open the "Profile Settings" window, under video section, set the output resolution as"1920*1080 or"1080*720, frame rate as 29.96fps, bit rate as 3500Kbps, audio codec as aac, sample rate as 44100, channels as mono.

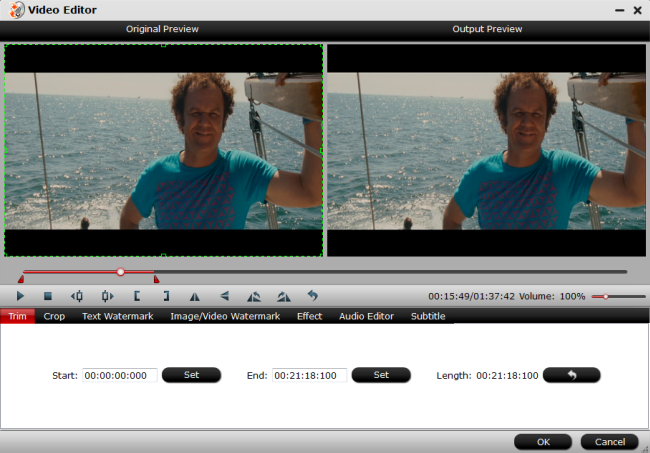
Step 3: Trim or cut DJI 4K video to less than 60 seconds.
Open "Video Editor" window and switch to the "Trim" tab, you can drag the slider bars to include the segment you want to remain, click the left square bracket to set start point, and click the right square bracket to set end point when previewing the video or directly input specific values to "Start" and "End" box.
Step 4: Start the conversion process.
After all settings are done, click right-bottom "Convert" button to begin to convert and compress DJI 4K video to the best formats and settings for Instagram.
When the conversion is completed, you can smoothly upload and share DJI 4K video on Instagram.
Related Articles
Any Product-related questions?support@pavtube.com