If you want to watch YouTube Videos on your VLC Media Player then it possible to watch it on VLC Media player. You get advanced controls which you don’t get on YouTube video Player or while watching YouTube videos online. You can also correct MRL errors which are shown when you try to play YouTube Videos on you VLC Meda Player.
VlC Media Player can do lot of things while viewing these online videos. YouTube video player provides minimum control while watching videos on it, but with VLC you can use all possible features available in it. It’s also good, if you don’t want to view those unnecessary video recommendations, comments and advertisements in the sidebar which is associated with your video and if you are looking for a YouTube player alternative then VLC Media Player is the best option for you.
Sometimes when you try to play YouTube Videos online then you get some type of errors known as MRL error, http error, Decoding error or SMTP error and other errors. These errors are usually shown if you dont have an online streaming file of YouTube which is very essential for any YouTube video and by adding these file you can play your all Videos of YouTube on your Vlc Media Player. So let’s get started with this trick in 2 Methods:
How to Play YouTube Videos on VLC without any Errors:
Method 1
Next, in Input/ Codec section, find Preferred video resolution and from the drop down list Select video resolution which depends on your internet speed.
If this method doesn’t work then you can try:
Now Hit Play.
Tips: How to Solve can’t play downloaded YouTube videos on VLC
There are plenty of tools for converting YouTube videos, and VLC Media Player is one of them (but VLC only support few video formats). With its latest update, though, VLC can also simply play YouTube videos when you paste in a YouTube URL. But sometimes you can’t play downloaded YouTube videos on VLC. Why? Because the video format/codec is not friendly with VLC. So you can use Pavtube Video Converter to convert your downloaded YouTube videos to VLC best played format like H.264 MP4. It can convert various videos like H.265, MKV, AVI, MP4, MOV, MEG, MPEG, XAVC, XAVC S, MXF, MTS, M2TS etc to VLC supported formats. (Mac version - Pavtube Video Converter for Mac).
Hot search: H.265 to VLC, FLV to VLC, MOV to VLC, AVI to VLC, MP4 to VLC


Other Download:
- Pavtube old official address: http://www.pavtube.com/video_converter/
- Cnet Download: http://download.cnet.com/Pavtube-Video-Converter/3000-2194_4-75734821.html
- Softonic Download: http://pavtube-video-converter.en.softonic.com/
Change YouTube videos to VLC media player supported format
Step 1. Add videos
Install and run the Video to YouTube Converter on your computer, then click "Add Video" button to browse and load your rvideos which you've transferred to your Windows PC.

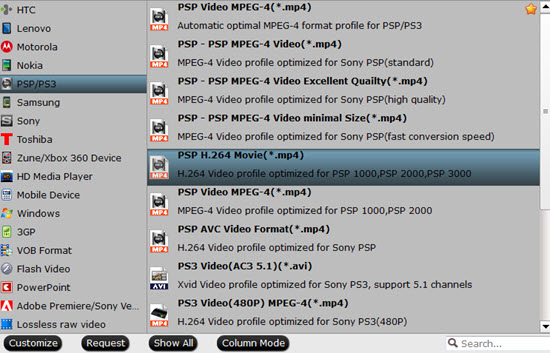
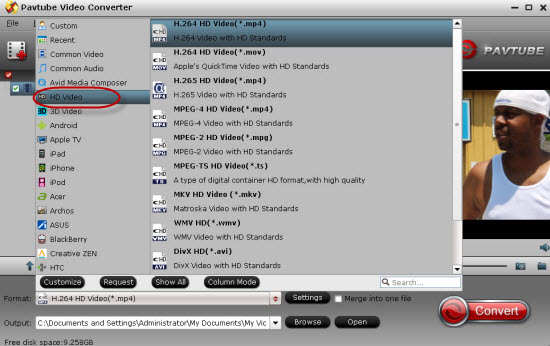
Step 2. Set right output format. Click "Format" bar, and select .mp4 from "Common video" or "HD video" to fit VLC.

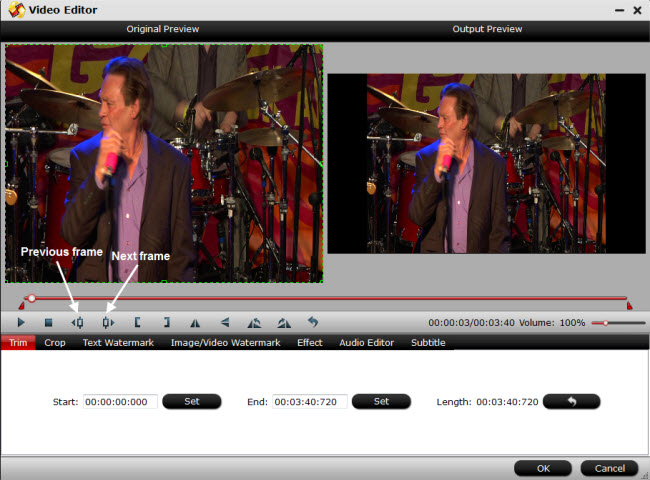
Tips: The default settings may not satisfy you, and you can click the "Settings" button to change the settings by yourself including video resolution, bit rate, audio sample rate, audio channel etc. for full screen playback smoothly. Or keep no changes, which is also a good choice.
Step 3. Click the "Convert" button on the main interface and the software will start to convert YouTube video to VLC friendly video formats immediately. When the conversion finishes, click "Open" to find the converted video files. Then you can effortless transfer the video files to VLC for playback easily.
Read More:
VlC Media Player can do lot of things while viewing these online videos. YouTube video player provides minimum control while watching videos on it, but with VLC you can use all possible features available in it. It’s also good, if you don’t want to view those unnecessary video recommendations, comments and advertisements in the sidebar which is associated with your video and if you are looking for a YouTube player alternative then VLC Media Player is the best option for you.
Sometimes when you try to play YouTube Videos online then you get some type of errors known as MRL error, http error, Decoding error or SMTP error and other errors. These errors are usually shown if you dont have an online streaming file of YouTube which is very essential for any YouTube video and by adding these file you can play your all Videos of YouTube on your Vlc Media Player. So let’s get started with this trick in 2 Methods:
How to Play YouTube Videos on VLC without any Errors:
Method 1
- Download and Install VLC Player.
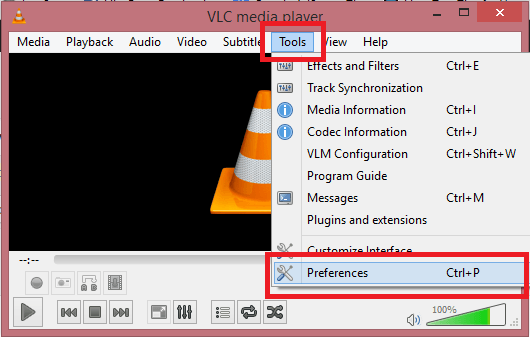
- Open your VLC Media Player.
- Click on Tools and select Preferences from the toolbar.
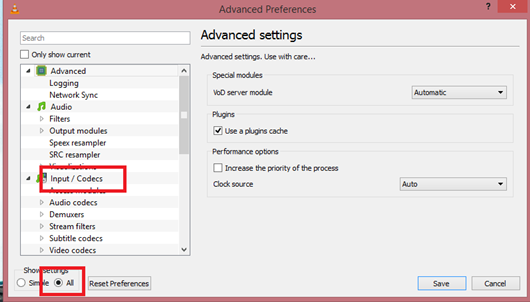
- In the next window, at the bottom select All from Show settings section.
- When you click on All, you’ll see all hidden settings.
- From the list click on Input/Codec.
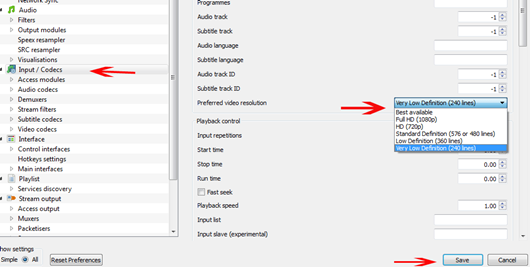
Next, in Input/ Codec section, find Preferred video resolution and from the drop down list Select video resolution which depends on your internet speed.
- Click on Save to save the settings.
- Now to watch any YouTube video, go to YouTube.com and simply drag the video OR the video URL to your VLC player and Click on Play button of VLC.
- Wait until it loads and starts to play.
If this method doesn’t work then you can try:
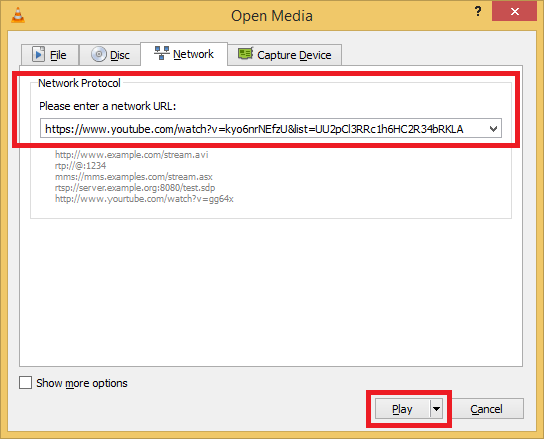
- Open your VLC Media Player.
- Now Go to Media → Open Network Stream and paste the desired YouTube video URL
Now Hit Play.
Tips: How to Solve can’t play downloaded YouTube videos on VLC
There are plenty of tools for converting YouTube videos, and VLC Media Player is one of them (but VLC only support few video formats). With its latest update, though, VLC can also simply play YouTube videos when you paste in a YouTube URL. But sometimes you can’t play downloaded YouTube videos on VLC. Why? Because the video format/codec is not friendly with VLC. So you can use Pavtube Video Converter to convert your downloaded YouTube videos to VLC best played format like H.264 MP4. It can convert various videos like H.265, MKV, AVI, MP4, MOV, MEG, MPEG, XAVC, XAVC S, MXF, MTS, M2TS etc to VLC supported formats. (Mac version - Pavtube Video Converter for Mac).
Hot search: H.265 to VLC, FLV to VLC, MOV to VLC, AVI to VLC, MP4 to VLC
Other Download:
- Pavtube old official address: http://www.pavtube.com/video_converter/
- Cnet Download: http://download.cnet.com/Pavtube-Video-Converter/3000-2194_4-75734821.html
- Softonic Download: http://pavtube-video-converter.en.softonic.com/
Change YouTube videos to VLC media player supported format
Step 1. Add videos
Install and run the Video to YouTube Converter on your computer, then click "Add Video" button to browse and load your rvideos which you've transferred to your Windows PC.
Step 2. Set right output format. Click "Format" bar, and select .mp4 from "Common video" or "HD video" to fit VLC.
Tips: The default settings may not satisfy you, and you can click the "Settings" button to change the settings by yourself including video resolution, bit rate, audio sample rate, audio channel etc. for full screen playback smoothly. Or keep no changes, which is also a good choice.
Step 3. Click the "Convert" button on the main interface and the software will start to convert YouTube video to VLC friendly video formats immediately. When the conversion finishes, click "Open" to find the converted video files. Then you can effortless transfer the video files to VLC for playback easily.
Read More:
- Fix the YouTube Not Working Problem on Samsung TV
- How to Play MP4 on Google Nexus 7 2016?
- 100% Working - Fix AC3 Audio Format Not PlayedError in MX Player
- Best PS Vita Converter - How to Convert Video to PS Vita
- 2016 Top 5 Best DVD Ripper Program Review | Which One Will You Choose?(updated)
- Play 3D Movies with VLC on Mac
- Play Panasonic Video with VLC
- Convert VLC Files to MP4