Summary: This article focus on problems which occur when adding MP4 video to EDIUS 6/7/8 timeline and provides a quick and easy solution.
 Hot search: MKV to EDIUS Pro 8 | GoPro MP4 File with EDIUS Pro 7 | AVI to EDIUS 7/7.01EDIUS is a non-linear editor (NLE) that works with most modern video formats. As an ideal video editing tool, EDIUS is widely used by video professionals and hobbyists. You probably would like to use EDIUS to edit MP4 recordings to get more wonderful video files. While, some errors appeared when adding MP4 video to EDIUS 6/7/8 timeline: file import failure, no video playback, program crashed and etc.“I am looking for suggestions on MP4 workflow with EDIUS. Recently I’ve received a Sony a7 II camera which records footage in XAVC S codec in MP4 format. I intend to edit these MP4 videos in EDIUS 6.5.3, but it seems that the EDIUS 6 doesn’t recognize XAVC S MP4 footage as import. I know that the most recent EDIUS Pro 7 has support for XAVC Intra 4K and HD as well as XAVC S Long GOP QFHD and HD, but there’s no go on EDIUS 6 system. How can I get the XAVC S MP4 video to EDIUS 6? I really appreciate any help.”If you don’t want to upgrade the version, you’ll need to convert MP4 to a format that is suited for editing in EDIUS 6/7/8, like WMV, MOV, DNxHD and more. After multiple testing, I found Pavtube Video Converter is the best option for me. It is able to convert MP4 to EDIUS friendly format WMV easily with the best video quality. Besides MP4, this video convert program can also help to convert between any popular video and audio formats as you need. Plus, with the built-in video editing feature of the program, you can trim, crop, add watermark and more to your video files.
 Other Download:- Pavtube old official address: http://www.pavtube.com/video_converter/- Amazon Download: http://download.cnet.com/Pavtube-Video-Converter/3000-2194_4-75734821.html- Cnet Download: http://download.cnet.com/Pavtube-Video-Converter/3000-2194_4-75734821.htmlHow to add MP4 video to EDIUS 6/7/8 timeline?Step 1: As soon as you download and install the program, launch it and when the main interface pops up in front of us, just click the “Add Video” or “Add from Folder” to let in.
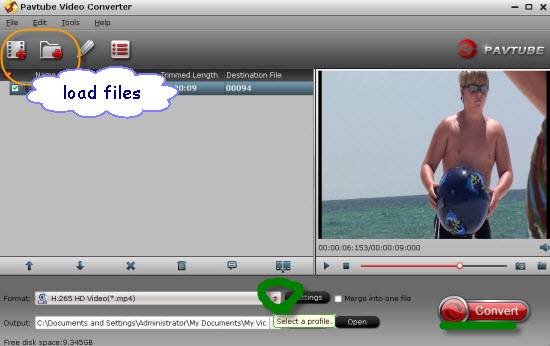 Step 2: Click the drop-down list in the format line to get the format box. Then choose “HD Video>>WMV HD (*.wmv)” as output format.
 Step 3: Click “Settings” button to customize the output video and audio settings by yourself. But if you are not good at it, you’d better use the default parameters, they will ensure you a good balance between file size and image quality basically. You can change the resolution, bit rate, frame rate as you need.Step 4: After that, click “Convert” to start MP4 to WMV conversion.
Conclusion: After conversion, you can get the generated files by clicking “Open” button. Now, you’ll get no troubles in adding MP4 video to EDIUS 6/7/8 timeline.Further Reading:
Read More:
Summary: Have some 4K MP4/MOV footage from DJI Phantom 3, any suggestions about how to edit Phantom 3 4K MP4/MOV in iMovie 11/09/08 would be appreciated. Below is a simple tutorial for your reference.
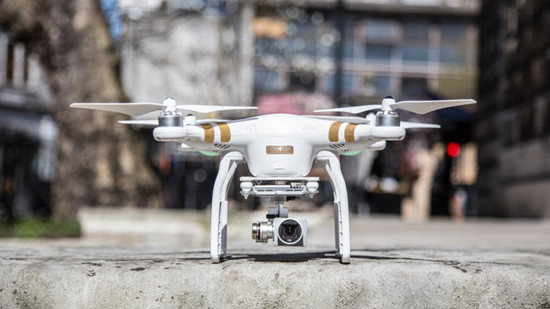 If you wanted to get a DJI Inspire 1 so you can shoot 4K from a birds eye view, but couldn’t afford it, no sweat–DJI has you covered. The innovative unmanned aerial systems market leader just released a new version of its most popular quadcopter–the DJI Phantom 3.From the DJI Phantom 3 4K camera spec, I got to know it builds 4K videos in MP4/MOV wrapper. Generally, iMovie can support MOV format. But the problem is, the DJI Phantom 3 4K is encoded with MPEG-4 AVC/H.264, which is a compressed format and not ideal for editing. Plus, expect for iMovie, FCP, Premiere, Avid can’t support this kind of 4K video either.To edit Phantom 3 4K MP4/MOV in iMovie 11/09/08 flawlessly, an ultimate solution is to convert DJI Phantom 3 4K MP4/MOV to AIC MOV for iMovie. Although there are numbered tools and utilities can convert and compress the ultra HD videos, few of them can process at a fast speed. Featured with the most advanced converting technology, Pavtube HD Video Converter for Mac (review) is now providing the most reliable and professional 4K solutions to all format issues including 4K XAVC/XAVC S, 4K MP4, 4K MTS, 4K MXF and more.
 Other Download:- Pavtube old official address: http://www.pavtube.com/hd-video-converter-mac/- Amazon Store Download: http://www.amazon.com/Pavtube-Video-Converter-Mac-Download/dp/B00QI9GNZS- AppStore Download: https://itunes.apple.com/de/app/pavtube-hd-video-converter/id502792488?mt=12- Cnet Download: http://download.cnet.com/Pavtube-HD-Video-Converter/3000-2194_4-76177786.htmlHow to import DJI Phantom 3 4K MP4/MOV to iMovie 11/09/08 for editing?Step 1: Download and have a quick installation. The trial version will have a watermark on your converted files. Except for that, there are no time limitation, no virus, and no unnecessary bundle apps while downloading. After that, click “Add Video” button to load your original videos. You can load several files at once thanks to “Add from folder” button.
 Step 2: Here, you need to choose what you want the output to be. Click “Format” drop-down list, and then select “iMovie and Final Cut Express>>Apple InterMediate Codec (AIC) (*.mov)” as the best output format.
 Step 3: Click “Settings” button to customize the output video and audio settings by yourself. But if you are not good at it, you’d better use the default parameters, they will ensure you a good balance between file size and image quality basically. You can change the resolution, bit rate, frame rate as you need.Step 4: When everything is done, you can take a preview by hitting “Play” button. If you are satisfied with the final result, you can click “Convert” button to finish the conversion work.Conclusion: Once the conversion process is complete, you can click “Open Folder” button to get the generated files for editing Phantom 3 4K MP4/MOV in iMovie 11/09/08 with optimum performance.Further Reading:
Summary: Problems occurred when importing MP4 from AEE S71 to Pinnacle Studio. You can fix AEE S71 MP4 problems with Pinnacle Studio by reading the following guide.
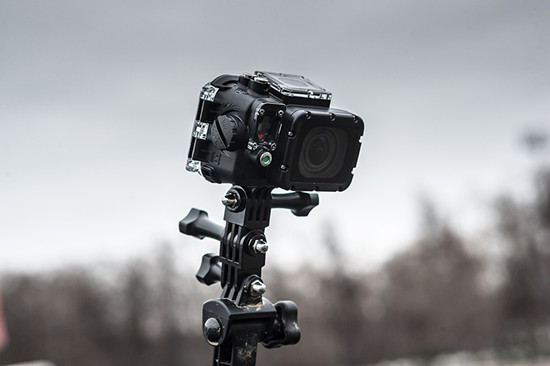 Hot search: XAVC S to Pinnacle | DJI Phantom 2 Vision+ to Pinnacle Studio | GoPro Hero 4K video with Pinnacle StudioThe AEE S71 Action Cam Ultra HD is the best 4K HD camera on the market today. Not only does the AEE S71 come standard with features the competition doesn't hold a candle to like a 10X zoom, it offers a larger standard battery (1500mAh), G-sensor Auto Start/Stop, 16MP photos, 180-degree Auto Image Turnover, 2 inch LCD Display Screen, and 1/4 inch Tripod Mount.Read here, then the problem came: We can’t edit AEE S71 MP4 in Pinnacle Studio flawlessly. “I just switched to Windows 8 in my new tower. Just downloaded the trial version of Pinnacle Studio. Wanted to try it out before I buy the full blown version today. It lets me import AEE S71's 4K MP4 files but will not show the video, only audio in Pinnacle. Anyone else have this issue or have a way to correct?”Pinnacle Studio is one of the most popular video editing software owned by almost everyone, pro-alike and green hand. For users looking for maximum video editing power, Pinnacle Studio 18 Ultimate also offers new 4K Ultra HD Smart Encoding, support for 4K videos (XAVC S). But based on multiple testing, I found working 4K videos in Pinnacle Studio is a heavy and slow process. To get AEE S71 MP4 files work well with Pinnacle Studio, the easy option is to convert AEE S71 MP4 to Pinnacle Studio supported format.The video format that Pinnacle Studio support:AVI File–(.avi)MPEG Files–MPEG-1, MPEG-2 SD & HD, and MPEG-4 – (.mpg, .mpeg, .mod, .mp2, .mp4, .m2ts, .mts, .m1v, m2v. mpv)WMV Files- (.wmv)DIVX–(.avi)MOD (JVC Everio cameras)–(.mod)3GPP Files–(.3gp)TOD Files–(*.tod)AVCHD–(.m2ts, .mts)–Requires Ultimate or Ultimate CollectionComparing with others, Pavtube Video Converter has the strong ability of transcoding all different videos. With a faster conversion speed and easy operation, it can support most hot media devices and editing programs. Also, I’m sure you’ll be satisfied with some other functional items there. Other Download:- Pavtube old official address: http://www.pavtube.com/video_converter/- Amazon Download: http://download.cnet.com/Pavtube-Video-Converter/3000-2194_4-75734821.html- Cnet Download: http://download.cnet.com/Pavtube-Video-Converter/3000-2194_4-75734821.htmlHow to import AEE S71 MP4 to Pinnacle Studio?Step 1: Download and install the program. Click “Add video” on the main interface to load AEE S71 MP4 to the program. You can also drag the files to the program’s window list directly. This program can also support the batch video clips.
 Step 2: Select the right formats for editing in Pinnacle Studio. Here we suggest you to go to the “HD Video” list, you will get the “AVI HD Video (*.avi)”as the best output.
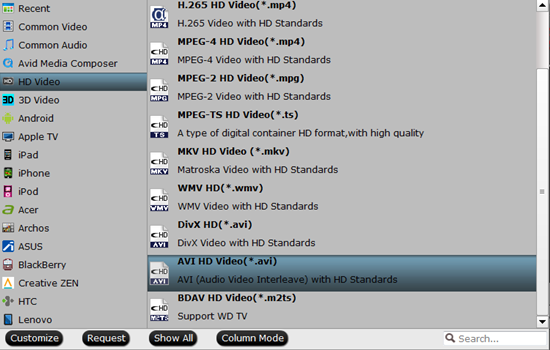 Step 3: Click “Settings” button to customize the output video and audio settings by yourself. But if you are not good at it, you’d better use the default parameters, they will ensure you a good balance between file size and image quality basically. You can change the resolution, bit rate, frame rate as you need.Step 4: With all the preparations work done? Why not go back to the main interface to click the “Convert” button to get the work started?Conclusion: Once the conversion is finished, click “Open” to quickly find the converted files. Then, Pinnacle Studio will recognize, catalog, play and stream them just fine.Further Reading:
Summary: In this page, we’ll study the Sony HDR-CX440 to Avid MC workflow to deal with the XAVC S footage in an effective way. Learn how to convert CX440 XAVC S to DNxHD MOV for Avid MC smooth editing.
 The Sony HDR-CX440 HD Handycam, with 8GB Internal Memory features an Exmor R CMOS sensor and a wide-angle Carl Zeiss zoom lens with 30x optical zoom. The Sony HDR-CX440 captures Full HD 1920*1080 video at 60p and 9.2MP still images to its 8GB of internal memory or to optional media cards. The Sony CX440 records using XAVC S codec (up to 50 Mb/s) and features dual recording, which lets you simultaneously capture both high-quality AVCHD and web-optimized MP4 files.You may have got the Sony HDR-CX440 camera, recorded some full-HD footages in XAVC S format, and wanted to import the XAVC S recordings to Avid MC for editing. But you will encountered problems when importing Sony CX440 XAVC S files to Avid MC. Why the problems occur? Sony XAVC S is the latest high definition format introduced by Sony–is not supported by Avid Media Composer so far. To import Sony HDR-CX440 XAVC S videos to Avid MC for editing without issues, the best solution is to convert Sony CX440 XAVC S to Avid MC supported format.Main Supported Video Formats for Avid Media Composer:DNxHD: This is Avid’s baby. All kinds of DNxHD are supported natively via either of the import methods mentioned above.
H.264: H.264 is the ubiquitous codec, and it looks like it will stay for quite some time. Avid Media Composer supports H.264 natively, via AMA as mentioned above.MPEG-4: Like H.264, Avid Media Composer supports MPEG-4 natively, via AMA as mentioned above. The Quicktime plug-ins are installed by default.Since, DNxHD MOV is the most compatible codec for Avid MC, so if we want to edit Sony HDR-CX440 XAVC S in Avid MC, it is necessary to convert those already shot XAVC S files to DNxHD .mov using third-party software. Here, you can depend on Pavtube HD Video Converter for Mac (review). With this best program, besides Avid MC, it can also export MPEG-2 for Adobe Premiere Pro, AIC for iMovie and more for native editing. Other Download:- Pavtube old official address: http://www.pavtube.com/hd-video-converter-mac/- Amazon Store Download: http://www.amazon.com/Pavtube-Video-Converter-Mac-Download/dp/B00QI9GNZS- AppStore Download: https://itunes.apple.com/de/app/pavtube-hd-video-converter/id502792488?mt=12- Cnet Download: http://download.cnet.com/Pavtube-HD-Video-Converter/3000-2194_4-76177786.htmlHow to work with Sony HDR-CX440 XAVC S videos in Avid MC?Step 1: Launch the HD Video Converter on your Mac, and then click the “Add video” button to import your XAVC S videos from Sony HDR-CX440 directly. In order to import several files at one time, you can click “Add from folder” button. Step 2: Click the “Format” bar to get the drop-down menu and you can get “Avid Media Composer>>Avid DNxHD (*.mov)” as output format.
 Step 3: Click “Settings” button to customize the output video and audio settings by yourself. But if you are not good at it, you’d better use the default parameters, they will ensure you a good balance between file size and image quality basically. You can change the resolution, bit rate, frame rate as you need.Conclusion: Once the conversion process shows in 100%, click “Open” to get the output videos. Create a project and start Sony HDR-CX440 editing XAVC S videos in Avid MC with light speed.Further Reading:
Summary: Below is a simple guide for you to smoothly import and edit Panasonic AJ-PX380 MXF in Premiere Pro CC on Mac with the best video quality.
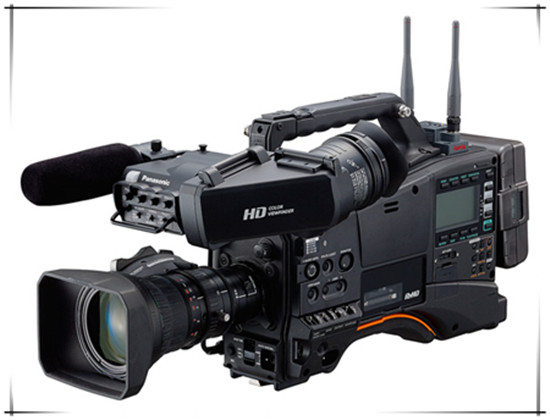 The PX380, expected to release in September 2015, will record in AVC-LongG to output on-air content direct from the shooting location and for workflows using content transferred over the internet. The camera will capture at different AVC-LongG bit rates - AVC-LongG50/25 keeps 10 bit, 4:2:2 quality at bit rates of approximately 50/25 Mbps, and the more economical AVC-LongG12 is optimized for wireless field workflows.Well, something frustrating, if you want to put the clips from Panasonic AJ-PX380 to Premiere Pro CC for editing, you will meet problems. The recordings from AJ-PX380 in MXF format can not be played or recognized by Premiere Pro CC easily. Up to now, Premiere Pro seems to work fine if you import your P2 MXF footages directly from cameras, but if you have already copied P2 MXF recordings to your HDD or you download them from somewhere, the importing error may jump out. If you accidentally meet with the problem, the best solution is to convert P2 MXF to MPEG-2, the format which is proved to be the most compatible one with all the Adobe products.Well, Pavtube MXF Converter for Mac (review) is highly recommended here to help you achieve your goal. It's an easy-to-use yet professional (P2) MXF converter, player and editor. The program is capable of converting PX380 MXF as well as Canon XF, Sony XDCAM to DNxHD, MPEG-2, Apple ProRes, AIC, etc on Mac OS X for smoothly importing and editing in various non-linear editing systems, including Avid Media Composer 5.5/6.0/6.5, Adobe Premiere Pro, Final Cut Pro, iMovie and more.
 Other Download:- Pavtube old official address: http://www.pavtube.com/mxf-converter-mac/- AppStore Download: https://itunes.apple.com/us/app/pavtube-mxf-converter/id502807634?mt=12- Amazon Download: http://www.amazon.com/Pavtube-MXF-Converter-Mac-Download/dp/B00QID8K28- Cnet Download: http://download.cnet.com/Pavtube-MXF-Converter/3000-2194_4-76177789.htmlHow to import Panasonic AJ-PX380 MXF to Premiere Pro CC for editing?Step 1: Download Mac MXF Converter, and follow the prompts to install the program. When the installation is complete, the best MXF to Premiere Converter will launch automatically.Step 2: Click “Add video” button to load Panasonic AJ-PX380 MXF files or directly drag the files into file list. By default, the files are selected. You can delete files which you don’t want to import to.
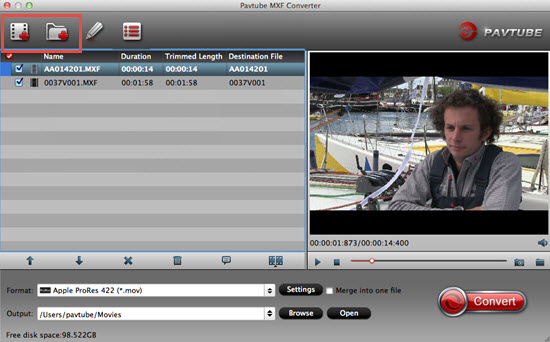 Step 3: Click “Format” bar to determine output format. For best image quality, click the format bar and choose “Adobe Premiere/Sony Vegas>>MPEG-2 (*.mpg)” as output format.
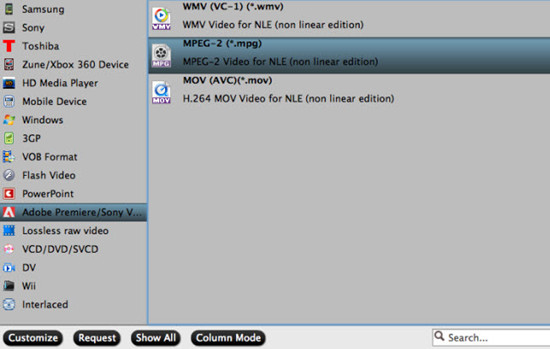 Step 4: Click “Convert” button to start to convert Panasonic AJ-PX380 MXF to MPEG-2 MPG format. After conversion, import the converted MXF videos to PPro CC for real time editing and mastering.Conclusion: You can set auto shutdown in progress window or leave it there and come back later. There is no more difficulty in editing Panasonic AJ-PX380 MXF in Premiere Pro CC.Further Reading:
Summary: You may find that Avid Media Composer won’t work beautifully with Sony PXW-X320 XAVC videos. The easy workaround to resolve the issues is to convert Sony XAVC to DNxHD MOV, a more editable format for Avid MC.
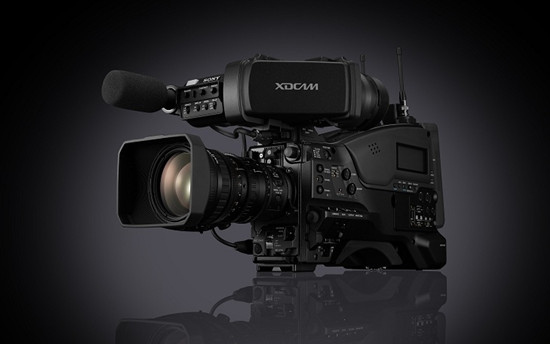 The PXW-X320, with various functions inherited from Sony's world-acclaimed XDCAM camcorders and yet highly cost effective with lens included has won lots of users. The PXW-X320 supports recording in MPEG HD422, MPEG HD, MPEG IMX, and DVCAM. In additional, XAVC is also supported offering high quality content creation in the HD domain.“I followed instructions on installing PDZK-MA2_v2.31_for Mac driver to make XAVC files editable in Avid with AMA. However, when I load the XAVC footage into the source monitor it says: CORE CONSISTENCY CHECK FAILURE. What’s the problem?”Although Avid plug-in can solve some people’s confusion about importing XAVC to Avid MC for editing, it’s not for all the cases. The simplest workaround I found on Google is to convert Sony PXW-X320 XAVC to DNxHD MOV, which is compatible with Avid Media Composer, with a powerful third party program if you are eager to get a fluent workflow.Tips: Main supported video formats for Avid Media Composer:DNxHD: This is Avid’s baby. All kinds of DNxHD are supported natively via either of the import methods mentioned above.H.264: H.264 is the ubiquitous codec, and it looks like it will stay for quite some time. Avid Media Composer supports H.264 natively, via AMA as mentioned above.MPEG-4: Like H.264, Avid Media Composer supports MPEG-4 natively, via AMA as mentioned above. The Quicktime plug-ins are installed by default.Pavtube HD Video Converter for Mac (review) is the solid tool to help users achieve the goal, applying which you are capable of converting Sony XAVC to DNxHD MOV with lossless quality at faster speed so that you can edit Sony X320 XAVC in Avid MC without any problem. Besides, the program is developed with some useful editing features, including merging several clips into one for easy importing, downsizing the files for editing and storage, adding text/image/video to original files, adding subtitles, replacing original audio tracks, etc. Other Download:- Pavtube old official address: http://www.pavtube.com/hd-video-converter-mac/- Amazon Store Download: http://www.amazon.com/Pavtube-Video-Converter-Mac-Download/dp/B00QI9GNZS- AppStore Download: https://itunes.apple.com/de/app/pavtube-hd-video-converter/id502792488?mt=12- Cnet Download: http://download.cnet.com/Pavtube-HD-Video-Converter/3000-2194_4-76177786.htmlHow to convert Sony PXW-X320 XAVC to DNxHD MOV for Avid MC editing on Mac?Step 1: Download and have a quick installation. The trial version will have a watermark on your converted files. Except for that, there are no time limitation, no virus, and no unnecessary bundle apps while downloading. After that, click “Add Video” button to load XAVC video. You can load several files at once thanks to “Add from folder” button.Step 2: Click the “Format” bar to get the drop-down menu and you can get “Avid Media Composer>>Avid DNxHD (*.mov)” as output format.Step 3: Click “Settings” button to customize the output video and audio settings by yourself. But if you are not good at it, you’d better use the default parameters, they will ensure you a good balance between file size and image quality basically. You can change the resolution, bit rate, frame rate as you need.Step 4: Click “Convert” button on the bottom of the screen to start Sony XAVC to DNxHD MOV conversion process. The amount of time it takes will vary based on your system’s hardware and the quality settings you selected.Conclusion: When the conversion is done, you can click “Open” button to get the generated video files. Now, you can edit Sony PXW-X320 XAVC in Avid Media Composer freely.Further Reading:
Summary: If you wanna a way to edit AJA Cion 4K video in iMovie/FCE smoothly, just follow this page. This article will shed you some light on how to convert 4K video to AIC MOV.
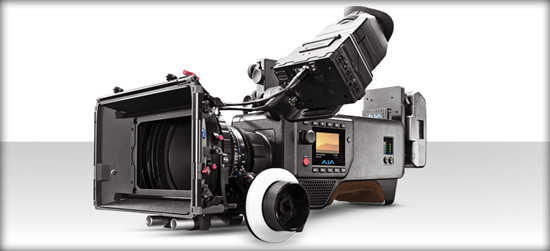 AJA’s CION is a new ergonomic professional production camera, capable of shooting at 4K/UltraHD and 2K/HD resolutions. CION offers in-camera recording directly to the Apple ProRes family of codecs including ProRes 4444, and ProRes 422 up to 4K 60 fps, and offers the ability to output 4K AJA Raw data at up to 120 fps via 4x 3G-SDI outputs. When recording in HD or 2K, the image is oversampled from the full 4K sensor, retaining focal length as well as providing a vibrant and detailed image.4K footage looks amazing but if you don’t have a fast computer with a high end RAM and speedy processor it can make video editing a real nightmare. Your computer may freeze or crash when editing AJA Cion 4K video in iMovie/FCE. iMovie is one of the best video editing tools for Mac. With it, you can beautify your videos simply by cutting, cropping, merging, adding effects etc. to them. It works stable on Mac computer, so it's loved by millions of users. On the official site, it says iMovie can support DV, MPEG-4, MPEG-2, MOV and M4V file types. According to this, you are unable to import AJA Cion 4K ProRes to iMovie/FCE.All in all, to smoothly import AJA Cion 4K ProRes to iMovie/FCE, you’d better to convert 4K video to iMovie/FCE totally compatible formats as we searched above. To get the job well done, we need to use an all-in-one program- Pavtube HD Video Converter for Mac (review), applying which you are capable of converting AJA Cion 4K video to AIC MOV format, the compatible video format with iMovie/FCE, with lossless quality at faster speed so that you can edit 4K videos in iMovie/FCE without any problem. Besides, the program is developed with some useful editing features, including merging several clips into one for easy importing, downsizing the files for editing and storage, adding text/image/video to original files, adding subtitles, replacing original audio tracks, etc. Other Download:- Pavtube old official address: http://www.pavtube.com/hd-video-converter-mac/- Amazon Store Download: http://www.amazon.com/Pavtube-Video-Converter-Mac-Download/dp/B00QI9GNZS- AppStore Download: https://itunes.apple.com/de/app/pavtube-hd-video-converter/id502792488?mt=12- Cnet Download: http://download.cnet.com/Pavtube-HD-Video-Converter/3000-2194_4-76177786.htmlHow to import AJA Cion 4K video to iMovie/FCE for editing?Step 1: Download and have a quick installation. The trial version will have a watermark on your converted files. Except for that, there are no time limitation, no virus, and no unnecessary bundle apps while downloading. After that, click “Add Video” button to load AJA Cion 4K video. You can load several files at once thanks to “Add from folder” button.Step 2: Click the “Format” bar to get the drop-down menu and you can get “iMovie and Final Cut Express>>Apple InterMediate Codec (AIC) (*.mov)” as output format.Step 3: Click “Settings” button to customize the output video and audio settings by yourself. But if you are not good at it, you’d better use the default parameters, they will ensure you a good balance between file size and image quality basically. You can change the resolution, bit rate, frame rate as you need.Step 4: Click “Convert” button on the bottom of the screen to start AJA Cion 4K video to AIC MOV conversion process. The amount of time it takes will vary based on your system’s hardware and the quality settings you selected.Conclusion: When the conversion is done, you can click “Open” button to get the generated video files. Now, you can edit AJA Cion 4K video in iMovie/FCE freely.Further Reading: