To make Canon XC10 XF-AVC MXF footage edited or played well on PC and Mac, we need to convert the 4K MXF to common MOV or with multi-tracks preserved. Do you have any related issues with that? This post will show you an quick guide on rewrapping Canon XC10 4K MXF files for Windows and Mac in common MOV.
What videos can Canon XC10 4K camcorder shoot and bring to us?
Canon has recently announced the development of XF-AVC, a new proprietary video format for the efficient recording of high-image-quality 4K, 2K and HD video footage. On the other hand, Canon XC10 uses XF-AVC movie recording format, employs the MPEG-4 AVC/H.264 video compression format, and stores shootings in an MXF wrapper, which seems not so compatible for Windows and Mac. What’s the useful MXF tips? s examples below.
‘Hey it’s so cool I got the latest Canon 4K camcorder---XC10 XF-AVC as soon as it released out. You know it is indeed can shoot the videos with higher resolutions and flexible personal settings, I love it so much. But it always tells me the ‘errors’ when I import them on Mac. Why these MXF recordings cannot be added to PC? I’m now seeking a professional video transcoder to convert the files nicely.’
Hot Search: MXF to VLC | MXF to WMP | MXF to Sony Vegas | MXF to QuickTime | MXF to iMovie
How to rewrap Canon XC10 XF-AVC MXF footage to MOV for PC/Mac?
Pavtube iMixMXF/MXF MultiMixer can convert all the original MXF videos to any others formats with multi-track audios for both Windows/Mac users. As the professional MXF importer, transcoder or editor, it can do all work well for MXF files. Of course including the workflow of converting Canon XC10 XF-AVC MXF files to common MOV or multi-track MOV on PC/Mac. What’s more, so many output media players and editing tools are also listed there for other choices. More converting details are listed below.
Easiest guide on converting Canon XC10 XF-AVC MXF to MOV on PC/Mac:
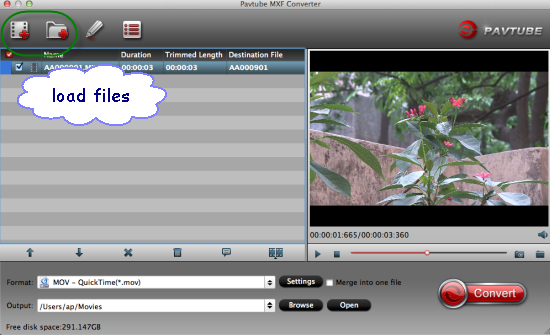
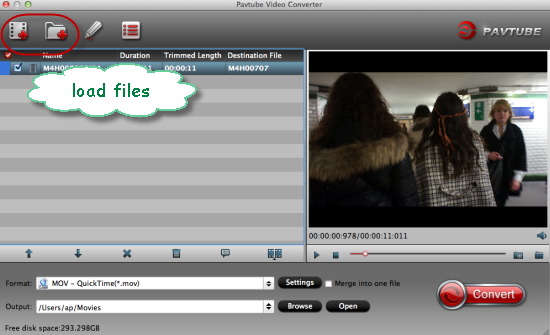
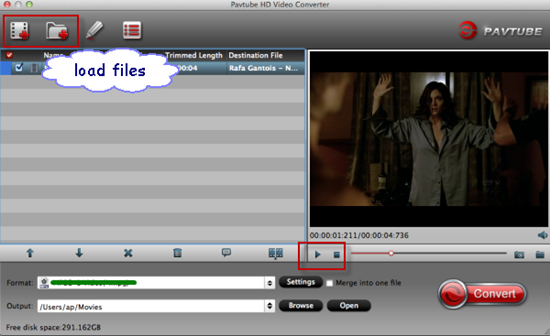
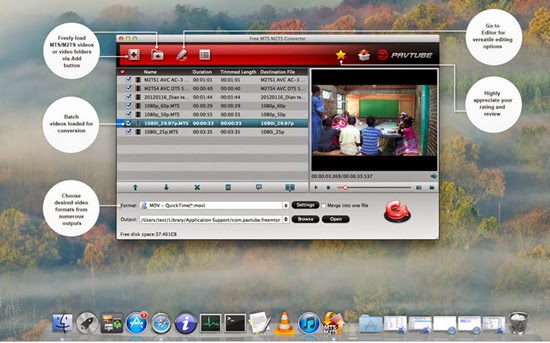
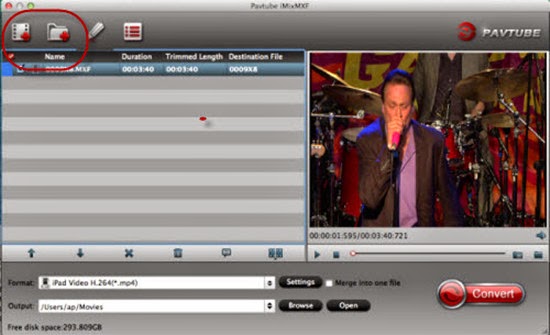
Step 1: Start up multi-track MXF Video Converter as a professional Canon XC10 MXF Converter for Windows/Mac. When its main interface pops up, click ‘Add File’ to input your source media. Directly drag files in is also available.
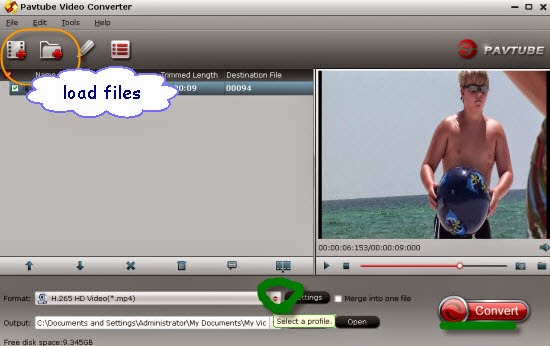
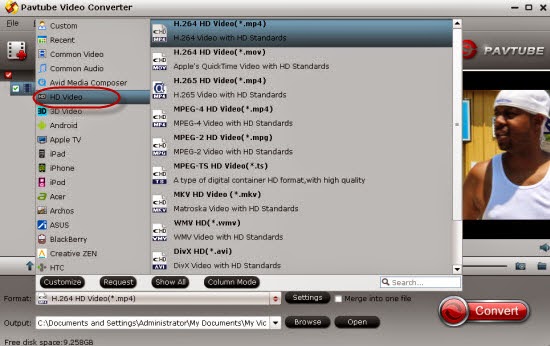
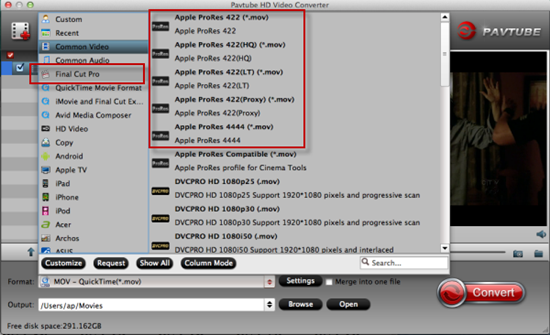
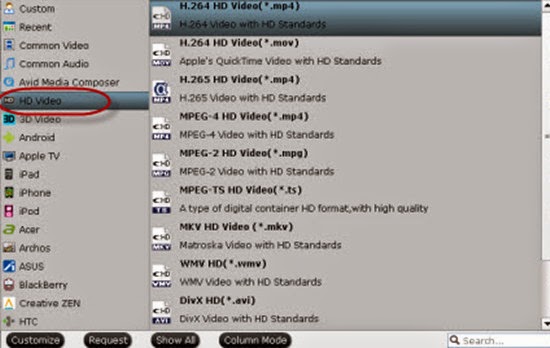
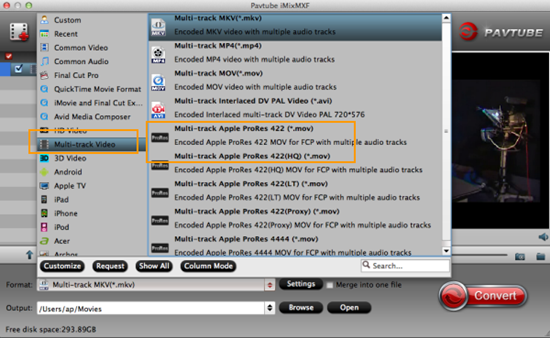
Step 2. Select suitable MOV as you need for Windows/Mac. If you are seeking the common ones, just go to the ‘HD Video’ to find the MOV as the output. While for those advanced users who wanna trancode the MXF files with multi-tracks preserved, we suggest you to choose the ‘Multi-track Video’>>’Multi-track MOV (*.mov)’ as the best one.
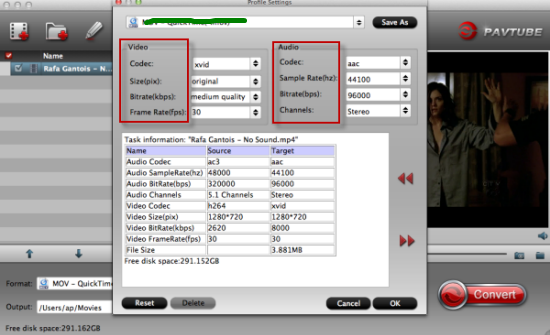
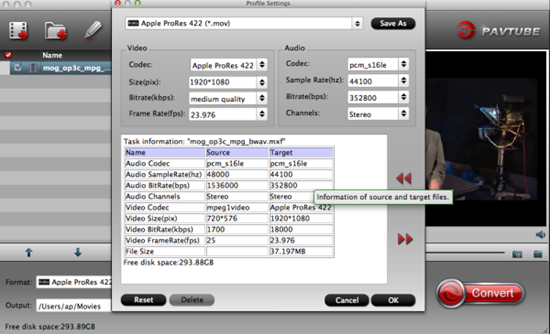
Step 3: Custom video and audio settings
If necessary, you can click ‘Settings’ button and go to ‘Profiles Settings’ panel to modify video and audio settings like video encoder, resolution, video bit rate, frame rate, aspect ratio, audio encoder, sample rate, audio bit rate, and audio channels.
When you get ready for all preparation work, click ‘Convert’ to start format conversion. As soon as the conversion is complete, you can click ‘Open Folder’ button to get the exported MOV files for Window/Mac. No matter for editing or playing your Canon XC10 XF-AVC MXF recordings, this program will not make us disappointed.
Canon has recently announced the development of XF-AVC, a new proprietary video format for the efficient recording of high-image-quality 4K, 2K and HD video footage. On the other hand, Canon XC10 uses XF-AVC movie recording format, employs the MPEG-4 AVC/H.264 video compression format, and stores shootings in an MXF wrapper, which seems not so compatible for Windows and Mac. What’s the useful MXF tips? s examples below.
‘Hey it’s so cool I got the latest Canon 4K camcorder---XC10 XF-AVC as soon as it released out. You know it is indeed can shoot the videos with higher resolutions and flexible personal settings, I love it so much. But it always tells me the ‘errors’ when I import them on Mac. Why these MXF recordings cannot be added to PC? I’m now seeking a professional video transcoder to convert the files nicely.’
Hot Search: MXF to VLC | MXF to WMP | MXF to Sony Vegas | MXF to QuickTime | MXF to iMovie
How to rewrap Canon XC10 XF-AVC MXF footage to MOV for PC/Mac?
Pavtube iMixMXF/MXF MultiMixer can convert all the original MXF videos to any others formats with multi-track audios for both Windows/Mac users. As the professional MXF importer, transcoder or editor, it can do all work well for MXF files. Of course including the workflow of converting Canon XC10 XF-AVC MXF files to common MOV or multi-track MOV on PC/Mac. What’s more, so many output media players and editing tools are also listed there for other choices. More converting details are listed below.
Easiest guide on converting Canon XC10 XF-AVC MXF to MOV on PC/Mac:
Step 1: Start up multi-track MXF Video Converter as a professional Canon XC10 MXF Converter for Windows/Mac. When its main interface pops up, click ‘Add File’ to input your source media. Directly drag files in is also available.
Step 2. Select suitable MOV as you need for Windows/Mac. If you are seeking the common ones, just go to the ‘HD Video’ to find the MOV as the output. While for those advanced users who wanna trancode the MXF files with multi-tracks preserved, we suggest you to choose the ‘Multi-track Video’>>’Multi-track MOV (*.mov)’ as the best one.
Step 3: Custom video and audio settings
If necessary, you can click ‘Settings’ button and go to ‘Profiles Settings’ panel to modify video and audio settings like video encoder, resolution, video bit rate, frame rate, aspect ratio, audio encoder, sample rate, audio bit rate, and audio channels.
When you get ready for all preparation work, click ‘Convert’ to start format conversion. As soon as the conversion is complete, you can click ‘Open Folder’ button to get the exported MOV files for Window/Mac. No matter for editing or playing your Canon XC10 XF-AVC MXF recordings, this program will not make us disappointed.
Read More: