Two generation Red One
The first Red Ones were outfitted with the 12 megapixel Mysterium sensor, capable of capturing up to 120 frames per second at 2K resolution and 30 frames per second at 4K resolution
The second generation, Red One Mysterium-X has a 14 megapixel Mysterium-X sensor. It captures up to 120 frames per second at 2K resolution and up to 30 frames per second at 4K resolution. With the upgraded sensor, the Red One Mysterium-X offers more dynamic range, higher sensitivity and enhanced color management tools than the Red One Mysterium.
Why you guys cannot handle the original 4k video in After Effects CC/CS6
There are many, many flavors of 4K files, and more to come. RED camera for example can be setup to shoot uncompressed RAW 4K, 3X compression, 5X compression, 8X compression, and 10X compression.
With an iMac, or even with the new Mac Pro, to handle 4K workflows effectively, you would have to add-on a Thunderbolt expansion chassis with a RED Rocket card or RED Rocket X card, at least one or two powerful graphics cards such a the GTX 680 Mac Edition, and a beefy Thunderbolt RAID like a Promise Pegasus 6-drive model. All the costs over $18800 totally.
That is to say, there is unfortunately no way you will be able to edit native 4K files at any of the higher quality, lower compression rates. The only alternative on a Mac would be to transcode to a lighter codec, such as Pro Res. Well...yes, if you convert to ProRes and scale to 2K for editing.
Solution Here
Working with raw 4K videos could be tedious and time-consuming in many situations. The best workaround is to have the flexibility and efficiency of working with a professional and edit-friendly codec such as MPEG-2 with a powerful 4K to After Effects converter-Pavtube HD Video Converter for Mac. With it, you can effortlessly encode/re-encode 4K H.264(MP4), RAW, etc footage for smoothly importing and editing in various non-linear editing systems (NLE), including After Effects, Avid Media Composer, Final Cut Pro, iMovie, FCE and more. Besides, this 4K Video Converter is also available to customize the output resolutions to any size like 1080p, 2K, 4K as users want.


Other Download:
- Pavtube old official address: http://www.pavtube.com/hd-video-converter-mac/
- Amazon Store Download: http://www.amazon.com/Pavtube-Video-Converter-Mac-Download/dp/B00QI9GNZS
- AppStore Download: https://itunes.apple.com/de/app/pavtube-hd-video-converter/id502792488?mt=12
- Cnet Download: http://download.cnet.com/Pavtube-HD-Video-Converter/3000-2194_4-76177786.html
How to Downscale the 4K Red One RAW Video to MPEG-2 for Editing in Adobe After Effect CC/CS6
1.Add raw files
Run the program you just set up. Drag and drop the 4K video files to the converter. You can also hit Add files button to import videos to the app. If you wanna combine several videos into one file, you can click the "Merge into one" box.

2.Choose output format
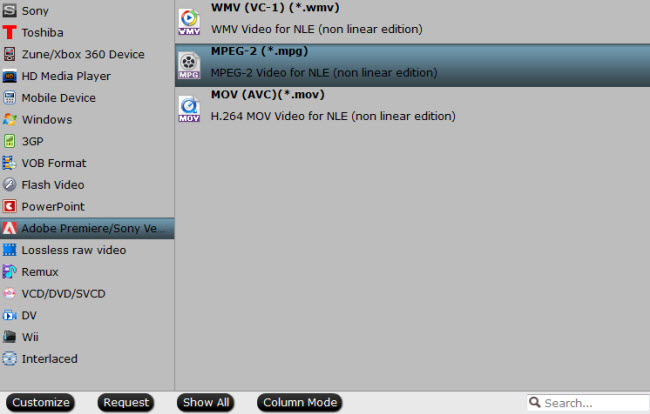
Click "Format" bar and choose Adobe Premiere/Sony Vegas -> MPEG-2(*.mpg) as output format for editing raw 4K in AE with natively supported video codec.
3.Advanced V/A settings
Click "Settings" button if you'd like to customize advanced audio and video parameters like Video Codec, aspect ratio, bit rate, frame rate, Audio codec, sample rate, audio channels. Note: If you want to get original 4K resolution, just keep the video size as original.

4.Start converting 4K footage
Hit the convert button of the best 4K Video Converter. It will start converting 4K for importing to Adobe After Effect CC/CS6 immediately. Soon after the conversion, just click "Open" button to get the generated files for natively editing in Adobe After Effect CC/CS6 perfectly.
Read More:
- Samsung NX500 H.265 4K to FCP X Workflow on Mac El Capitan
- Compress 4K Ultra HD Videos to 1080p without Quality Loss on Mac EL Capitan
- How to stream H.265/HEVC 4K Videos to Apple TV 4/3/2/1 on Mac
- Uploading and Sharing Video Recording by Sony PXW-FS5 4K XAVC to Youtube on Mac
- 2015 Best Mac Video Converters Review: Top 5 4K Video Converter for Mac
- Compress 4K Videos to 1080p HD Videos for Playing, Editing or Sharing