Do you have any suggestions for us to export the iMovie videos to YouTube for sharing? Are you seeking the best solutions to convert iMovie exported videos to FLV for uploading to YouTube? Here is the right place you come! A good iMovie to YouTube converter here is strongly recommended for us!

iMovie do not natively support FLV output. That’s the main reason why we need to export the iMovie videos to FLV for YouTube for nicely sharing. A workaround is to share the video to YouTube and then download the video, which would be in FLV format. Due to this cause, we should know the best supported formats by YouTube, right? This method is time consuming and you'll need a YouTube Downloader in order to capture your video from YouTube. On the other side, we all know that YouTube refuses the videos not only including FLV, but also for MTS, MXF, H.265, etc.
The easy workaround requires an iMovie to Flash video converter. Fortunately, Pavtube Video Converter for Mac is such a useful program which can make the iMovie output videos compatible with YouTube. It's a well known utility to convert video files to and from any desirable format like MOV, AVI, MP4, MPEG, WMV, etc. Most important is that the video quality will be kept while transforming to another format. What’s more, with the latest upgraded version 4.8.5, it can also supported to decode the H.265/HEVC files.
Follow the step-by-step tutorial to convert iMovie videos to FLV format for YouTube on Mac OS X.
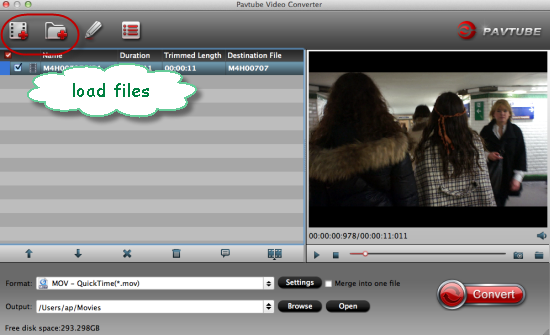
Step 1.To add your iMovie videos to the FLV Mac video converter, you have two options: directly drag and drop the iMovie output video to the program, or click the ‘Add File’ and choose Load Media Files.
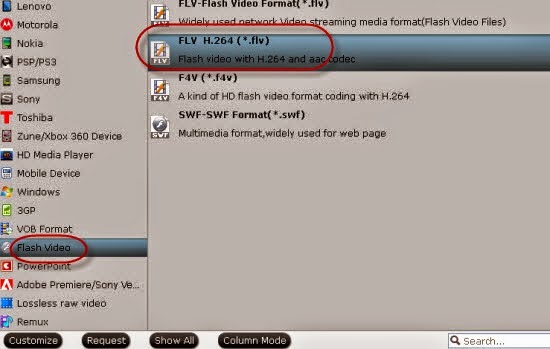
Step 2.When you come to the output list, we suggest you to drop down it and choose the ‘Flash Video’>>’FLV H.264 (*.flv)’ for YouTube as we mentioned above. Just like the screen shot below.
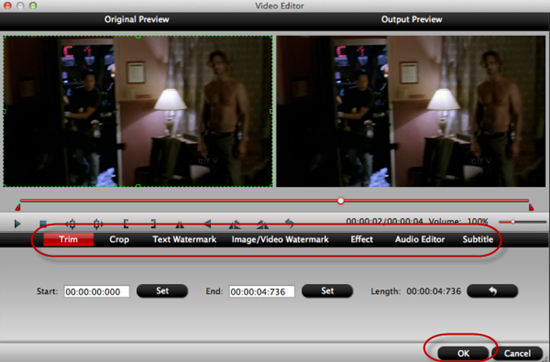
Step 3. Most of you guys must have the desire of a further editing with your output videos, right? On the main interface, ‘Edit’ is waiting for you. ‘Trim’ to decide where to start and where to end, ‘Crop’ to cut some unwanted clips, ‘Subtitles’ to add some explanations to your audience.
After you have finished your preparation job, just go back to the main interface to click the ‘Convert’ button, you can start your conversion job. Then as usual, just upload the videos to YouTube to share with your friends nicely.
Further:
- Upload XAVC S to Vimeo/Facebook/Youtube for Sharing
- How to Play MKV, AVI, VOB, FLV, WMV on Google Nexus 6/9?
- Convert BDMV Files for QuickTime, iMovie, FCP on Mac Perfectly
- Top 5 YouTube Video Converters for Mac
- Upload H.265/HEVC Videos to YouTube or Vimeo?
- http://www.video-pedia.com/2017/06/12/upload-quicktime-mov-to-youtube-mac/