Wednesday, March 12, 2014

Backup or rip "Bullet to the Head" Blu-ray/DVD on Mac for personal entertainment

An easy solution to backup "Blu-ray Bullet to the Head" to Mac HDD, so that you can watch it on your Mac, iPhone, iPad, TV and other devices together with your friends.

Lights go down, and the movie opens up with an odd sequence of a bullet being shot towards the audience and shattering the various studio logos. It then transitions into an out of context scene from later in the movie, in black and white. It left a bad taste immediately, feeling clumsy and odd. Bullet To The Head” is directed by Walter Hill (The Warriors) and stars Sylvester Stallone, Sung Kang, Sarah Shahi, Adewale Akinnuoye-Agbaje, and Jason Momoa.


My best friend loves this movie very much. We have already bought a Blu-ray and DVD disc of the movie. We found interactions fairly surprising that we want to keep the precious moment forever, then we can get them playable for personal entertainment anytime and anywhere.

As we know, most commercial Blu-rays/DVD are protected, "Bullet to the Head" is no exception. So we cannot move it to other devices directly. If you want to do so, you’ll have to roll off BD/DVD disc protection and convert the clean Blu-ray/DVD to suitable format for playback.

Among all the software applications, free or paid, Pavtube BDMagic for Mac is my first choice for two reasons. One is its easy-to-use feature with user friendly interface; another is its reasonable price and lifetime support. They also have a Windows version ripper, see this Pavtube BDMagic.

Mac Workflow: Backup or rip "Bullet to the Head" Blu-ray/DVD for personal entertainment

Note: Firstly you need to get an external Blu-ray drive, otherwise your computer will not recognize it as most built-in drive only works on DVD.

1. Plug Blu-ray drive to Mac computer, insert Blu-ray/DVD disc and launch Pavtube. See the disc-like icon on the top? Click it and you will see your disc name inside, hit it.


It seems this ripper breaks movie protection during the loading process, because once I took my laptop to kitchen where’s no signal, the program refused to take any of my discs. In case of that, pls ensure your Internet connection is OK.

2. Choose MP4/AVI format for playback.

There’re lots of preset inside “Format” list. I prefer "H.264 HD Video(*.mp4)" from "HD Video"  option as it’s widely accepted by most devices, like our iPhones, iPads, PC, or Android device.


You can also hit “HD Video> AVI HD Video(*.avi)” for watching Blu-ray/DVD on TV.

3. Convert Blu-ray/DVD movie on Mac for personal entertainment

Just hit the big “Convert”, now you can leave it working and do your own things. Oh don’t forget to cancel your computer auto-sleep mode. Wait for moments, click “Open” or “Open output folder” to find the converted MP4/AVI files.

Ok it’s done! Transfer converted video to iPad, iPhone, TV or other devices and enjoy your time watching "Bullet to the Head" with friends.

Review for this movie:

Stallone’s and Kang’s interactions are fairly surprising. Going in, I expected something akin to “two buddies fight the bad guys”. Except, Stallone’s character despises cops, and is basically an awful person. They sabotage each other with subtlety, which makes for some interesting sequences and arguably best parts of the movie.

The best thing about this movie is that it knows exactly what it is. It’s the movie you’ll pick up at a discount rack, and have a good time with, which could also be the worst thing about it. It’s not incredibly memorable, and fairly forgettable. There isn’t a stand out sequence, just a couple of generic shoot outs and fights. Also, for a movie called “Bullet To The Head”, there are a lot of gratuitous scenes of bodies being shot up in every place but the head.

“Bullet To The Head” has the right to exist. It’s B level, but not schlocky. It has some tension, but it isn’t painfully self serious. At worst it’s flat and boring, at best it’s a perfectly enjoyable average action movie.

Read more:

Movies and TV Series coming out on DVD at March 2014
New Movies coming out March 2014 List with Release Dates
How to Backup new released DVD discs on Windows 8.1/8?

Saturday, March 8, 2014

Ripping DVD movies with Pavtube DVD Ripper (Windows/Mac) upgraded version now!

Pavtube Studio has updated DVDAid to 4.5.0 and DVDAid for Mac to 3.7.0.

Windows version


Version: 4.5.0
Supported OS: Windows XP/2003/Vista/Windows 7/Windows 8/Windows 8.1

What’s new:
  • Support latest DVD
  • Windows install package with digital signature
  • Fixed some known bugs

Download here: http://www.multipelife.com/download/dvdaid/dvdaid_setup.exe

Mac version


Version: 3.7.0
Supported OS: Mac OS X 10.9 Mavericks, 10.8 Mountain Lion, 10.7 Lion, Snow Leopard 10.6, Leopard 10.5

What’s new:

  • Support latest DVD
  • Update Mac pkg and dmg install packages simultaneously
  • Fixed some known bugs

Download here: http://www.multipelife.com/download/dvdaid-mac/dvdaid_setup.dmg

From: http://open-mobile-share.com/pavtube-dvd-ripper-new-features/

Friday, March 7, 2014

Stream Blu-ray TrueHD and DTS-HD 7.1 audio from HTPC

The following post is reproduced from Bitstreaming Dolby TrueHD and DTS-HD with the Intel Core i3, Published on Do it Yourself HTPC Blog, written by ddewaele, to whom I would like to say THANK YOU.

“When the Intel Core i3 platform was announced, it was hailed as being the holy grail for HTCP enthusiasts. The reason being that the Core i3 chip (that combines both CPU and GPU onto one physical chip) offers more then the current Atom based platforms have to offer. Not only is the Core i3 platform a lot more powerful compared to the Intel Atom platform, is also maintains a fairly low power consumption. Obviously, it cannot compete with the power consumption of the Atom. However, combine the Atom with an Ion chipset and a blu-ray player, and the difference becomes a lot smaller.

One of the biggest strengths of the Core i3, and the H55 chipset is that it also supports HDMI Audio Pass Through for Native Dolby TrueHD & DTS-HD Master Audiostreaming.

The primary goal off this writing was to get the Dolby TrueHD & DTS-HD Master Audio up & running. And guess what …. it really worked !

I hooked up the Corei3 build to my Onkyo TX SR-507 receiver via HDMI


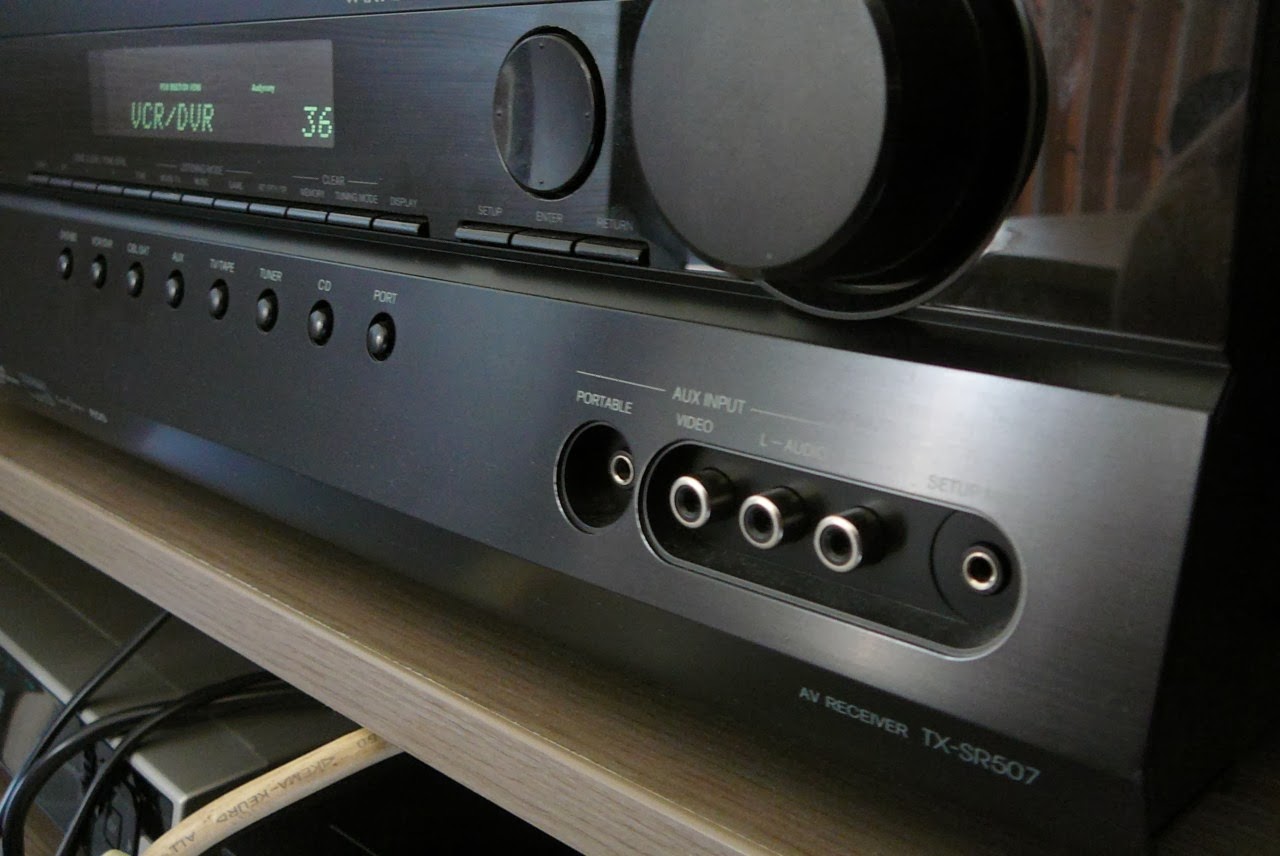
The receiver has support for HD audio formats such as Dolby TrueHD and DTS-HD Master Audio making it an ideal combo for a high definition audio experience.


Streaming DTS-HD/Dolby TrueHD from HTPC

Most Blu-ray discs contain either a DTS HD Master Audio, or a Dolby True HD soundtrack They’re basically the successors of the DTS 5.1 and Dolby Digital 5.1 coded. Most HTPC boxes support DTS 5.1 and Dolby Digitial 5.1 without much effort. Most Atom/Ion combos for example, when hooked up to a receiver through HDMI, will have no problem sending the DTS / Dolby stream to the receiver. With DTS HD Master Audio, or Dolby True HD, it’s a different story.

If you’re not all that familiar with audio formats, try to think of DTS or Dolby as a compressed format (much like a ZIP file). The audio is encoded or compressed (to consume less space on a Blu-ray disc). That encoded / compressed audio is sent to the receiver, and it’s the receivers responsibility to decode the audio stream. Because the receiver is receiving the encoded / compressed audio from the player (your HTCP), it notices this and turns on the DTS or Dolby symbol on your receiver display.

There are basically 2 types of audio

uncompressed audio = LPCM
lossless compressed = DTS HD / DD TrueHD

So bitstreaming means sending undecoded True HD or DTS HD Bitstream over a digital link (minimum HDMI 1.3) to an external device (receiver / amplifier). The amplifier with True HD and DTS HD decoding capabilities can then decode that stream, rather than the software on the HTPC.

An alternative to bitstreaming is software decoding. Here, a piece is software (ex: ffdshow) is responsible for decoding the True HD / DTS HD bitstream. It then goes on to send multi channel linear PCM to the receiver (MCH PMC). Here, your receiver is unaware that it’s receiving either Dolby True HD or DTS HD, so there will be no indicators on the receiver telling you that it is actually playing Dolby True HD / DTS HD. The receiver just gets the multi channel linear PCM and outputs that.

Cards that support bitstreaming :

Asus Xonar 1.3 HDMI
Auzen X-Fi HomeTheater HD.
ATI 57* graphic card series
The Core i3 HTCP build

Today I got my gigabyte motherboard replacement (the mini-ITX version I had originally ordered), so I could finally start building my first Core i3 based HTCP. The core components of the build are the GigaByte H55N-USB3 motherboard, and the Intel Core i3 530 CPU.


Everything was assembled in my Lian Li PC-Q07 mini-ITX case.


First some general figures on the Core i3 system:

Idle

CPU32/38 degrees

Intel stock cooler1200rpm (audible – but very quiet)

Idle (windows desktop)50W

Load (Prime95

CPU67/70 degrees

Intel stock cooler2500rpm (audible – noisy)

Idle (windows desktop)90W

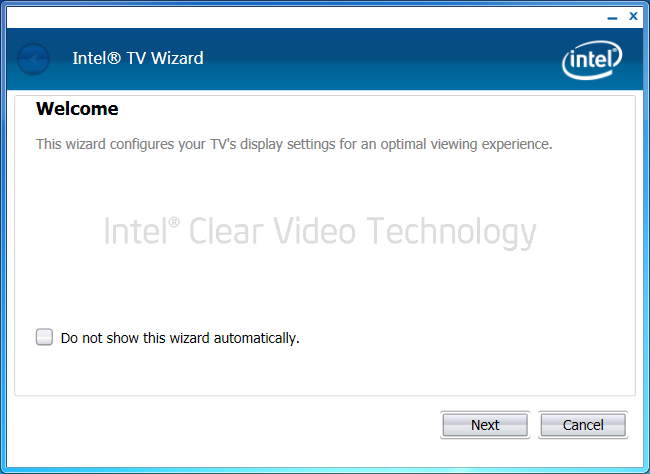
I installed Windows 7 on it (I’ll write up my experiences with Linux in a future story). After installing all the drivers from the Gigabyte CD (+ updates received via the internet), the system booted and the Intel TV Wizard allowed me to calibrate the screen on my Sony LCD TV.


This allows you to calibrate the screen, as initially, there were black borders around the screen, so it needed to be stretched a little.


After that, it was time to configure my audio settings.

For some reason, the Realtek Digital Output was selected as the default playback device. I had to manually select the Intel(R) Display Audio as the default playback device in order to get sound up & running.

The sound settings in control pannel allow you to configure the playback device by selecting your speaker set (in my case, 5.1 speaker setup).
It also allows you to test the speaker setup by emitting a sound through each individual speaker.

Once this was done, the sound was up & running in both the windows environment, and my other media player software (XBMC, TotalMedia Theatre3,….)


The Intel Display Audio device supports all the major high definition audio formats such as :

DTS Audio
Dolby Digital Plus
DTS-HD
Dolbu TrueHD
Dolby Digital

I supports up to 8 channels.

Obviously, the DTS-HD and Dolby TrueHD is the main interest for this topic.Test setupSoftware required for the tests

As the goal is to bitstream some Dolby TrueHD and DTS-HD Master Audio to the receiver, we’ll be needing some software to do so.

I’ve selected a commercial player (required for Blu-ray disc playback), and an open-source video player for HD media formats (H264 encoded video in a mkv container).

TotalMedia Theatre 3 Platinum. (trial version or full version)

Blu-ray movie player
Homepage : http://www.arcsoft.com/estore/software_title.asp?ProductCode=TMT3P

Media Player Classic – HomeCinema v1.4.2499.0 (latest version at the time of writing)

Free audio and video player for Windows.
Homepage : http://mpc-hc.sourceforge.net/

ffdshow tryouts revision 3556

DirectShow and Video for Windows codec with support for a wide range of audio and video formats, such as Xvid, DivX, and H.264.
Homepage : http://ffdshow-tryout.sourceforge.net/index.php
The latest stable beta is rev3154 (released on 20091209).
For these tests however, you’ll be needing rev3556 (built on 20100902)
Media required for the test

Obviously, if we want to test we also need some files containing high definition audio.Demo World contains a large number of Dolby / DTS trailers, some of them Dolby True HD and DTS-HD Master Audio.

There’s a lot of talk on the internet regarding the playback of these high definition audio codecs. Some say that you can only bit-stream them to your receiver when played from an original Blu-ray disc. We’ll soon find out….

I’ve downloaded 2 media files from Demo World that we’ll be using in the test :

Terminator 2 (Lossless) : DTS-HD MA 5.1
Bit Harvest (Lossless) : Dolby TrueHD 7.1
Inspecting the media files

When dealing with media files, it’s always very interesting to know what kind of video and audio tracks are included. Media Player Classic Home Cinema allows you to view the properties of a media file by either

right-clicking in the video screen and clicking properties
using the File menu – Properties
SHIFT – F10

Terminator 2 (Lossless) : DTS-HD MA 5.1
Video: WVC1 1920×1080 29.97fps [Video - VC-1, 1920x1080, 29.970 fps (1011,fd,00)]
Audio: DTS 48000Hz 6ch 1509kbps [Audio - DTS-HD Master Audio, 48.0 kHz, 6 chn, 1509.8 kbit/s (1100,fd,00)]
Subtitle [No subtitles]

Bit Harvest (Lossless) : Dolby TrueHD 7.1
Video: MPEG4 Video (H264) 1920×1080 23.98fps [Video - AVC (H.264), High Profile, Level 4.1, 1920x1080, 23.976 fps (1011,e0,00)]
Audio: Dolby AC3 48000Hz 6ch 640kbps [Audio - Dolby TrueHD, 48.0 kHz, 6 chn, 640.0 kbit/s (1100,fd,00)]
Subtitle [No subtitles]Test #1 : Playing a Blu-ray disc

The first test I did was playing a Blu-ray disc using TotalMedia Theatre 3 Platinum. As you can see, both the Dolby True HD and DTS-HD Master Audio lights started blinking on my Onkyo Receiver.


Test #2 : Playing a media file using TotalMedia Theatre.

We played the media files (m2ts) using TotalMedia Theatre :


The Dolby TrueHD movie was also bitstreamed correctly to the receiver.


Test #3 : Playing the m2ts media file using Media Player Classic

ArcSoft TotalMedia Theatre is a great product, but it comes at a price. Most HTPC enthousiast use free players like Media Player Classic Home Cinema (MPC-HC), VLC or XBMC. Would it be possible to bitstream the HD Audio using these free players as well ? Lets find out….

When playing media files using Media Player Classic, you’lI get this on the receiver :


Media Player has a DTS / AC3 Decoder. By default, it decodes 16 bit PCM as stereo to the speakers.


Be sure to change this to your 5.1 or 7.1 configuration in order to get surround sound instead of stereo.


We’re going to disable the DTS/AC3 decoder by adding an external filter. We’ll select the ffdshow audio decoder. (Options – Filters – External Filters – Add Filter)


When we now play the media file, the ffdshow audio decoder will be used (instead of the built-in DTS/AC3 Decoder)


During my first attempt with ffdshow, I still wasn’t able to get the DTS-HD or Dolby TrueHD bitstreaming up & running. As you can see from the ffdshow audio decoder configuratio (output section), only AC3 and DTS were mentioned.


I was using the latest stable beta (rev3154).


When using the latest revision (at the time of writing , rev 3556), things started to change.


In the output section, I now had the option of selecting Dolby TrueHD and DTS HD. And from that moment on, Dolby TrueHD and DTS HD was up & running using Media Player Classic HomeCinema.


Related Apps:

More Blu-ray Disc Media Players- PowerDVD, WinDVD, etc

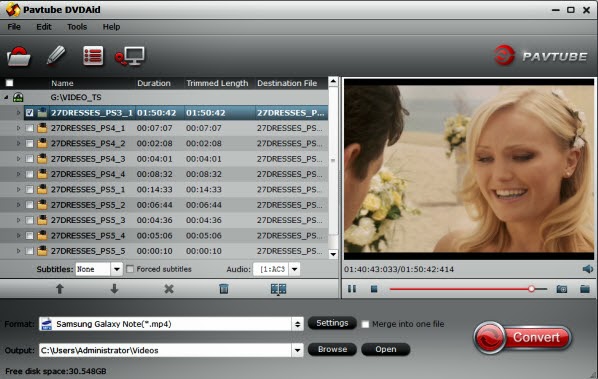
Blu-ray Disc Rippers (for ripping Blu-ray to HTPC with original HD audio) – Pavtube Blu-ray Ripper (for Windows/Mac)

Read more:

Thursday, March 6, 2014

Hot info! Pavtube ByteCopy (Windows/Mac) now updates to new version

Good news! As your best tool to rip and convert Blu-ray movies and DVDs to MKV container format with multiple audio tracks and subtitle sinclided, Pavrtube ByteCopy, both Windows and Mac version have updated to the new version!

Windows Version:


Version: 2.2.0

Supported OS: Windows 2003/XP/Vista/Windows 7/Windows 8/Windows 8.1

What's new:

* Support latest BD and DVD

* Windows install package with digital signature

* Fixed some know bugs

Download here:  http://www.multipelife.com/download/bytecopy/bytecopy_setup.exe

Mac Version:


Version: 2.3.0

Supported OS: Mac OS X 10.9 Mavericks, 10.8 Mountain Lion, 10.7 Lion, Snow Leopard 10.6

What's new:

* Support latest BD and DVD

* Update Mac pkg and dmg install package simultaneously

* Fixed some know bugs

Download here: http://www.multipelife.com/download/bytecopy/bytecopy_setup.exe


Source: http://pc-mac-compatibility-issues.blogspot.com/2014/03/pavtube-bytecopy-new-version.html

Read More:

Subtitle Tips: Blu-ray subtitles format, PGS/.sup subtitles, Play and convert PGS subtitles

This article will give you tips and tricks about Blu-ray subtitles format, as well as the way to convert and play .sup/pgs subtitles.


What is .SUP file format?
The .sup file extension stands for subtitle bitmap image extracted from a Blu-ray movie; it contains subtitle text graphics that are displayed during movie playback. The .sup subtitles are encoded with PGS codec, and sometimes known as PGS subtitles. It can be used for adding DVD subtitles to movies with authoring programs such as IfoEdit.

Convert a .sup subtitle to .srt, .ssa, .sub etc
SUP files can be converted to plain text using Optical Character Recognition programs such as SupRip. (Guide- convert .sup to .srt)

Which players support .sup subtitles?
Blu-ray Players and some HD Media Players (e.g. WD TV Live Hub, Netgear NeoTV 550 Ultimate HD Media Player)

How to extract .sup subtitles from a Blu-ray Disc?
Rip Blu-ray to BDMV /MKV/ISO and use tsMuxer to demux the Blu-ray structure (Guide- extract .sup subtitles from .m2ts).

How to convert .sup subtitles when ripping a Blu-ray Disc?
ByteCopy is a by far the exclusive Blu-ray ripper that converts .sup subtitles to .sub when ripping Blu-ray to MKV.

More topics:

Wednesday, March 5, 2014

Blu-ray Disc Encryptions: Regions and BD Region Hack

If you would like to watch Blu-ray disc without region limitation, this article below the definition region codes and how to bypass the blu-ray region codes built into their BD players
What are Blu-ray Disc region codes? 

Region codes place geographical restrictions on where in the world a Blu-ray movie can be played. For example, a BD system bought in the USA region would play only Blu-ray movie disks with that area’s encoding.

Why are there BD region codes?
The purpose of region codes is twofold. First, it allows regional pricing to be affected by the movie studios. Since pricing will be very different around the world, the system prevents home users importing home movies bought overseas at a lower price. Secondly, it allows the control of regional release of movie titles. Often, for instance, Hollywood films are available to buy on disk in the USA and Europe before other parts of the globe. With regional encoding, the studios can prevent unlicensed movie imports so giving distributors around the world control of supply.

The region codes are entirely voluntary on the part of the studios releasing the disks, and Blu-ray movie releases need not have any region code, so called “region free” releases. If a Blu-ray movie is region free, it can be played on all systems regardless of region. Interestingly, many early releases of Blu-ray films were region free.

Blu-ray Disc regions: Region A, Region B, and Region C
The world is divided into three regions by the BDA (Blu-ray Disk Association): Region A, Region B and Region C. The following map shows the regions as defined.


A: East Asia (except Mainland China and Mongolia), Southeast Asia, the Americas and their dependencies.
B: Africa, Southwest Asia, Europe (except Russia), Oceania and their dependencies.
C: Central Asia, East Asia (Mainland China and Mongolia only), South Asia, central Eurasia and their dependencies.

Blu-ray Region Hack/Crack/Bypass
In any case, many people are trying to work out how to bypass the blu-ray region codes built into their BD players, but there are rarely successes. But there are another way to play Region A blu-ray discs on Region on B/ C BD players and PS3: Use BDMagic to rip commercial blu-ray discs to remove the regions, and play the unprotected blu-ray movie from hard drive. Blu-ray players and PS3 boxes support playback of M2TS, MP4, AVI, MKV, MOV, etc.

More reviews:

Movies and TV Series coming out on Blu-ray at March 2014
New Movies coming out March 2014 List with Release Dates
How to Backup new released DVD discs on Windows 8.1/8 

Tuesday, March 4, 2014

For Nexus Fans: Rip and Enjoy/Watch/Play DVD discs/movies on Nexus 7 and Nexus 7 (2013)

This step-by-step guide reveals how to rip and put your favorite DVD movies to Google Nexus 7 and Nexus 7 (2013) best video format keeping HD video quality for freely enjoyment on the go.

The second generation Google Nexus 7 tablet contiinues with the tradition of the first to offer great specs at cost, which ballooned the Android tablets market share, chipping away at the archrival's iPad domination. The 2013 iteration of the Nexus 7 comes with the record for a tablet 323ppi pixel density, quad-core processor, 2 GB of RAM and 5 MP camera on the back, all for the low starting price of $230, cementing its place in the tablet hall of fame. Beautiful 1920×1200 HD resolution display. Updated hardware design makes it the perfect machine for watching videos, just like the old Nexus 7.


If you have a large DVD movie collection, it should be such a cool thing to enjoy them on Nexus 7 and Nexus 7 (2013) anytime and anywhere. In this article, I will share the way to get your DVD movies onto Neuxs 7 and Nexus 7 (2013) while keeping original high quality. To get the work done, you need to get some help from third-party softwares. Here, this professional DVD to Nexus Converter is just designed to help you convert DVD movies to Nexus 7 and Nexus 7 (2013) MP4 for playback. With its clean interface, fast converting speed and good video quality, converting DVDs to Nexus will be simply finished within a few clicks.

Download a trial version here. The Mac version is DVDAid for Mac.

FYI: If you want to keep all the audio tracks (language) and soft subtitles, here's another choice for you: Blu-ray/DVD Converter Pro.

3 Steps to Rip  DVD movies to Nexus 7 and Nexus 7 (2013) support video format

Step 1. Run this Top DVD Ripper, as the DVD to Nexus  Converter. Click "Load Disc" to load your DVD movies into it. 

Pavtube DVD Ripper will detect and list the main title (the full length of this movie) and check it by default. So just keep it untouched and let's move on to Step 2. 


Step 2. Select Google Nexus 7 and Nexus 7 (2013) compatible format.

Here we select MP4 with H.264 codec for Nexus 7 and Nexus 7 (2013). Click the Format drop-down list, and select “Google Nexus 7 H.264 Video (* mp4)" from "Android" category.


Tips: Customize video specs. (Optional)

Click "Settings" to free choose output video size, bitrate, frame rate and other specs. Remember the file size and video quality is based more on bitrate than resolution which means bitrate higher results in big file size, and lower visible quality loss.

According to my experience, for watching DVD movies on Nexus 7 and Nexus 7 (2013), 1080p with 1500~2500kbps is just all right.

Step 3. Start the DVD to Nexus conversion.

When everything is OK, just press the "Convert" button to start the DVD video to Nexus MP4 conversion. It will not take much time. Just wait for the conversion process to get done. After the conversion, you can click "Open output folder" to quick locate the converted video.

Once get the converted videos, just copy and dump them to Surface via USB. Then you are ready to play DVD movies on Nexus 7 and Nexus 7 (2013) freely.

Tip:

If you are looking for a powerful all-in-one ultimate video converter software to convert various 1080p/720p videos, Blu-ray and DVD movies to your tablet or phone for enjoying, simultaneously saving time and effort, the Blu-ray Video Converter Ultimate program will be a nice choice for you. If you are running a Mac OS X computer, iMedia Converter Mac is the alternative.

You may also want to read:

How to copy videos and movies to Google Nexus 7 (2013), Nexus 10 tablet? 
Convert DVD VOB to new Nexus 7 Android 4.3 tablet on Windwos and Mac 
How to Play AVI videos on Google new Nexus 7 (2013)? 
Google Nexus 7 2 playback MKV issues