Got the XAVC S recordings but failed in importing your Sony XAVC S files to Premiere Pro CC? Such similar questions often asked on some hot forums by most video lovers, right? Fortunately, today here let’s have a specific talking on the XAVC S workflow, would you like to join us?
‘I've seen this asked in various places however nobody from Adobe has addressed the issue so the result is a bunch of speculation from other users. Could someone from Adobe PLEASE tell us if there are plans to support Sony's XACV S codec in Premiere Pro CC and if so when we can expect to see this support added.’ That’s the emergency question asked by those Sony fans. Have you ever got the problems of working your XAVC S codec videos with popular NLEs, such as iMovie or Avid MC etc.?
While for the Adobe Premiere Pro CC, any good suggestions of working XVAC S codec movies with it? Here is the good news! In order to be able to transcode XAVC-S footage for editing in Premiere Pro CC with lossless quality, we here highly recommend you guys the Pavtube Video Converter for Mac, which we could also see as the prefessional XAVC S converting assistant that can help us a lot. It comes with very easy to use menus and produces very good quality conversions as well as bulk processing so you could load it with files and leave it alone to do the job.
More tips of converting XAVC S codec to MPEG-2 we can learn on this XAVC S assistant below:
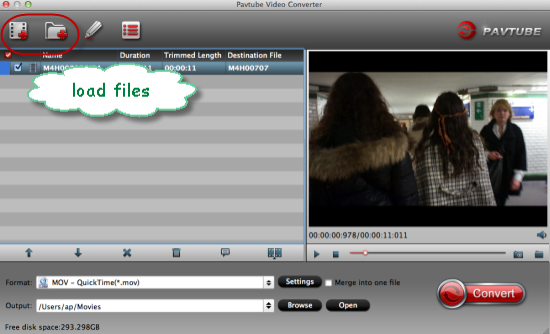
Step 1. Start up XAVC S Video Converter as a professional XVAC-S to MPEG Converter. When its main interface pops up, click ‘Add File’ to input your source media.
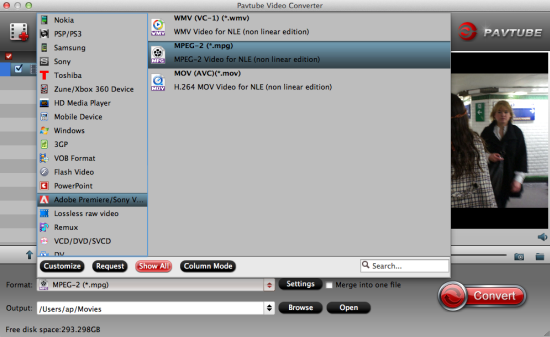
Step 2. Choose output format. This video converter offers optimized format preset for Adobe Premiere. Just click “Format” menu firstly and then follow “Adobe Premiere/Sony Vegas” to set ‘MPEG-2 (*.mpg)’ as the best output one.
Optional tips: If the default settings do not fit you requirement, you can click “Settings” icon to and enter the interface panel to adjust video size, bit rate, frame rate, sample rate and audio channels.
After the conversion, click this “Open output folder” to see your converted files. Then you can open your Premiere Pro CC and load them without any problem as the ordinary steps, ‘add files’… to make the work well. Just enjoy your XAVC S recordings after editing XAVC S videos in Premiere Pro CC.
More: