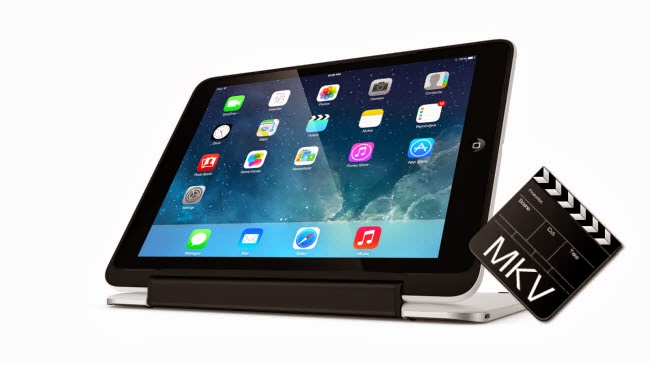
How to play 1080p/720p mkv movies on iPad Air? Please follow below simple steps to easily & quickly convert MKV to iPad Air support video formats for smoothly playback on Mac.The new iPad Air is a new model tablet released by Apple Inc. in 2013. It is only 0.29 in depth and about 1 pound in weight, very thin and light. Especially, it comes with Retina Display and 2048-by-1536 resolution at 264 ppi. What an amazing experence to carry with iPad Air for a commute and travel to watch 1080p/720p videos and movies!

According to Apple, however, iPad Air supported video formats are limited to .mp4, mov and m4v, which means there will be many videos in different file format can’t be played with this device. Then many movie fans may have the question: How can we watch MKV files on iPad Air with subtitles when we are out?
To accomplish this goal, the most effective way is to convert MKV to MP4 with best video settings for iPad Air. Now follow this article; you will learn how to change MKV to iPad Air with subtitles easily within a few clicks on Mac OS X system. For Windows users, the workflow is almost the same.
Preparation:
Here I'd like to introduce Pavtube iPad Air Video Converter for Mac, a very easy-to-use video to iPad Air converting program which comes with flawless video quality and quick conversion speed on Mac. Reach the Windows version here: iPad Air Video Converter.
(Both are 20% off now at Pavtube Christmas & New Year Huge Discount).
Tip 1:
If you have any requirements of outputting 3D (Side-by-Side, Top-Bottom, Anaglyph) in MKV/MP4/AVI/MOV/WMV formats, you are suggested to try this 20% off Video Converter Ultimate (Mac Verison: iMedia Converter for Mac)
Tutorials: Converting MKV to iPad Air friendly format on Mac
Step 1: Load video files to this Mac Video to iPad Air Converter
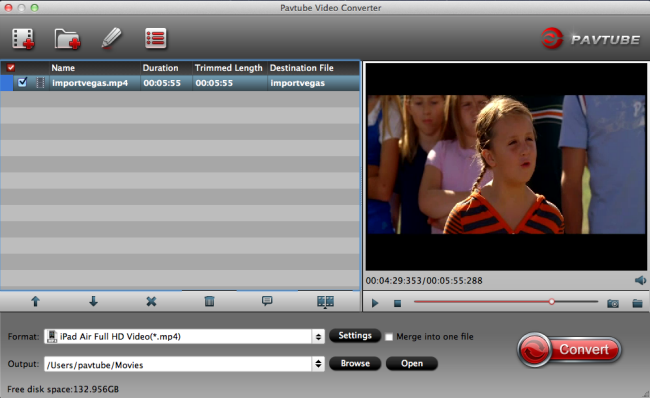
Download the Pavtube Video Converter for Mac on your computer, install and run the program, add videos. You can choose to import videos or the entire folder by clicking the top left two icons.

Tip 2:
From the drop-down list of Subtitles tab, choose the desired language you want to show in converted movie. You are allowed to choose audio track as well. (Read more: Subtitle FAQs)

Step 2. Choose a proper format for iPad Air.
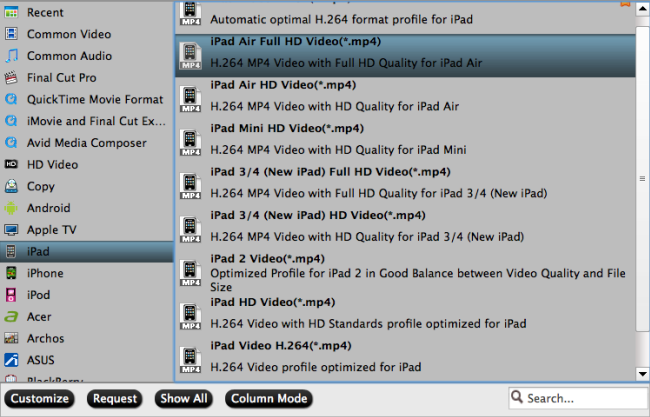
Click the "Format" drop-down list and select "iPad >iPad Air Full HD Video(*.MP4)" for iPad Air. Or you can choose other presets if you don't need full size videos. You can submit "iPad Air" in the search box at the bottom right corner.

Step 3. Customize video specs for iPad Air (Optional).
You could also click the "Settings" to adjust the video and audio parameters of output files.
In the Video Settings, you can select Encoder, Frame Rate, Resolution (you could define it yourself according to your iPad Air tablet) and Bitrate for your movie.
In the Audio Settings, you can select Encoder, Channels, Bitrate and Sample Rate for your movie.
Step 4. Start 1080p/720p MKV Videos to iPad Air Conversion.
You can hit the big red "Convert" to start converting MKV to MP4 with best video settings for iPad Air on Mac. After the conversion, click "Open output folder" in the conversion window, or "Open" in main interface to quick locate the converted video. Now, you can transfer these MKV to iPad Air on Mac for smooth playback without any problem. Enjoy your digital life!
Related Articles:
Put Blu-ray movies to iPad Air
Play DVD movies on iPad Air
Transfer Blu-ray ISO files on iPad Air
Rip DVD IFO Files to iPad Air for watching