Monday, October 24, 2016

Insert a movie clip into PowerPoint 2016 on Mac

PowerPoint presentations can be spiced up further by adding visual movies. Do you want to add a movie video file for your presentation to make it interesting and appealing? Whereas, in most cases, embedding MP4, MKV etc in PowerPoint will end in failure.

 
Microsoft PowerPoint, no matter PowerPoint version is 2016, 2013, 2010, 2007, 2003 or 2000, supports many kinds of video file formats, such as WMV, ASF, AVI, and MPG. However, it does not support many video file like MP4, MKV, H.265 etc. This is why when we tried to insert movie file into PowerPoint slide, only get error message "PowerPoint couldn't insert a movie from the selected file. Either the file is non-standard, or QuickTime is not properly installed." or evern successfully embed a movie in PowerPoint, but get a "Cannot play back the file. The format is not supported" message when you play the video during a presentation. Well, if you are looking for ways to embed and play movie in PowerPoint 2016, 2013, 2010, 2007, 2003, 2000 to PowerPoint, just read on.

To insert a movie to PPT without any hassle, we need to transform movie resource to PowerPoint WMV (with WMV8 codec), AVI (with some ancient codec) or MPG format, which are universal formats among all versions of PowerPoint firstly. To accomplish the task, you need to seek help from a PowerPoint Video converter that supports the movie input and WMV, AVI, MPG output.

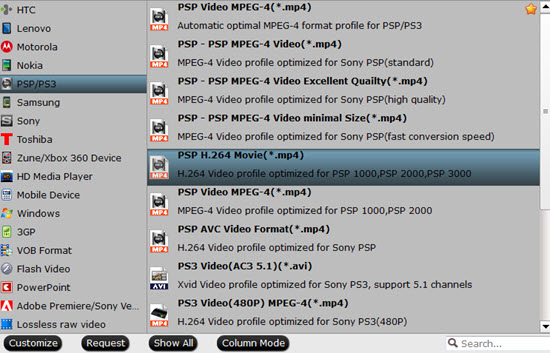
Here iMedia Converter for Mac is highly recommended to help you achieve your task. This program can help you easily and quickly encode unsupported movies to PowerPoint friendly WMV, AVI, ASF, and MPG (MPEG-1) to let you insert all movie into PowerPoint with ease. Besides, the built-in video editor lets you personalize your video. With it, you can also transform MKV, MP4, H.265, MOV, WTV, WebM, M4V, MXF, FLV, Blu-ray, DVD movies, etc to PowerPoint sensible formats. Besides converting movie to PowerPoint supported video format, the above powerful movie converter can also convert movie for playback on iPad, iPhone, Apple TV, Zune, Xbox 360, PSP, PS3, mobile phone and more, or import movie to Sony Vegas, Pinnacle Studio for editing. Enjoying movie and Saving movie files is just so simple.

If you insert a movie in PPT on Windows, turn to Pavtube Video Converter Ultimate. Now, please download the most suitable program according to your need and follow the corresponding tutorial.

Free download the video converter for PowerPoint (2016) 


Embed and Play movie in PowerPoint

1. Import files

First, launch the PPT converter. Click "Add video" button on the main interface to import movie files to the app. The Video converter supports batch conversion, so you can add a pile of videos to enjoy the fast conversion speed.


2. Choose your desired format

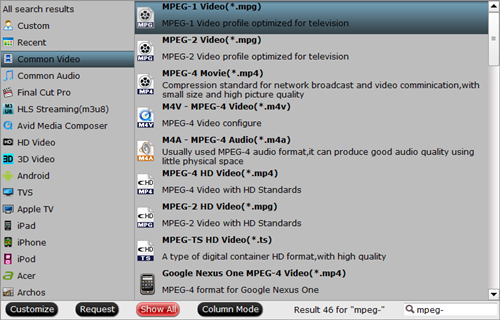
Now you should go to the Output Format drop-down list, choose "MPEG-1 Video(*.mpg)" as the output format on the Format > Common Video list.


Tip: Select right resolutions for output video

Press "Settings" button, a setting box will pop up, select wanted resolution or write your desired ones like "1920*1080" from the drop down list of "Size(Pix)". You may also select lower or higher resolution according to your specific needs.

3. Start conversion

After everything is ready, you should press the big, shiny "Convert" button to begin the video to PPT conversion. After the conversion, you will get the desired videos in the destination folder.

Read More: 

Wednesday, October 19, 2016

How to Play Canon C100 MTS videos on Windows Media Player?

Can Windows Media Player be able to play the Canon C100 MTS video files? You have probably tried this at some time. But strangely, MTS files work and some just don't seem to be playable on the WMP. Your guesses are right! How to slove Windows Media Player can’t play Canon C100 MTS footages?

The solution for you is to find a third-party tool to make everything easy. Pavtube Video Converter is one of the options. It's good because you can use it as a video converter to first turn all kinds of MP4 files with any codecs to Windows Media Player supported video format without quality loss. Using this best MTS to Windows Media Player converter, you can convert, play and edit Canon C100 MTS files and export videos in any other format including MKV, AVI, WMV, MOV, MPG, etc or popular personal devices like DVD Player, TV, etc. as you need. Now learn the guide how to re-encode Canon C100 MTS to Windows Media Player in detail. Mac version is here.

More features of the Pavtube Video Converter:
  • Convert Canon C100 MTS videos to Windows Media Player friendly format with zero quality loss. 
  • It supports to convert MTS/M2TS to 250+ video formats, including MOV, MP4, AVI, FLV, VOB, WMV, MKV, 3GP, M4V, etc. 
  • It allows you to edit your MTS or M2TS videos before converting to Windows Media Player with built-in editor. 
  • It helps extract audio files from your MTS/M2TS files, and convert audio format between any two formats. 
  • Fully compatible with macOS 10.12 Sierra, 10.11 El Capitan, 10.10 Yosemite, 10.9 Mavericks, 10.8 Mountain Lion, 10.7 Lion and 10.6 Snow Leopard. 
>> Tips about edit Canon C100 MTS with editors:
Canon C100 MTS to FCPCanon C100 MTS to FCPCanon C100 MTS to Premeire Pro/Sony Vegas Pro 

Free download the MTS to Windows Media Player video converter:


Other Download:
- Pavtube old official address: http://www.pavtube.com/video_converter/
- Cnet Download: http://download.cnet.com/Pavtube-Video-Converter/3000-2194_4-75734821.html
- Softonic Download: http://pavtube-video-converter.en.softonic.com/

Turn Canon C100 MTS to Windows Media Player Video Formats

Step 1. Add Canon C100 MTS files

Run the best Canon C100 MTS to Windows Media Player Converter; click the "Add video" button to import the Canon C100 MTS video to it. This ideal app also supports drag and drop function.


Step 2. Choose a Windows Media Player supported format

Click the "Format" drop-down button to select WMP supported WMV, ASF as output profile from "Common Video" or "HD Video" Category.


Tip- Video/Audio Settings: You can also click "Settings" icon to and enter "Profile Settings" panel to adjust video size, bit rate, frame rate, sample rate and audio channels.

Step 3. Start Canon C100 MTS to Windows Media Player conversion

Hit the "Convert" button at the bottom right corner to start and finish encoding/re-encoding MTS to Windows Media Player more supported format WMV, ASF. After the conversion, click the Open button to get the resulted video. Now, you can successfully load and play MP4 in Windows Media Player (11/12) without any issue.

Read More: 

Monday, October 10, 2016

How to Import QuickTime projects to iMovie on Mac?

If you want to import a QuickTime movie file into iMovie on your Mac, you may soon realize that the video editing application does not support the standard MOV QuickTime file format. You can, however, import a QuickTime file into iMovie by first using one converter to convert the file to a compatible format, then importing that file into iMovie.

In fact, this is not difficult if you have a professional assistant: Pavtube Video Converter for Mac which can do the most of work for you so that you only need do come clicks. Use it, you can adjust your QuickTime projects to iMovie friendly formats on Mac easily.

Features the Best QuickTime to iMovie Video Converter:

  • Simple clicks to help convert QuickTime videos for editing on iMovie with 99% high quality. 
  • You can also edit and compress your QuickTime videos before converting to iMovie formats. . 
  • Convert QuickTime video, iPhone video and other MP4, MKV, AVI, H.265, XAVC, MTS/M2TS etc to iMovie supported format. 
  • Extract audio from your QuickTime or iMovie videos to MP3, WAV, M4A, AC3, AAC, WMA, AIFF, etc. 
  • Combine several QuickTime videos into one iMovie file for batch convertsion. 
  • Compatible with macOS 10.12 Sierra, 10.11 El Capitan, 10.10 Yosemite, 10.9 Mavericks, 10.8 Mountain Lion, 10.7 Lion and 10.6 Snow Leopard. 
Free download the QuickTime to iMovie Video Converter for Mac:


Other Download:
- Pavtube old official address: http://www.pavtube.com/video-converter-mac/
- Cnet Download: http://download.cnet.com/Pavtube-Video-Converter/3000-2194_4-76179460.html
- Top4download.com: http://www.top4download.com/pavtube-video-converter-for-mac/iujpttsg.html

Start Converting QuickTime Videos to iMovie Supported Format

Step 1. Locate QuickTime files into the Mac converter

Just directly drag and drop the QuickTime files to the Mac program, or click the "Load Files" in the "File" menu to add the source QuickTime files.


Step 2. Choose "Apple InterMediate Codec (AIC) (*.mov)" for your iMovie

Click format bar to choose the output format, for editing Canon MXF files on iMovie, you can choose "iMovie">" Apple InterMediate Codec (AIC) (*.mov)".


Step 3. Start QuickTime to iMovie conversion on Mac

Click the "Convert" button, and then leave the Mac Video Converter to do the rest. The converter also works on MacBook, MacBook Pro, MacBook Air, iMac. What's more, if you have something emergency and have to leave from your Mac, you can set the Mac converter to shut down your Mac automatically after the QuickTime video to iMovie Mac conversion.

Importing into IMovie
Step 1. Launch iMovie and open the "File" menu.
Step 2. Click on "Import" and select "Movies."
Step 3. Locate the video file on your hard drive by using Finder. If a new window labeled HD Import Setting pops up on your screen, select either "Large" or "Full" and click on "OK."
Step 4. Select the hard drive partition to which you wish to save your video file and click on the "Save" button.
Step 5. Click on "Add to an existing event" and select the event from the drop-down menu. Alternately, you can create a new event by clicking on "Create new event" and entering a name.
Step 6. Activate the check box next to "Optimize video" if you are importing a high-definition movie file.
Step 7. Select either "Copy file" or "Move file" and click on "Import" to finish importing the QuickTime file. While the "Copy file" option will leave the exported file on your hard disk once the importing process is complete, the "Move file" option will instruct iMovie to delete the exported file after it has been successfully imported.

Read More: 

Saturday, October 8, 2016

Compress GoPro Hero5 Black/Session 4K to 1080p HD on Mac/Windows

The GoPro Hero5 includes GoPro Hero5 Black & GoPro Hero5 Session. Its video recording: Video 4k@30fps,1440p@80fps, 1080@120fps with video stabilization. Though 4K is so popular, there are still tons of stuff needed to be completed in 1080P full HD, like video playback and editing. In this case, while you are scrambling to experience the high definition 4K videos. So here we talk about how to compress GoPro Hero 5 4K video to 1080p HD video on Mac/Windows easily with you.


Is There Any Tool to Compress/Convert GoPro Hero5 4K?

To convert and reduce GoPro Hero 5 4K video to 1080P, you need a 4K video converter at the first place. There are a dozen of 4K video converters in the market and most of them claimed that they are the fastest, but it is usually just advertisement, not the fact. Here according to the feedbacks of dozens of users, they unanimously recommend the award-winning 4K video compressor - Pavtube Video Converter for Mac (or Windows Version). Why this video converter for 4K wins so many users' favor? That's because:

Pavtube Video Converter for Mac provides you with all the bells and whistles you are looking for in a 4K video converter program. It is compatible with macOS Sierra, Mac OS X 10.11 El Capitan, Mac OS X 10.10 Yosemite, 10.9 Mavericks, 10.8 Mountain Lion, 10.7 Lion, 10.6 Snow Leopard, 10.5 Leopard. See, it can perform well as a video converter to convert 4K to 1080P video, 4K to HD 720P video, 1080P to 720P video and upscale 1080p to 4K with 98% quality reserved with world's fastest speed (6X faster than other converters), thanks to its inherent High Quality Engine, multi-core CPU (up to 8) utility, hyper-threading tech and Intel QSV hardware acceleration tech.

In addition, this No.1 4K to HD 1080P video converter can also downsize 4K to 1080P video formatted with various formats like H.265, MP4, MOV, AVI, MKV, MTS, AVCHD, MP3, AAC, etc. so as to smooth playback on iPhone 7/6s/6s Plus/6/6 Plus, iPad mini 4/Air 2, Samsung, HTC One M9, Sony Xperia Z5, Surface Pro 4, PS4(Pro), PS3, Xbox One, etc. with 350+ profiles offered. (read review)

Related search: play GoPro hero5 4K on mac ǀ GoPro Hero 5 4K to FCP X ǀ GoPro Hero5 4K videos to YouTube 

Download and get the best GoPro Hero5 4K Video Converter:


Guide: How to downscale/convert GoPro Hero5 Ultra HD 4K to 1080p

Step 1. Load Source Video Launch the 4K to 1080p Converter; click "Add Video" and load your 4K HD files. This program supports batch conversion, so you can add multiple files into it at a time.


Step 2. Decide Output Format Click the "Format" drop down list to select MP4, MOV, MKV, AVI, etc format from "Common Video" as you want. Since this video converter also provides optimal profiles for kinds of editing programs and media devices, you can also select a proper format that best meets your needs.


Step 3. Set Video Resolution at 1080p Click "Settings" button; you can adjust video and audio settings, including codec, aspect ratio, bit rate, frame rate, sample rate, and audio channel. To down-convert ultra HD 4K to 1080p, do remember adjusting video size to 1920*1080. That is the exact 108p.


Step 4. Start GoPro Hero5 Black/Session 4K to 1080p Conversion. Hit "Convert" button to let the 4K HD to 1080p conversion begin. When the conversion finished, check the generated 1080p video, you will certainly be satisfied with its final video quality. It would be easier for you to playback and edit.

Read More: 

Additinal Knowledge: 

1. 4K resolution- Wikipedia: The name "4K resolution" refers to a horizontal resolution of approximately 4,000 pixels.

2. High-definition video - Wikipedia:High-definition video is video of higher resolution and quality than standard-definition. While there is no standardized meaning for high-definition, generally any video image with considerably more than 480 horizontal lines (North America) or 576 horizontal lines (Europe) is considered high-definition.

Monday, October 3, 2016

How to play a YouTube video in VLC media player?

If you want to watch YouTube Videos on your VLC Media Player then it possible to watch it on VLC Media player. You get advanced controls which you don’t get on YouTube video Player or while watching YouTube videos online. You can also correct MRL errors which are shown when you try to play YouTube Videos on you VLC Meda Player.

VlC Media Player can do lot of things while viewing these online videos. YouTube video player provides minimum control while watching videos on it, but with VLC you can use all possible features available in it. It’s also good, if you don’t want to view those unnecessary video recommendations, comments and advertisements in the sidebar which is associated with your video and if you are looking for a YouTube player alternative then VLC Media Player is the best option for you.

Sometimes when you try to play YouTube Videos online then you get some type of errors known as MRL error, http error, Decoding error or SMTP error and other errors. These errors are usually shown if you dont have an online streaming file of YouTube which is very essential for any YouTube video and by adding these file you can play your all Videos of YouTube on your Vlc Media Player. So let’s get started with this trick in 2 Methods:

How to Play YouTube Videos on VLC without any Errors:

Method 1 
  • Download and Install VLC Player. 
  • Open your VLC Media Player. 
  • Click on Tools and select Preferences from the toolbar. 

  • In the next window, at the bottom select All from Show settings section. 
  • When you click on All, you’ll see all hidden settings. 
  • From the list click on Input/Codec. 


Next, in Input/ Codec section, find Preferred video resolution and from the drop down list Select video resolution which depends on your internet speed.


  • Click on Save to save the settings. 
  • Now to watch any YouTube video, go to YouTube.com and simply drag the video OR the video URL to your VLC player and Click on Play button of VLC. 
  • Wait until it loads and starts to play. 
Method 2 

If this method doesn’t work then you can try:
  • Open your VLC Media Player. 
  • Now Go to Media → Open Network Stream and paste the desired YouTube video URL 


Now Hit Play.

Tips: How to Solve can’t play downloaded YouTube videos on VLC

There are plenty of tools for converting YouTube videos, and VLC Media Player is one of them (but VLC only support few video formats). With its latest update, though, VLC can also simply play YouTube videos when you paste in a YouTube URL. But sometimes you can’t play downloaded YouTube videos on VLC. Why? Because the video format/codec is not friendly with VLC. So you can use Pavtube Video Converter to convert your downloaded YouTube videos to VLC best played format like H.264 MP4. It can convert various videos like H.265, MKV, AVI, MP4, MOV, MEG, MPEG, XAVC, XAVC S, MXF, MTS, M2TS etc to VLC supported formats. (Mac version - Pavtube Video Converter for Mac).

Hot search: H.265 to VLCFLV to VLCMOV to VLCAVI to VLCMP4 to VLC


Other Download:
- Pavtube old official address: http://www.pavtube.com/video_converter/
- Cnet Download: http://download.cnet.com/Pavtube-Video-Converter/3000-2194_4-75734821.html
- Softonic Download: http://pavtube-video-converter.en.softonic.com/

Change YouTube videos to VLC media player supported format

Step 1. Add videos

Install and run the Video to YouTube Converter on your computer, then click "Add Video" button to browse and load your rvideos which you've transferred to your Windows PC.


Step 2. Set right output format. Click "Format" bar, and select .mp4 from "Common video" or "HD video" to fit VLC.


Tips: The default settings may not satisfy you, and you can click the "Settings" button to change the settings by yourself including video resolution, bit rate, audio sample rate, audio channel etc. for full screen playback smoothly. Or keep no changes, which is also a good choice.

Step 3. Click the "Convert" button on the main interface and the software will start to convert YouTube video to VLC friendly video formats immediately. When the conversion finishes, click "Open" to find the converted video files. Then you can effortless transfer the video files to VLC for playback easily.

Read More: 

Friday, September 30, 2016

100% Working - Fix AC3 Audio Format Not PlayedError in MX Player

Due to some licensing issues the official MX player has removed some of its codecs like AC3, DTS, MLP, etc. When you play your favorite videos you get an error Audio format (AC3) is not supported. It means only video will be played not the Audio. But It doesn’t means you should delete the video or uninstall the Application. You can not uninstall MX Player for one simple problem that will take hardly 2 minutes to solve. A question will come in your mind How to Fix AC3 Audio Format not supported error in MX Player ?

When you see such an error while playing your video in MX player that means the required codec to play such format is missing and you need to download the righr codec or convert your AC3 audio to MX player supported MP3 audio for MX Player.

Method 1. Installing custom codec in MX Player
  • Download All In One custom codec pack from XDA 
  • Save the AIO codec zip file in the root directory (main location) of your device 
  • Open MX Player app 
  • Go to Settings >> Decoder >> Custom Codec 
  • Browse to the folder where the zip file is located and select it. 
  • MX Player will automatically load the right codec from the AIO zip file 
  • Go to Help >> About 
  • Check whether the new custom codec is loaded or not 
  • Now open the video file and you should get the audio back with no AC3 format error. 
Method 2. Converting AC3 to MX player supported MP3/AAC format

In order to quickly solve MX Player play AC3 issues , you can also encode MX Player unsupported AC3 to MX Player more compatible AAC/MP3 format with a professional audio/video converter. Pavtube Video Converter (Pavtube Video Converter for Mac) will give you a massive number of input and output options. It is easy enough and you can get AC3 working with MX Player in minutes even if you don't have much experience with computers or MX player technology.

It not only makes it fast and easy to solve this problem by converting AC3 audio to AAC/MP3 audio that can works on MX Player, but also has the feature of converting other audio files AIFF, WAV, M4A, 3GA, WMA, CAF, DTS, APE, VOC, AMR, QCP, MP2, M4R etc and any videos like SD, HD, 4K XAVC, MXF, MOV, MP4, H.265 etc to MX Player supported audio format effortlessly.
Free download the best AC3 to MX player converter:


Other Download:
- Pavtube old official address: http://www.pavtube.com/video_converter/
- Cnet Download: http://download.cnet.com/Pavtube-Video-Converter/3000-2194_4-75734821.html
- Softonic Download: http://pavtube-video-converter.en.softonic.com/

User guide to Convert AC3 to MX Player compatible formats for Playback

Step 1: Add AC3 files to the program.

Click "File" button to load your source AC3 audio files or video files with AC3 audio. The converter supports batch conversion, so you can add multiple files into it at a time.


Step 2: Choose output video file format.

Click the "Format" bar, from its drop-down list, choose one of MX Player supported video format such as avi, wmv, mp4, mkv, mpeg, mov, vob, divx, xvid, 3gp, mkv, flv, webm, etc to output. Or directly select "AAC - Advanced Audio Coding(*.aac)" or MP3 format from "Common Audio" which are all supported by MX Player.


Step 3: Click "Settings" to open "Profile" settings window, in "Audio" section, click "Codec" drop-down list, select MX Player playable AAC codec to output.

Step 4: Start the conversion.

Click the "Convert" button at the bottom-right corner of the interface to convert the AC3 file to MX Player. Once the conversion is finished, you will be able to get the output files via clicking on "Open" button effortlessly. Now you can enjoy the converted files to MX Player.

Read More: 

Monday, September 26, 2016

Best PS Vita Converter - How to Convert Video to PS Vita

The PlayStation Vita (officially abbreviated PS Vita or Vita) is a handheld game console developed and released by Sony Interactive Entertainment. It is the successor to the PlayStation Portable as part of the PlayStation brand of gaming devices. It takes your gaming experience to a whole new level with its 5" OLED touch screen, quad-core GPU SGX543MP4+, 2Ghz quad-core ARM Cortex-A9 MPCore processor and other great features. It can also function as a portable media player that allows you to watch videos on it. But not all videos are supported by PS Vita. So, we have to know the best video format for PS Vita, the following article will show you the right thing.

PS Vita supported video formats:

MPEG-4 Simple Profile Level 3, Maximum 320×240 pixels, AAC
H.264/MPEG-4 AVC Baseline/Main/High Profile Level 3.1, Maximum 720p, AAC

Music supported audio formats:

MP3 MPEG-1/2 Audio Layer 3, MP4 (MPEG-4 AAC), and WAVE (Linear PCM)

As you see, PS Vita only supports some video and audio formats. So sometimes you can’;t play your videos or movies on PS Vita smoothly. In this case, you need one professional PS Vita video converter.

Best PS Vita Video Converter - Converting unsupported video to PS Vita supported video

Pavtube Video Converter is an all-sided video converter available to convert any SD/HD/4K videos to PS Vita best supported video/audio format on Windows (10/8/7/XP) in a few clicks. With it, you can convert high definition videos into VOB, AVI, MP4, H.265, 3GP, MKV, M2TS, WMV, FLV, MOV, MPG and other formats for playback on PS Vita. This is a complete video toolbox that converts, edits, in more than 250 formats. With Pavtube Video Converter, you can convert videos at speeds of over thirty times faster than other converters. If you are a Mac user, you can get Pavtube Video Converter for Mac.
  • Convert any video to PS Vita like MP4 to PS Vita, MKV to PS Vita, AVI to PS Vita, H.265 to PS Vita, MOV to PS Vita, 4K to PS Vita etc. 
  • Convert any audio to PS Vita like MP3 to PS Vita, WMA to PS Vita, WAV to PS Vita, AIFF to PS Vita, FLAC to PS Vita, AAC to PS Vita, AC3 to PS Vita, M4A to PS Vita, APE to PS Vita, etc. 
  • Convert any video or audio format to portable devices like PS Vita, PSP, PS3, PS4, PS4 Pro, iPhone, iPod, iPad, Blackberry Phones, Samsung, Zune, Xbox, etc. 
  • Powerful media player: built-in media player can open any video or audio file. 
  • Convert video or audio recorded by any camcorders or cameras or mobile phones to PS Vita. 
  • Batch conversion and super fast conversion speed.
>> Hot search: MKV to PS Vita ǀ AVI to PS Vita ǀ MP4 to PS Vita

Free download the PS Vita Converter for Windows:
 

Free download the PS Vita Converter for Mac:
 

How to Convert videos to PS Vita friendly video for smooth playing?

Step 1. Click "Add video" button to add your video files to the program. Or directly drag the video you want to convert to the left item bar.


Step 2: Choose compatible format for PS Vita.

PS Vita supports similar video formats as PSP, so you can click the format bar and choose "PSP/PS3">"PSP H.264 Movie(*.mp4)"


Tips: The default settings may not satisfy you, and you can click the "Settings" button to change the settings by yourself including video resolution, bit rate, audio sample rate, audio channel etc. for full screen playback smoothly. Or keep no changes, which is also a good choice.

Step 3. Click the "Convert" button on the main interface and the software will start to convert video to PS Vita friendly video formats immediately. When the conversion finishes, click "Open" to find the converted video files. Then you can effortless transfer the video files to PS Vita for playback on the go.

How to Transfer Video to PS Vita

It’s easy to transfer videos to PS Vita. First, the Content Manager Assistant should be installed on your PC and running. You’ll know if the app is running by looking at the icon for Content Manager Assistant in the taskbar’s notification area.

Tap Content Manager on the PS Vita system then click Start. Click PC and then USB cable or Wi-Fi. If you want to connect through Wi-Fi, you have to option for connecting the PS Vita system through Wi-Fi. This can be found in the Content Manager Assistant. You also need to register the PS Vita system with your computer.

Click PC. Next, click PS Vita System. Then, click Videos choose the videos you want to transfer. Check the videos you’d like to transfer then click Copy. You can also use the same method to move your music files to PS Vita.

Related Software:

If you want to rip DVD and Blu-ray movies into PS Vita for playing, you can use Pavtube Video Converter Ultimate/iMedia Converter for Mac to rip DVD/Blu-ray to PS Vita supported .mp4 video for nice playing. Enjoy.

Read More: