Sunday, June 12, 2016

Get Cheapest Pavtube Video Converter Ultimate on 2016 Father’s Day

Have you prepared the Father’s Day gift for your dear Dad? If not, Pavtube gives you the best idea. You can record the happy time with your father and add your thanks in the video using a video editing program. Then show the love video to your daddy. To release the idea, Pavtube Studio prepares 2016 Father’s Day Facebook Special Offer where you can get the best tool to help you achieve the video produce. 


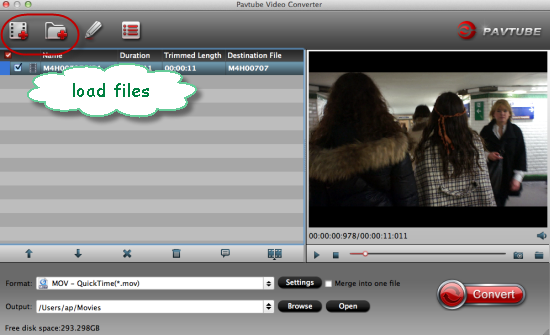
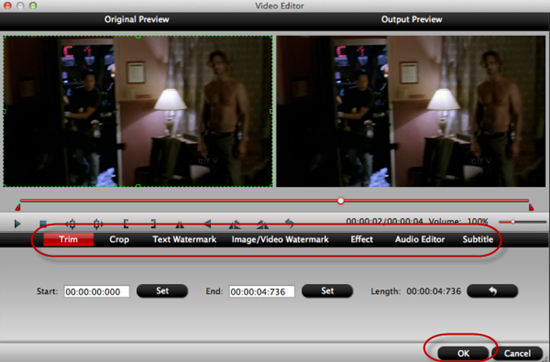
Pavtube will offer you the professional and top-rank Video/BD/DVD software at a lower price than ever in the Father’s Day promotion activity. The top all-in-one Video/Blu-ray/DVD Converter tool is Pavtube Video Converter Ultimate <Mac version>. This program helps you convert your shoot to iMovie, FCP, Premiere Pro CC, etc to edit and rip DVD/Blu-ray movies about fathers to your Premiere Pro CC, CS6, CS5, etc supported digital files. You even can trim a video footage in movies with them to add your own thanksgiving record. 

More Features of Pavtube Video Converter Ultimate do? 

1) 1:1 Backup Blu-ray/DVD without region code or protection limit in two clicks.  

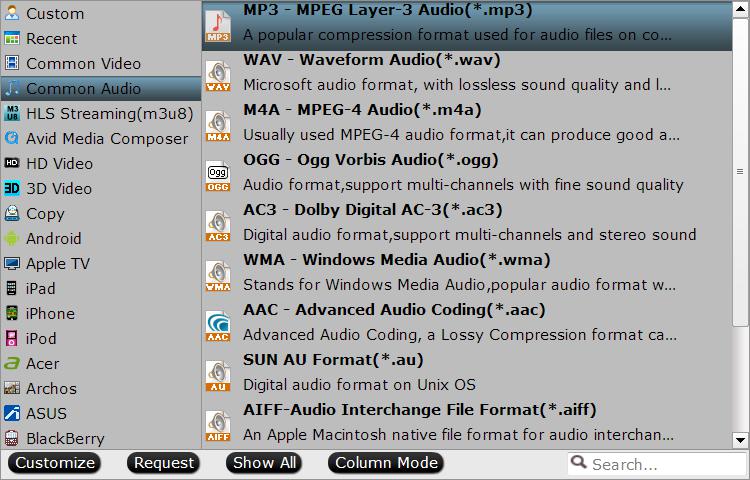
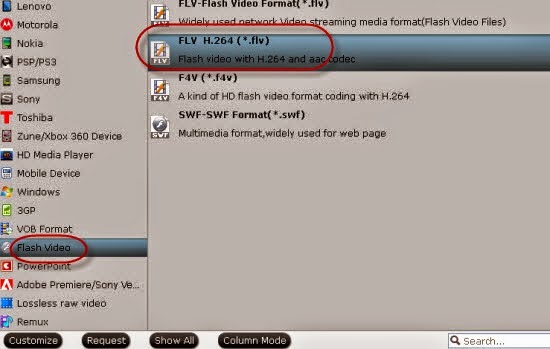
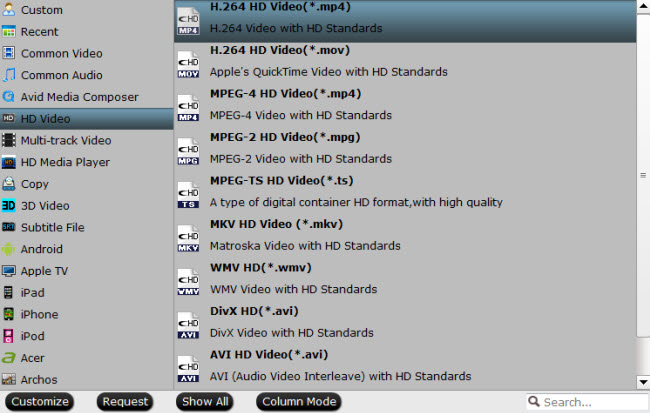
2) Rip Blu-ray/DVD into H.265/HEVC, M3U8, MP4, Apple ProRes, DNxHD, MOV, M4V, MOV, MKV, AVI, Xvid, Divx, VOB, MPEG-2, SWF, FLV... for playback on smartphone, tablet, TV set, HD media player, streaming server, Hard drive, Game console, etc.  

3) Convert Canon/Sony/Panasonic/Nikon/JVC/Blackmagic/Red One shooted H.265, XAVC, XAVC S/L, MXF, MOV, AVCHD, AVI, MP4, VOB footage into common video formats, so you can watch or edit them on PC/Mac.  

4) Compress 4K to 1080P, 720P and allows you to adjust video/audio bitrate, frame rate, codec, sample rate to get more compatible video for Apple TV 4Amazon Fire TV (2015)VLCPC

5). Pavtube Video Converter Ultimate is fully compatible with Windows 2003/XP/Vista/Windows 7/Windows 8/Windows 8.1/Windows 10 while the Mac version supports Mac OS X 10.11 El Capitan, Mac OS X 10.10 Yosemite, 10.9 Mavericks, 10.8 Mountain Lion, 10.7 Lion, 10.6 Snow Leopard, 10.5 Leopard. 

If you want to know more the function of Pavtube Video Converter Ultimate, just read its review 

Now get Pavtube Video Converter Ultimate for Windows/Mac below: 


Once you have a Pavtube product in hand, you will enjoy the service of life-long technical support and update in time to compatible with any Win/Mac system upgrade. Catch this opportunity and enjoy the best video production experience with the least money in Pavtube. 

This Pavtube Father’s Day promotion coupon will expire on June 26th 2016. Once the campaign ends, the price will go back to the original $65. But you still can get some discount on Pavtube Software Bundles in daily life. The software bundles with the discount on Pavtube Video Converter Ultimate includes: 

ByteCopy($42) + Video Converter Ultimate($65) = Only $79.9, Save $27.1 
Video Converter Ultimate($65) + DVD Creater($35) = Only $64.9, Save $35.1 
Video Converter Ultimate($65) + ChewTune($29) = Only $74.9, Save $19.1 

User Guides: 


Src: http://i-loveshare.com/pavtube-fathers-day-deal/ 

Sunday, June 5, 2016

Can’t Import Sony Cyber-shot DSC-RX10 III 4K videos to Avid Media Composer?

The Sony Cyber-shot RX10 III boasts a 24-600mm equivalent F2.4-4 zoom lens, 14 fps continuous stills shooting and 4K video capture. When you get some 4K recordings (4K XAVC-S/4K AVCHD/MP4) by Sony Cyber-shot DSC-RX10 III, say, captured with your Sony Cyber-shot DSC-RX10 III you will find the 4K files are nothing when you try to import them to Avid Media Composer, they will not show in the window. So, what is the best workflow to edit Sony Cyber-shot DSC-RX10 III 4K video files in Avid Media Composer so that you can publish them onto the web like OneDrive, Facebook, Vimeo, YouTube, and Flickr and share them with family and friends? Keep on reading.

Avid Media Composer is a helpful tool for users to make their home movies freely, however supported formats of this free editing software are limited. Unluckily, 4K XAVC-S/4K AVCHD/MP4 from Sony Cyber-shot DSC-RX10 III are still not an ideal editing codec for Avid Media Composer. To ensure successfully importing the Sony camera 4K videos to Avid Media Composer for editing, what you need to do is to resort to a 4K video converter to convert Sony Cyber-shot DSC-RX10 III 4K XAVC-S/4K AVCHD/MP4 video files to Avid Media Composer friendly video formats.

Here the award-winning Pavtube Video Converter cut the buck at this point, letting you convert Sony Cyber-shot DSC-RX10 III 4K videos to Avid Media Composer compatible formats so as to import 4K video files or other [url=http://pc-mac-compatibility-issues.blogspot.com/2013/05/Import-MXF-to-Avid-Media-Composer-with-best-MXF-Converter.htmlMXF[/url], MP4, MOV etc to Avid Media Composer on Windows 10/8.1/8/7/XP/Vista with incredible fast speed. In addition, this also works as a wonderful Player with high compatibility. Better still, it supports compress big 4K video files to smaller ones, join several video into one, split video file, adjust bitrate/frame rate/size/codec, change audio channel and more for experience. For Mac users, Pavtube Video Converter for Mac is the alternative choice. (read review)

Below demonstrates a workaround to transcode Sony Cyber-shot DSC-RX10 III 4K video to Avid Media Composer friendly formats.


Other Download:
- Pavtube old official address: http://www.pavtube.com/video_converter/
- Amazon Download: http://download.cnet.com/Pavtube-Video-Converter/3000-2194_4-75734821.html
- Cnet Download: http://download.cnet.com/Pavtube-Video-Converter/3000-2194_4-75734821.html

Convert Sony Cyber-shot DSC-RX10 III 4K XAVC-S/MP4/AVCHD for editing in Windows Movie Maker

Step 1. Import Sony Sony Cyber-shot DSC-RX10 III 4K files

After downloading and installing the 4K Converter, run the program following the direction. The similar interface as below will appear, press "Add Video " button to import your sony videos copied on hard drive to the program. Since batch conversion is allowed, you can import multiple files to the Converter and convert them at one go.


Step 2: Click format column to Choose Avid Media Composer-> Avid DNxHD(*.mov) as output format for Avid Media Composer 8, 7, 6, 5, etc..


Tip: Adjust the video and audio parameters as the below screenshot, including the Bitrate of Video & Audio, Video Size, Sample Rate, Frame Rate, Audio Channels, etc., by clicking the "Settings" button on the main interface for getting the best quality before starting conversion.

Step 3: Tap the "Start conversion" button at the bottom right corner to start transcoding MP4 to DNxHD for Avid Media Composer. After the conversion, you can click "Open" button to get the generated MOV files effortlessly. Now, it's much easy for you to add any Sony Cyber-shot DSC-RX10 III files to Avid Media Composer 8, 7, 6, 5, etc. for further editing.

Additional Tip:

This 4K to Avid Media Composer, not only can transcode 4K videos to Avid MC, but also includes FCP, iMovie, FCE, Adobe Premiere Pro, etc. If you want to edit 4K media in Final Cut Pro, please choose the "Final Cut Pro > Apple ProRes 422 (*.mov)" as output; For iMovie or FCE, choose the "iMovie and Final Cut Express -> Apple InterMediate Codec (AIC) (*.mov)". For Adobe Premiere Pro, choose "Adobe Premiere/Sony Vegas > MEPG-2(*.mpg)". Best wishes to you!

Read More: 

Thursday, June 2, 2016

How to Play FLAC /M4A/WAV/DTS/AAC/WMA/audio files on PS4?

PS4 is a good partner for game fans, and it's also a media player which is the role always overlooked. According to PlayStation support website, PS4 has strict requirements of audio files, only supports playing MP3, AAC (M4A) audio format. It means you cannot play audio (FLAC/DTS/AC3/WAV) that aren't PS4 audio formats supported. Here comes the question: How can we play All Types of audio files on Sony PlayStation 4? If you are audio enthusiasts and breaking too much of a sweat to have your music playing from your PC, just take a few minutes to get the answer. 


Recommended Audio Formats Supported by PS4: MP3, AAC (M4A) 

Note: 

1. For a smooth playback of the audio files on PS4 via its media player, make sure to save the to a folder so that they can be readable by the system. 
2. The PS4 media player only accepts FAT and exFAT formatted USB drives. 
3. Difference data types or file sizes might as well cause playback issues. 
4. The PS4's audio can either be put out with digital or optical audio. The PS4's auto detection has difficulty discerning audio signals through a splitter. When connected simultaneously to a two-channel output and a multi-channel output, the PS4 may opt to output only multi-channel sound. This results in center audio channel sound being lost. 

This is why users asks question like: 

Could we have a firmware update so FLAC files can be played? Sony is all for the Hi-Res audio experience re: walkman and Xperia products. The PS4 should not be left out. 

How to Play All Types of audio files on Sony PlayStation 4? 

Sony will add support for CDs, WAV, DTS, WMA, FLAC audio files, and other features in a future PS4 software update. At the same time, Microsoft has announced that the Xbox One will support CDs and DLNA out of the box, while MP3 support is currently limited to streaming those files from a windows 8/8.1 PC. (See Xbox One vs. PlayStation 4) But currently those audio files are not supported by Sony PS4. 

In order to successfully play various unsupported audio files FLAC/DTS/AC3/WAV on PlayStation 4, a widely used solution is to convert them to PS4 recognized audio formats. And to address the above PS4's audio lossing issue, under Audio Output Settings: 

Set sound to Digital Out (Optical) 
Uncheck DDS5.1, DTS5.1, and ACC 
Check Linear PCM 
This should correct the HDMI audio output. 
When playing a movie on blu-ray or DVD, the AV receiver may only detect Linear PCM (Stereo) even if the audio on the movie is set to Dolby Digital 5.1 or DTS 5.1. To correct the issue: 

When the disc is playing, press Options 
Go to the Settings menu 
Under Audio Format, select Bitstream (Direct) 
This solution will save the audio format for future reference when playing DVD or blu-ray movies. 

Best PS4 Audio Converter for Windows & Mac: 

Pavtube Video Converter or Pavtube Video Converter for Mac 

PC version System Requirement: 

Windows 10/8/7/XP/Vista; 500MHz Intel or 500MHz AMD CPU 

Mac version System Requirement: 

Mac OS X 10.7, 10.8, 10.9, 10.10; 512 MB physical RAM or above, Intel processor 

With it, you can convert almost any audio files including FLAC/DTS/AC3/WAV to Sony PS4 recognized MP3/AAC format. For advanced users, it is able to optimize audio files in the following aspects: trim, merge files into one, adjust channel/bitrate, etc. Besides transcoding audio to PS4 supported formats, it also has the powerful feature of converting almost all kinds of videos to PS4 like AVI to PS4, MKV to PS4, MP4 to PS4H.265 to PS4, FLV to PS4, WMV to PS4, MOV to PS4, VOB to PS4, Tivo to PS4 and MPG to PS4, and more videos to PS4. Then you're able to play these multimedia files on the Sony PS4 smoothly with almost the original video/audio quality. Now, just follow the tutorial below to play any audio files on Sony PS4 freely. 

Free Download Pavtube Video Converter: 


Other Download: 
- Pavtube old official address: http://www.pavtube.com/video_converter/ 
- Amazon Download: http://download.cnet.com/Pavtube-Video-Converter/3000-2194_4-75734821.html 
- Cnet Download: http://download.cnet.com/Pavtube-Video-Converter/3000-2194_4-75734821.html 

How to Convert FLAC/DTS/AC3/WAV etc. to Sony PS4 friendly formats? 

Step 1: Add audio files 

Install and run the Sony PS4 audio converter program and click "Add video" button to import the FLAC/DTS/AC3/WAV audio files you want to convert. If you want to combine all the files together for easy using in PS4, please tick the box "Merge into one file" on the main interface. 


Step 2: Set PS4 recognized audio format 

Select Common Audio > MP3 - MPEG Layer-3 Audio(*.mp3) or AAC - Advanced Audio Coding(*.aac) as the export format for playing on PS4 perfectly. 


Tip 1: If you like, click on "Settings" and you could easily set audio codec, bitrate, sample rate, channels, etc to adjust parameters that affect audio quality and file size for the audio you prefer. Keep in mind bitrate higher results in big file size, and lower visible quality loss, and vice versa. 

Recommended Audio Settings: 

Codec: mp3 
Audio Sample Rate: 48000 
Audio Bitrate: 128K or 160K 
Channels: Stereo 

Tip 2: With built-in editor, you can trim your audio files to capture and convert your favorite audio clips for playing on PlayStation 4 (PS4). Click "Edit selected task" to activate the trim function. 

Step 3: Convert FLAC/DTS/AC3/WAV to PS4 

The last step is to click the "Convert" button to start converting FLAC/DTS/AC3/WAV audio to PS4. You can follow the conversion progress from the pop-up window. 

Read More: 

Monday, May 23, 2016

Export iMovie Videos to FLV for YouTube

Do you have any suggestions for us to export the iMovie videos to YouTube for sharing? Are you seeking the best solutions to convert iMovie exported videos to FLV for uploading to YouTube? Here is the right place you come! A good iMovie to YouTube converter here is strongly recommended for us!


iMovie do not natively support FLV output. That’s the main reason why we need to export the iMovie videos to FLV for YouTube for nicely sharing. A workaround is to share the video to YouTube and then download the video, which would be in FLV format. Due to this cause, we should know the best supported formats by YouTube, right? This method is time consuming and you'll need a YouTube Downloader in order to capture your video from YouTube. On the other side, we all know that YouTube refuses the videos not only including FLV, but also for MTSMXFH.265, etc.

The easy workaround requires an iMovie to Flash video converter. Fortunately, Pavtube Video Converter for Mac is such a useful program which can make the iMovie output videos compatible with YouTube. It's a well known utility to convert video files to and from any desirable format like MOV, AVI, MP4, MPEG, WMV, etc. Most important is that the video quality will be kept while transforming to another format. What’s more, with the latest upgraded version 4.8.5, it can also supported to decode the H.265/HEVC files. 

Follow the step-by-step tutorial to convert iMovie videos to FLV format for YouTube on Mac OS X.

Step 1.To add your iMovie videos to the FLV Mac video converter, you have two options: directly drag and drop the iMovie output video to the program, or click the ‘Add File’ and choose Load Media Files.


Step 2.When you come to the output list, we suggest you to drop down it and choose the ‘Flash Video’>>’FLV H.264 (*.flv)’ for YouTube as we mentioned above. Just like the screen shot below.


Step 3. Most of you guys must have the desire of a further editing with your output videos, right? On the main interface, ‘Edit’ is waiting for you. ‘Trim’ to decide where to start and where to end, ‘Crop’ to cut some unwanted clips, ‘Subtitles’ to add some explanations to your audience.


After you have finished your preparation job, just go back to the main interface to click the ‘Convert’ button, you can start your conversion job. Then as usual, just upload the videos to YouTube to share with your friends nicely.

Further:

Thursday, May 19, 2016

Best avchd to YouTube Converter for Windows and Mac

AVCHD is a tapeless high definition recording format used by many consumer camcorders. After you take some AVCHD videos with your Sony, Panasonic or Canon camera, and try to share the funny clips on YouTube, two things may confuse you should be: “Is AVCHD supported by YouTube?” and “Will the high definition video effect be lost after the uploading?”.

Though YouTube supports a very wide variety of video codecs, audio codecs and container formats, you still can not upload your AVCHD file to YouTube.

You Should Well-Known YouTube Supported Video Formats in Details Before Converting and Uploading AVCHD to YouTube Video

YouTube supported video formats:

MP4, WebM files (VP8 video codec and Vorbis audio codec), MPEG4, 3GPP and MOV files - (typically supporting h264 and MPEG4 video codecs and AAC audio codec), WMV, FLV (Adobe - FLV1 video codec, MP3 audio), AVI (many cameras output this format - typically the video codec is MJPEG and audio is PCM), MPEG-PS (typically supporting MPEG2 video codec and MP2 audio).

Well, firstly, AVCHD is not among the recommended file types for uploading by YouTube. You are very likely to receive an invalid file format error message. Secondly, YouTube will downgrade the video. Therefore, to upload AVCHD to YouTube, you’d better convert the videos to a YouTube friendly format, such as MP4, FLV, AVI, WMV, MOV, and 3GP. Pavtube (HD) Video Converter and Pavtube Video Converter Ultimate can convert AVCHD MTS/M2TS video to all the video formats above for uploading to YouTube except MPEG-PS.

More details or more features of the Pavtube Video Converter - the ability of convert AVCHD to YouTube

Best AVCHD to YouTube Converter
Products pavtube video converter Pavtube HD Video Converter Pavtube Video Converter Ultimate
Pavtube Video Converter Pavtube HD Video Converter Pavtube Video Converter Ultimate
Inpuut Supported
AVCHD Y Y Y
MTS Y Y Y
M2TS Y Y Y
M2T Y Y Y
Other Common Format Y Y Y
Output Format Support (4k included)
SWF Y Y Y
AVI Y Y Y
FLV Y Y Y
Other Youtube Supported Format Y Y Y
Additonal Function
Trim & Crop Video Y Y Y
Merge & Split Video Y Y Y
Adjust Video bitrate/size Y Y Y
Batch Conversion Y Y Y
GPU or Multicore Acceleration(Windows Olnly) Y Y Y
Windows download download download
buy buy buy
Mac download download download
buy buy buy
Price($) 35 35 65


How to Convert avchd to YouTube Compatible Formats

Pick one of the AVCHD to YouTube Converter you need and follow the step guide below, here we choose Pavtube HD Video Converter for Mac as example, other two have the same steps besides the tiny difference in interface. Here we go.

Step 1. Load AVCHD files

Click “Load Videos” to load video source or just drag the media files into the main window.


Step 2. Choose YouTube Compatible Formats As the Output Format

Click the "Profile" button and in the drop down list select the YouTube compatible format. You have many choices like "H.264 High Profile Video (*.mp4)" from the "Common Video" category; HD MP4 from "H.264 HD Video (*.mp4)" or “FLV-Flash Video format (*.flv)” from “HD Video” category.


Step 3. Simple edit the AVCHD video.

Most of you guys must have the desire of a further editing with your output videos, right? On the main interface, ‘Edit’ is waiting for you. ‘Trim’ to decide where to start and where to end, ‘Crop’ to cut some unwanted clips, ‘Subtitles’ to add some explanations to your audience.

Step 4. Start the conversion from AVCHD to YouTube

Click "Convert" button to complete the conversion process from AVCHD to YouTube. And then you can upload the converted exporting video to YouTube.

Conclusion

Pick any one of the AVCHD to YouTube Video Converter list above, you can convert any AVCHD (MTS or M2TS) of either standard definition (AVCHD-SD) or high definition (AVCHD 1080i) interlaced video for uploading AVCHD to YouTube for sharing or editing AVCHD recorded at 1080/60p, 1080/50p or 720/60p in any video editing tools, like iMovie10/11/09/08/HD, or playing AVCHD on any devices, like iPhone, Android, iPod, iPad, etc.

Read More

Monday, May 16, 2016

Paid & Free: MKV Converters for Mac Users in 2016

MKV files contains audios, video, and certain features like chapter points, multilingual subtitles, and audio tracks including rich metadata for descriptions, ratings, cover art, and many more. If you made a video in MKV format but unable to play them on your apple devices such as iPhone, iPad. Another reason might be that you are sitting there with a MKV video file you can"t use because it"s not recognizable by the editing program you"re using such as iMovie, Final Cut Pro.

In this case, you need a MKV Converters for Mac to make this MKV files compatible with your devices or editing program.

There are tons of MKV Converters out there for the Mac (Included El Capitan), many of which are free, and some are paid but priced all too high. In this article, I will share you the top 5 paid MKV Converters as well as top 5 free MKV Converters for Mac OS.

Paid - MKV Converters for Mac (Included El Capitan)

MKV Converters for Mac
Products pavtube Video Converter for Mac Pavtube HD Video Converter for Mac Pavtube iMedia Converter for Mac
Pavtube Video Converter for Mac Pavtube HD Video Converter for Mac Pavtube iMedia Converter for Mac
Format Supported
MKV Y Y Y
MKV (multi-track) Y Y Y
4K H.265 Y Y Y
3D MKV Y Y Y
H.265 MKV Y Y Y
Other Format Supported
MP4/AVI/WMV Y Y Y
MTS/M2TS/M2T Y Y Y
XAVC/XAVC-S/XAVC-L Y Y Y
WMV/MPEG/DivX/MPEG Y Y Y
MOV/VOB/ASF/3GP/DivX Y Y Y
DVD/Bluray - - Y
MP3, AAC, FLAC,OGG Y Y Y
WAV, M4A, DTS Y Y Y
Features
iPhone preset foramt Y Y Y
Android preset foramt Y Y Y
Windows preset foramt Y Y Y
Gaming systems, Projectors, 3D, HDTV, etc. Y Y Y
Adobe Premiere preset foramt Y Y Y
Final Cut Pro X/7/6 preset foramt Y Y Y
iMovie 11/10/9.. preset foramt Y Y Y
Trim & Crop Video Y Y Y
Merge & Split Video Y Y Y
Adjust Video bitrate/size Y Y Y
Batch Conversion Y Y Y
Mac Supported OS Mac OS X 10.5 or higher Mac OS X 10.5 or higher Mac OS X 10.5 or higher
Download download download download
Buy buy buy buy
Price($) 35 35 65

Free - MKV Converters for Mac (Included El Capitan)

#1. QuickTime

QuickTime is bundled with OS X, it is an extensible multimedia framework developed by Apple Inc., QuickTime 7 Pro. can convert your media to different formats and lets you playback videos on your iPhone, iPod and Apple TV and a variety of other devices.

#2. Handbrake

HandBrake is a free Mac video converter that is quick in converting and comes with a bit rate calculator that will alter video quality in order to adjust the video size to your desire. It is a video converter that has many options which will enable you to convert numerous files of various sizes without any compromise in quality. You can convert only MP4 and MKV formats on Mac OS X 10.11, and transcodes videos to be played on devices such as iPhone, iPod and iPad.

Handbrake is a rather disappointing video converting software when it comes to use on Mac El Capitan for video converting. Click to get a best alternative to Handbrake for Mac.

#3. MPEG Streamclip

MPEG Streamclip is a free Mac video converter, player, editor for MPEG files, QuickTime and transport streams. It can play many movie files at full screen, not only MPEGs; it can convert MPEG files between muxed/demuxed formats, and export to QuickTime, AVI, DV and MPEG-4 files with more than professional quality.

The output format is pretty limited, what' more, and It was not such intuitive or easy-to -use.Click to get a best alternative to MPEG Streamclip.

#4. Miro Video Converter

Miro Video Converter is a free mac video converter, it has pretty intuitive interface, you can easily know how to handle it as soon as launch the app. It"s a basic freeware option that works well for a variety of formats and devices. Just drag MKV videos to it or choose MKV files on your Mac. It can convert MKV videos to popular Apple devices (iPod, iPhone, iPad, Apple TV), and Android Phones, and other media players, but not available for iPhone 6S, iPad Pro those latest devices.

Too few output profiles, No batch conversion but it is good for beginners.

#5. FFmpegx

FFmpegx is fast video and audio encoder, as well as free video converter Mac . It doesn"t support previewing MKV video as HandBrake and MPEG Streamclip do, but Supports subtitles in MKV formats.
It is a little complex for beginners, as it is filled with settings and tools, that only confirmed users will feel comfortable with. It is more suitable for experts who want to set some advanced preferences.

Conclusion

Depend on your requirement, choose the best MKV video converter for Mac you prefer to. If you just needed to convert the MKV files for playback, the Handbrake or MPEG Streamclip would be fine. For further editing or something like this, the paid MKV converters should be take into your consideration. As we mention in the table, the paid MKV Converters for Mac include many additional functions which make your video beautiful, customized and editable before you convert the file.

Read More:

Thursday, May 12, 2016

How to Play, Convert, and Edit FLAC Files on Mac OS X (El Capitan included)

FLAC stands for Free Lossless Audio Codec, an audio format similar to MP3, but lossless, meaning that audio is compressed in FLAC without any loss in quality. This is similar to how Zip works, except with FLAC you will get much better compression because it is designed specifically for audio. 

To fully enjoy the brand-new technology from ‘Apple’, your audiophile side should also enjoy this. But…Apple didn’t want to implement any improvements on supporting FLAC. Users encounter problems while playing FLAC files on Mac because of different types of codec issues and the fact that Apple products such as Mac have not been programmed to describe various types of format files such as FLAC. 

How to Play FLAC Files on Mac OS X (El Capitan included)? 

Since FLAC is not supported by QuickTime, so you will find it hard to play it on the Apple official player. But you can use a nice FLAC player Mac to play the audio files. That’s VLC media player , which is the most powerful player for both Mac and Windows users to play almost all popular formats. 

How to Play, Convert, and Edit FLAC Files on Mac OS X (El Capitan included)? 

One of the widely used ways to play FLAC files on Apple devices such as Mac, iPod, iPad, iPhone without any audio quality loss is to use the Pavtube Video Converter for Mac, which provides the best conversion for a wide variety of format files. With this all-in-one audio/video converter, you can convert FLAC files to many audio formats like MP3, WAV, AAC, M4A, AIFF etc quickly and easily, even the Apple lossless format. The biggest advantage of using the Pavtube Video Converter for Mac is that it is compatible with different Mac OS such as El Capitan, Yosemite, Mavericks, Snow Leopard, Mountain Lion and Lion.

Free trail before purchase version available:


Here are 3 steps that will guide you on How to Play, Convert, and Edit FLAC Files on Mac OS X (El Capitan included): 


Step 1. Import FLAC Files

At first, you can drag and drop your FLAC videos to the program. Alternatively, you can load them to this all-in-one audio/video converter for Mac by clicking the top left two icons. 


Step 2. Select output format 

If you want to play your FLAC videos on Mac computer without any trouble, you should select Mac supported format (like MP3, M4A, etc) as the output format here. 


Step 3. Ready to Convert 

Then you just need to click the "Convert" button to start conversion. When the conversion is over, you can open the output folder and play the converted Flac files with Quick Time easily. 

Additional function - trim, cut, edit FLAC files 


This intuitive FLAC Converter Mac can be also used as a good FLAC editor. If you want to trim, cut FLAC files into several small-size clips, and merge your wanted clips into a big one, you can use it to edit FLAC files according to your need. 

Trim: The "Trim" feature allows users to decide where to start and where to end when converting the selected clip, so that unwanted segments will be cut out after conversion. 


Crop: The "Crop" facility enables users to get rid of the black edges and unwanted area of the image. 


Split selected file into several small pieces: By clicking the “Split” button video converter mac split button on file list, or from “Edit” menu, you can launch the “Video Split” window. Checking “Enable” to enable it, and then you can split the file by file count, time length, or file size. 


Merge selected files into one: By ticking off “Merge into one file” option behind “Settings” button, you can merge the ticked files in list into one single file. 


Read More