Wednesday, November 20, 2013

Import AVCHD MTS Files to FCP, Premiere Pro on Mac (Mavericks included)?

When you didn't get correct structure of your AVCHD footage, you will find FCP does not read your broken AVCHD structure properlythen how to open and edit your single .mts files in FCP and Premiere Pro without problems? Fortunately, there is an easy way to fix the issue. Let's find it out here. 


The reason that I can't sucessfully ingest the single .mts videos to your non-linear editing systems is simple. In fact, Final Cut Pro/Premiere Pro is very picky in importing videos. One can import AVCHD files on Mac directly from a memory card (with the original file structure in place), or from a camera archive, but can't import them by selecting the single .mts clips.

That's is to say, if your card structure is broken and whatever reason it doesn’t come across intact, you can't directly load your mts files onto your FCP and Premiere Pro. In case that FCP/Premiere needs a correct folder Structure so if you have to, transcoding the MTS to Prores with a 3rd party app is a feasible workaround. They you will have no requirement with ingest supported with additional software and no use camera archives method.

Hot Search: MTS to VLC | MTS to smart TVMTS to MP4

Here I would like to share this usefull MTS Converting program - Pavtube MTS/M2TS Converter for Mac is recommended for you, with this you can achieve the individual .mts to Prores conversion. No matter the AVCHD files are single .MTS files or directly from your camera, you can transfer it to FCP/Premiere compatible formats and directly import it to FCP for easy editing. 

Plus, this Mac AVCHD converter also supports converting AVCHD MTS footage to iMovie, Avid Media Composer, Final Cut Express and more to meet your needs. These output formats are specially presetted, so the conversion quality is guaranteed, you can get lossless video conversion with this tool. Now, download it and follow the step-by-step guide transcoding single .MTS/M2TS to Final Cut Pro/Premiere Pro. 

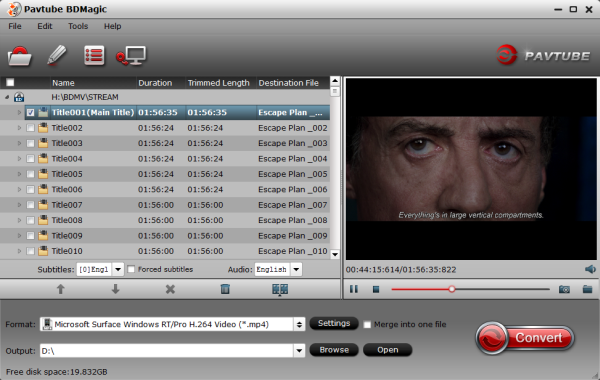
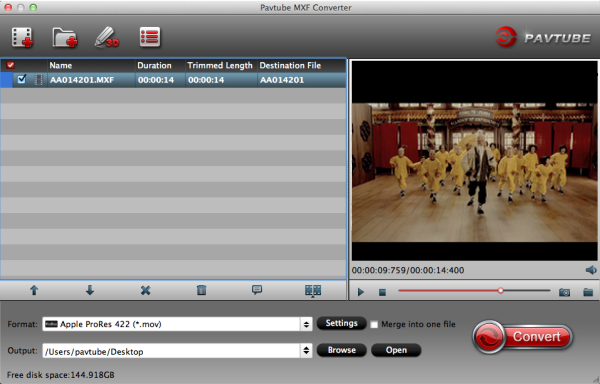
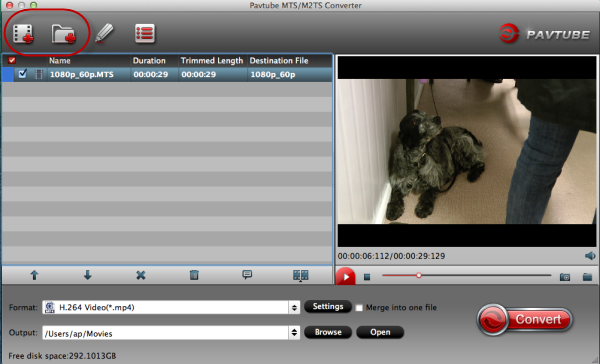
Step 1. Run the nice AVCHD MTS Converter on your Mac and load mpg clips to it by clicking "Add" button. There are two ways for you to import files: add video directly and add the entire folder. The software supports batch conversion, so you can import several videos to it one time.


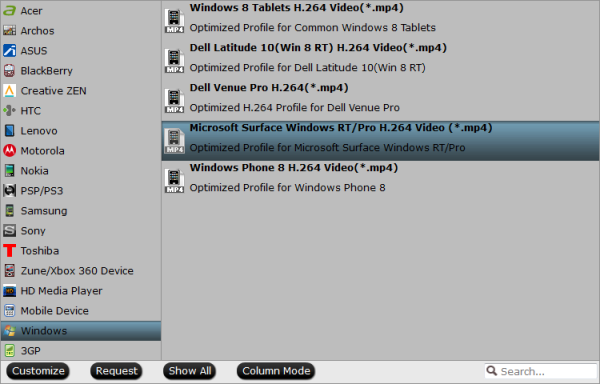
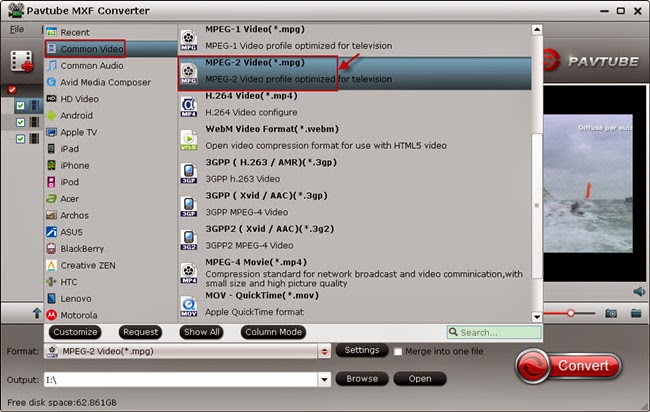
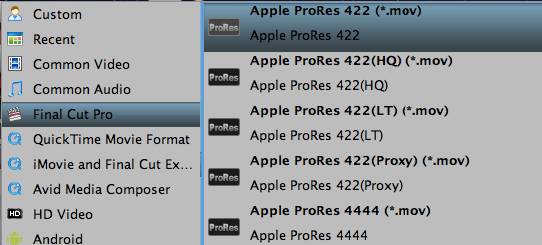
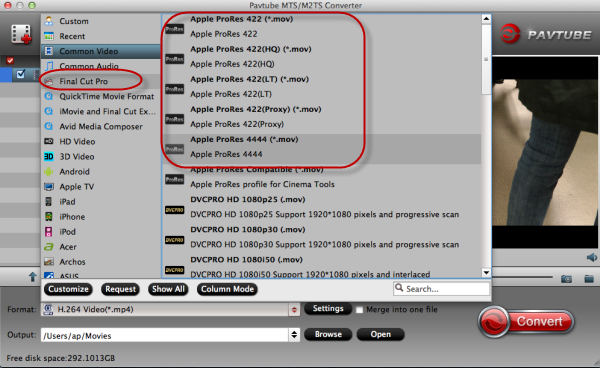
Step 2. Click "Format" bar and then move your pointer to "Final Cut Pro > Apple ProRes 422 (*.mov)" as the editable format for Final Cut Pro and Premiere Pro. 

  
Tips: 

Here listed the main difference of the five ProRes codecs. 

a. ProRes 422 (HQ): offers the utmost possible quality for 4:2:2 or 4:2:0 sources and provides target data rate of approximately 220 Mbps and higher quality than Apple ProRes 422; 

b. ProRes 422: provides target data rate of approximately 145 Mbps and higher quality than Apple ProRes 422 (LT); 

c. ProRes 422 (LT): provides roughly 70 percent of the data rate of Apple ProRes 422 (thus, smaller file sizes than Apple ProRes 422) and higher quality than ProRes 422 (Proxy); 

d. ProRes 422 (Proxy): provides roughly 30 percent of the data rate of Apple ProRes 422 and high-quality offline editing at the original frame size, frame rate, and aspect ratio; 

e. ProRes 4444: offers the utmost possible quality for 4:4:4 sources and roughly 50 percent higher than the data rate of Apple ProRes 422 (HQ). 

Step 4. You can click "settings" to customize the output parameters, adjust the resolution, bitrate as you want. 

Step 5. Click convert button to start converting AVCHD MTS to Prores MOV for Final Cut Pro and Premiere Pro editing. 

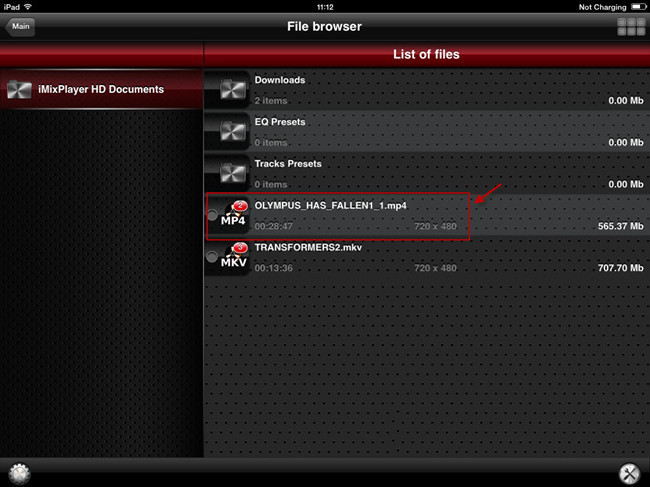
After the Mac MTS to Prores conversion, you can import the converted footages to FCP and Premiere Pro for editing smoothly on Mac. You're done! Now you may know how to ingest and edit single .MTS footage in Final Cut Pro and Premiere Pro. 

Read More:

How to Solve the freezes when importing MTS media to Premiere CC-2015.3?
How to Convert MTS/M2TS with Handbrake Easily?
Best Solution to Play Sony MTS/M2TS Files on MacBook Pro
Play MTS on Smart TV (Windows and Mac Solutions)
Top 5 MTS/M2TS Video Editors for Mac
Top 5 MTS/M2TS Video Editors for Windows (10, 8.1, 8, 7, XP, etc)
Fix Choppy Issues When Importing AVCHD Files to FCP
Join and Convert MTS/M2TS Files for playing with VLC Player
How to Convert 3D AVCHD MTS to 3D Tablet for Watching?

Tuesday, November 19, 2013

Transfer Blu-ray to Surface Pro 2, Put Blu-ray Folder/ISO to Surface Pro 2 for playback

To view Blu-ray movies on your new Surface Pro 2 tablet, the best way to rip Blu-ray disc/folder/ISO files to Surface Pro 2 support video format so that you can playback Blu-ray on Surface Pro 2 smoothly.
“For software that has to be loaded from a Blu-ray movie, how will I get my software on the Surface Pro 2? Will I have to use an external blu-ray drive whenever I want to watch Blu-ray movie on Surface Pro 2? Or is some other method involved??”
Surface Pro 2 is just a laptop without a keyboard. You can plug in a disk drive or any of the other peripherals that can be connected to any Windows computer. You could connect an external Blu-ray drive to play a blu-ray disc; but you don’t have to so this every time when you want to play (3D) Blu-ray movie on Surface Pro 2 as it’s inconvenient. In my way, I’d prefer to rip Blu-ray disc to MP4 format that works perfect on Surface Pro 2 for playback.

play blu-ray movies on surface pro 2

If you want to transfer Blu-ray movies to Surface Pro 2, a professional powerful ripping program will help you a lot.Pavtube Blu-ray to Surface Pro 2 Converter is such a tool with the easiest workflow to help you rip off Blu-ray disc/ISO/folder protection, then convert the decrypted movie to MP4 format with best video settings for Surface Pro 2. Get Blu-ray to Surface Pro 2 Converter for Mac here; well support Mac Mavericks!

Tutorials: How to transfer Blu-ray to Surface Pro 2? 

Step 1. Run Blu-ray to Surface Pro 2 Converter; load Blu-ray.

This converter does not only support Blu-ray disc/folder/ISO, but also able to convert DVD disc/folder/ISO/IFO files. Your ISO image file would be recognized automatically so there’s no need to run virtual drive to mount it any more.


Step 2. Choose format.

Click the drop-down list besides “Format” list, you can find many presets and columns for different devices and programs. Let’s switch to “Windows” column and select “Microsoft Surface Windows RT/Pro H.264 Video (*.mp4)” as the best preset for Surface Pro 2. (For Surface 2 users, refer the guide: How to copy Blu-ray movies to Surface 2 for playback easily)

Or you can enter “Surface” in the small search box at bottom right corner.


Step 3. Adjust specs or edit video before conversion (Optional).

If you want to customize output video size, bitrate, frame rate and others, just click “Settings” to enter profiles settings window.

And you can click the pencil-like icon on the top to crop, trim, edit audio/subtitles/ or add watermarks before conversion.

Step 4. Start conversion.

Now hit the big red “Convert” to start converting Blu-ray movies to Surface Pro 2 MP4 with best settings for playback.

After the conversion, you can get the converted Blu-ray rips in .mp4 format by tapping the Open button.

How to transfer media files to Surface Pro 2?

To see how much storage space you have:
  1. Open the Settings charm, tap or click Change PC settings.
  2. Tap or click General.

Scroll down to Available storage, to see how much storage space you have.
Or don’t move files to Surface. Store them in the cloud instead using your files on SkyDrive. This way you can access your files from other computers or your phone.

You can pick using one of the following methods to transfer video to Surface Pro 2
  • -Connect to a networked computer
  • Use a USB flash drive or a memory card -- microSD, microSDHC, or micro SDXC cards all work with Surface.
Connect to a network computer

Surface can access music, pictures, videos, and documents on computers that are part of your home network. To see the files and folders that have been shared on your network, go to the Start screen and open File Explorer. Shared items appear under HomeGroup or Network.

Use a USB flash drive or memory card
  
You can also move files to Surface, by copying them to a USB flash drive or memory card (microSD, microSDHC, or micro SDXC cards all work with Surface) and then adding the files to Surface. Here’s how:

1. Copy files onto a USB flash drive or memory card on your other computer.
2. Insert the USB flash drive or memory card into Surface.
3. Tap or click the notification that appears in the upper-right corner of the screen.
4. Tap or click Open folder to view files.
File Explorer opens.
5. Select the files or folders you want to add to Surface, tap or click Home, and then tap or click Copy to.
6. Select a location. For example, choose Documents if the flash drive or memory card contains documents.

Related Articles:

Monday, November 18, 2013

Workflow of editing Panasonic HPX-171E P2 MXF footages in Sony Movie Studio Platinum 12

Description: With the P2 MXF to Sony Movie Studio converter you can easily find the best video and audio codec for converting Panasonic HPX-171E P2 MXF footages to edit in Sony Movie Studio Platinum 12.

Question:
“What’s the best video and audio codec for converting P2 MXF footages to edit in Movie Studio Platinum 12? Actually I am new one in this entire story about videos. My camera is 171e-Panasonic. My audio codec is pcm_s16le. I have a material and before I start to make editing in Movie Studio I would like to give the converted file to my friend for a first look on his computer or TV. What should I do?”
Solution:
To edit Panasonic HPX-171E P2 MXF footages in Sony Movie Studio Platinum 12, you need to know which video and audio codec/formats this video editing tool supports. On Sony Movie Studio Platinum 12 official website, I find it works well with AAC, AA3, AIFF, AVI, BMP, CDA, FLAC, GIF, JPEG, MP3, MPEG-1, MPEG-2, MPEG-4, MVC, OGG, OMA, PCA, PNG, QuickTime®, RealMedia®, SND, SFA, W64, WAV, WDP, WMA, WM. Among them, I prefer MPEG-2 as video codec since they can be supported only by Sony Movie Studio as well as the computer and TV you request.


Here is a brief instruction about how to convert Panasonic P2 MXF files to MPEG-2/AC3 for Sony Movie Studio Platinum 12.
 
Setp 1. Free download the P2 MXF to MPEG-2 Converter. I used this app to successfully convert many MXF footages shot by my Canon XF100, so I guess it would also work well for your Panasonic P2 camcorder. 
 
Tip 1: If you are using a Mac OS X computer, Mac P2 MXF Converter is available as well.
 
Tip 2: When you import P2 MXF files from computer, don’t forget to copy the complete CONTENT folder from your camcorder to hard disk in advance.

Step 2. Hit the “Add video” button, navigate to the source file location and import your P2 MXF file.


Step 3. Then follow the path “Common Video > MPEG-2 Video(*.mpg)” and choose MPEG-2 as output format. Of course you would find other MPEG-2 profile under the “Format” list, but I would recommend this one because it allows you to change audio codec.


Step 4. Enter the “Settings” tab, and you can freely set profile presets in your own way. BTW, all these parameters under Profile Settings, including video codec, display resolution, bitrate, frame rate, etc, can be customized as you like to get better video and audio quality. To get better audio quality, you are suggested to switch Audio Codec from MP2 to AC3.


Step 5. Return back to the P2 MXF to Sony Movie Studio converter main UI, hit the big “Convert” button and start converting your P2 MXF files for Sony Movie Studio Platinum 12. Once it finishes, open output folder to locate the created MPEG-2 file and transfer it to Sony Movie Studio Platinum 12 for video editing.
  

Thursday, November 14, 2013

Convert DVD ISO/IFO to Multi-track MP4 for watch on iPad Air

Description: This article tell you how to watch DVD ISO/IFO movies on iPad Air in multi-track MP4 format so you can switch to the desired language during playback.

If you own many DVD movies which have been backed up in ISO/IFO files on computer hard drive and would like to convert DVD ISO/IFO movies to multi-track MP4 so that you may watch movies on the new iPad Air with any language by switching to the desired one, the Pavtube DVD to iPad Air Converter is your great choice to rip DVD ISO/IFO and original DVD disc to iPad Air compatible MP4 format as well as multiple audio tracks saved for iPad Air playback.

How to Rip DVD ISO/IFO to Multi-track MP4 for watch on iPad Air? 


Part One. Rip/Convert DVD ISO/IFO to Multi-track MP4 for iPad Air


Step 1. Free download the Multi-track DVD Converter (Mac users can download here), install and launch it. Click the “Load ISO/IFO” button to import source DVD ISO/IFO files.

blu-ray-to-multi-track-mp4

Step 2. Choose “Multi-track Video > Multi-track MP4 (*.mp4)” from the “Format” drop-down list as output format.

blu-ray-to-multi-track-mp4

Tip: This profile extracts more than one audio track from source DVD ISO/IFO movies in saved MP4 files. And you are allowed to remove unwanted audio track by unchecking the “Check” box in front of each audio source.

Step 3. Hit the “Convert” button on Pavtube ByteCopy main UI to start ripping DVD ISO/IFO to Multi-track MP4 for iPad Air. Once the conversion process finishes, open output folder and locate the created multi-track MP4 movie.

Part Two. Stream and watch Multi-track MP4 movies on iPad Air
 

Step 1. Install multi-track player on iPad Air. When typing in the keyword “multitrack player” in Apple Store, many free or charged apps would show up, choose one and install on your iPad Air.

Step 2. Open iTunes, and add created multi-track MP4 movie to this multi-track player.

Step 3. Open this multi-track player, open the source multi-track MP4, and choose wanted language during movie playback.


iPad Air related articles:
Get more money-saving tip:

Wednesday, November 13, 2013

Solve no audio issue when converting HVX200 P2 MXF to ProRes 422 for FCP X

Summary: Follow this article you will know how to solve Panasonic HVX200 MXF editing problems with Final Cut Pro X on Mac as well as how to work out the "no audio issues".
 
To start, the HVX200 becomes only the second camera in Panasonic’s lineup to employ true variable frame rates! While, when you want to import Panasonic HVX200 P2 MXF files in FCP X on Mac for editing, you will get frustrated due to the video codec incompatibility problem as below.

I would like ton convert MXF files from my Panasonic P2 AG-HVX200, to ProRes 422 for FCP X. As the files have proved to be not so well-suited when they are about to be edited in my Final Cut Pro X. I have converted many files from this same camera with no problem but for some reason now it has no audio.

I try the Free HD Video Converter For Mac, and it work well. So I bought and register HD VIDEO CONVERTER FOR MAC, but when I convert MXF files to Prores422, I have no audio. So I bought MXF CONVERTER FOR MAC and I have the same problem, no audio. What's the problem? Is there a way someone can help walk me through this?

To edit Panasonic HVX200 P2 video footage with Final Cut Pro, you have to convert P2 MXF to FCP natively supported video format like MOV with Apple ProRes Codec. Here we recommend you the best P2 MXF to FCP X Converter for Mac which can help you to transcode Panasonic P2 MXF to Apple ProRes .mov format for FCP on Mac OS X quickly and easily. Here comes the detailed guide. 

Note before converting:

1. Please ensure that the computer you are using to do P2 MXF conversion has Final Cut Pro installed, otherwise, the converted files will have audio only without image.

2. If you are using FCP X, please make sure you have installed ProApps QuickTime Codecs, or you may get files with sound only without video. The FCP X does not install the ProApps QuickTime Codecs automatically, so you need download and install the codec manually.

While importing MXF clips to Pavtube MXF to ProRes converter for conversion, please make sure you have the entire MXF file structure as it saved on your camcorder’s P2 card. If you only have some loose .MXF clips, your files will have image only without audio. See MXF file structure on Panasonic’s P2 card as below.


The above screenshot clearly shows .MXF clips are all saved in ‘VIDEO’ folder, while audio files are all stored in ‘AUDIO’ folder. When you importing .MXF clips from the correct file structure, Pavtube MXF to FCP Converter is able to recognize audio tracks from ‘AUDIO’ folder automatically, which ensures the generated ProRes 422 MOV files have both image and sound correctly. 

Guide: Convert Panasonic HVX200 MXF files to FCP X on Mac

Step 1: Add MXF video files.

Download and run Pavtube MXF Converter for Mac. Click the button "Add video" or "Add from folder" to add Panasonic HVX200 MXF files, or directly drag and drop your P2 MXF files.

canon c300 mxf to fcp converter

Step 2: Select an output format for FCP X and set the output folder.

Click on the "Format" and get the dropdown menu, then move you pointer to Final Cut Pro -> Apple ProRes 422 (*.mov), it’s the best format for editing in FCP X.


Step 3: Click "Settings" icon to adjust audio and video parameters.

Click the "Settings" icon and you will go into a new interface named "Profile Settings". You can adjust codec, bit rate, frame rate, sample rate and audio channel in the interface according to your needs and optimize the output file quality.

Tips: If your default audio track is in mute when recording, you may get only video without audio. So you can switch to the audio stream ID option to choose the right audio track.


Step 4: Start Converting.

Click the "Convert" button; it will convert Panasonic HVX200 P2 MXF files to Apple ProRes for FCP X on Mac immediately.

After the MXF to ProRes conversion, you will be able to get the output files for FCP X via clicking on "Open" button effortlessly. Afterwards, you can import the converted videos to FCP X freely for further editing without any trouble.

Futhermore, if your MXF files have 2 audio tracks or more, here is a new program named iMixMXF with multi-track preserving and mixing features. You can download the trial version for evaluation! (Read the multi-track MXF Converter guide)

Read more:

MP4 to FCP ǀ AVCHD to FCP ǀ MOV to FCP ǀ H.265 to FCP

Thursday, November 7, 2013

2013 Thanksgiving Special Offer: Freebies, Up to 66% off and Buy One Get One Free

Description: Pavtube 2013 Thanksgiving Day Promotion is available now. Free apps and up to 66% off discount is provided from Pavtube Studio to express the appreciation and gratitude for registered and potential customers on the coming Thanksgiving Day.

The annual traditional Thanksgiving Day is coming, and it’s time to show our gratitude to our mom, family members, and friends. How will you celebrate this sweet moment with your family and what will you do to thank your mom for giving birth to you? Stay at home and spend more time with her while watch her favorite movie together, enjoy a delicious dinner and tell her everything at work, plan a short trip and have her relaxed at weekend? Whatever you have decided to do on Thanksgiving Day, Pavtube is a great helper to make it work. Pavtube Studio, a professional multimedia software provider, is dedicated to bring you personal audio-visual feast of digital world and brighten your digital life. Great News, Pavtube Studio is now offering FREE apps and UP to 66% off promotion on Pavtube best sellers (both Windows and Mac versions are available) for you to celebrate the coming Thanksgiving Day from November 6, 2013 to December 10, 2013.

Pavtube 2013 Thanksgiving Giveaway and Hot Deals!
  
20% ~ 30% off for Pavtube Best Sellers
  
1. Pavtube BDMagic - $34.3 (original $49)
Highlights: full disc copy; Directly Copy only main movie; rip any Blu-ray/DVD to various formats

2. Pavtube DVDAid - $24.5 (original $35)
Highlights: convert standard DVDs to MP4, MKV, AVI, MPEG, MOV, M4V for smartphones, tablets, HD media players and more

3. Pavtube Video Converter - $28 (original $35)
Highlights: transcode videos to virtually any video/audio format for editing and playback

4. Pavtube Video Converter Ultimate - $52 (original $65)
Highlights: combination of a Blu-ray ripper, a DVD ripper and a Video converter to meet your needs for Blu-ray, DVD and video conversion

FREE programs – Pavtube Thanksgiving Giveaway

1. Pavtube Free DVD Ripper - a fun, easy and fabulous way to rip DVDs to various video formats with fast speed. Support adding SRT, ASS, SSA subtitles.

2. Pavtube Free Video DVD Converter Ultimate - provides with full Blu-ray, DVD and video solutions for your ultimate multimedia entertainment needs.

Buy One Get One Free

1. Buy MTS/M2TS Converter – handle AVCHD MTS/M2TS footages in an easy way
Get Free FLV/F4V Converter - convert any YouTube or Hulu videos (FLV/F4V) for portable devices

2. Bug MXF Converter - encode MXF clips for editing and playback
Get Free MKV Converter – convert MKV media contents to Android, Windows and iOS devices

3. Bug HD Video Converter - get your camera videos and TiVo recordings onto editors and players
Get Free DVD Creator - burn any kind of video sources to playable DVD

$9.9 for Pavtube Thanksgiving Hot Deals

1. Pavtube MKV Converter - select wanted subs/audio/video track from MKV to be kept in the output files

2. Pavtube FLV/F4V Converter – convert, trim, crop FLV or F4V to other formats

3. Pavtube TOD Converter - fast convert, compress, and edit TODs from JVC camcorders for any portable devices

4. Pavtube MOD Converter – stream, backup and edit MOD recordings shot by camcorders(JVC, Panasonic, Sony)

Get more discount - Sharing at your Facebook page

Click "Share on Facebook" button, insert "#PavtubeThanks2013", choose "Public", and click "Share Link". You will get another 20% coupon. The discounted link will be sent to your Facebook "Inbox" or "Other" within 24 hours on work days.

If don't receive message from strangers, please don't forget to contact us for the discounted link via faq@pavtube.com.


More Pavtube Thanksgiving Special Deals are available on Pavtube Thanksgiving page http://www.pavtube.com/thanksgiving-giveaway-2013.html. Share this activity at your Facebook page and more discounts you can get.


How to play DVD movies on Nook HD/HD+ Tablet?

This article shows you the easiest way to convert DVD to Nook HD/HD+ Tablet supported video formats so that you can view latest DVD movies on Barnes & Noble Nook tablets with HD quality. 

The Nook HD's 1,440x900-pixel resolution with its 243 ppi is the highest yet of any 7-inch tablet screen, higher than even the Kindle Fire HD's 1,280x800-pixel resolution. The 9-inch Nook HD+ houses a 1,920x1280 display and sports a 256ppi; slightly better than the Kindle Fire HD 8.9's 1,920x1,200 screen and 254ppi. With so many powerful features, both Nook HD and Nook HD+ are great for watching DVD movies. 

However, just like other tablets, the Nook HD/HD+ tablet still comes with no drive. In order to transfer DVD movies to Nook HD/HD+ Tablet for watching, you'll need to convert DVD to Nook HD/HD+ Tablet support video format first and then transfer the converted video files to your Nook HD or HD+ Tablet.

To get the work done, a top DVD Ripper software is needed. Here Pavtube DVDAid (Currently on sale during Pavtube's Thanksgiving Giveaway 2013) is highly recommended. The program is an easy-to-use yet wonderful DVD Ripping tool to help your rip both Blu-ray and DVD movies to Nook HD/HD+ highly compatible HD videos for playback. Besides, it can also rip DVD (ISO/IFO) to all other popular video formats like AVI, MOV, MKV, WMV, FLV, MPG, SWF, etc. for playing and sharing on iPhone 5S/5C, iPad Air, iPad Mini 2, Kindle Fire HDX, Galaxy Tab 3, Galaxy Note 3, Sony Xperia Z1, Archos, Zen, Blackberry Z10, YouTube, Facebook, etc. Moreover, it allows you to edit your DVD movies by trimming, cropping, adding watermarks, etc. The equivalent Mac version is Pavtube DVDAid for Mac, which can rip and convert DVD movies to Nook HD/HD+ Tablet under Mac OS X (Include Lion and Mountain Lion). Just get it now and follow the steps below to get your DVD movies ready for Nook HD/HD+ tablet in just a few clicks! 

Above all, let us have a look at the video formats supported by Nook.

Nook HD/HD+ supported media format:
  • Audio: MP4, M4A, 3GP, AAC, MP3, FLAC, WAV, OGG, AMR 
  • Video: MP4, 3GP, WEBM, AVI 
  • Gallery pictures: JPEG, GIF, PNG, BMP 
  • Reader/Other: PDF, ePUB, DRP, ePIB, FOLIO, OFIP, CBZ, TXT, RTF, XLS, DOC, PPT, PPS, PPSX, DOCX, XLSX, PPTX, LOG, CSV, EML, ZIP

Below is a quick guide:

How to convert DVD moives to Nook HD friendly format?

Step 1. Download, Install and Run the Pavtube DVD to Nook HD converter on your computer.

Step 2. Load DVD files.

Click "Add" button to load DVD disc, DVD folders, ISO files or IFO files respectively.

Step 3. Choose the output video format. 

Click the pull-down menu in the "Format" bar to select the output format. To play DVD movies on Nook HD tablet, you can select "Android" > "Nook Tablet (*.mp4)" as the output format.


Tip: If you like, you can click "Settings" to change the video encoder, resolution, frame rate, etc. as you wish. According to my experience, for watching DVD Movies on Nook HD, 720p with 1500~2000kbps is just all right. I found bitrate higher results in big file size, and lower visible quality loss, and vice versa. 

Step 4.Start ripping DVD movies for Nook HD.

Click "Start" button on right bottom of the main interface start the DVD to Nook HD MP4 conversion. When then conversion finishes, 

click "Open" to locate the ripped DVD files and transfer them to your Nook HD/HD + tablet for watching on the go.

Now, you have get it, just enjoying watching DVD movies on Nook HD.

Tips: 


1. You can get more information about how to transfer media content to Nook HD from here: How to transfer music, videos and ebooks to Nook HD/HD+ tablet?

2. If your movie isn't already in one of the supported formats or it's still on a DVD or a Blu-ray, you can get the Video Converter Ultimate (or the iMedia Converter Mac) which can help you rip Blu-ray/DVD, and convert various formats of 720p/1080p HD videos in MKV, AVI, TiVo, VOB, MPG, MTS, etc. to your Nook HD, Nook HD+ and the original Nook Tablet for smoothly playing.

3. Good new for you! Thanksgiving is coming! To celebrate this special festival, Pavtube launch Thanksgiving Giveaway and Promotion 2013, you can get Free, Buy one get one free, Up to 66% off discount between Nov. 7 and Dec. 10, 2013, such as:
  • * Free DVD Ripper
  • * 30% OFF Blu-ray/DVD Ripper
  • * 20% OFF Video Converter
  • * Buy HD Video Converter, Free Get DVD Creator
  • * Only $9.9 Get MKV Converter, FLV/F4V Converter, TOD/MOD Converter
2013 Pavtube Thansgiving Giveaway